CHASSIS
3-26
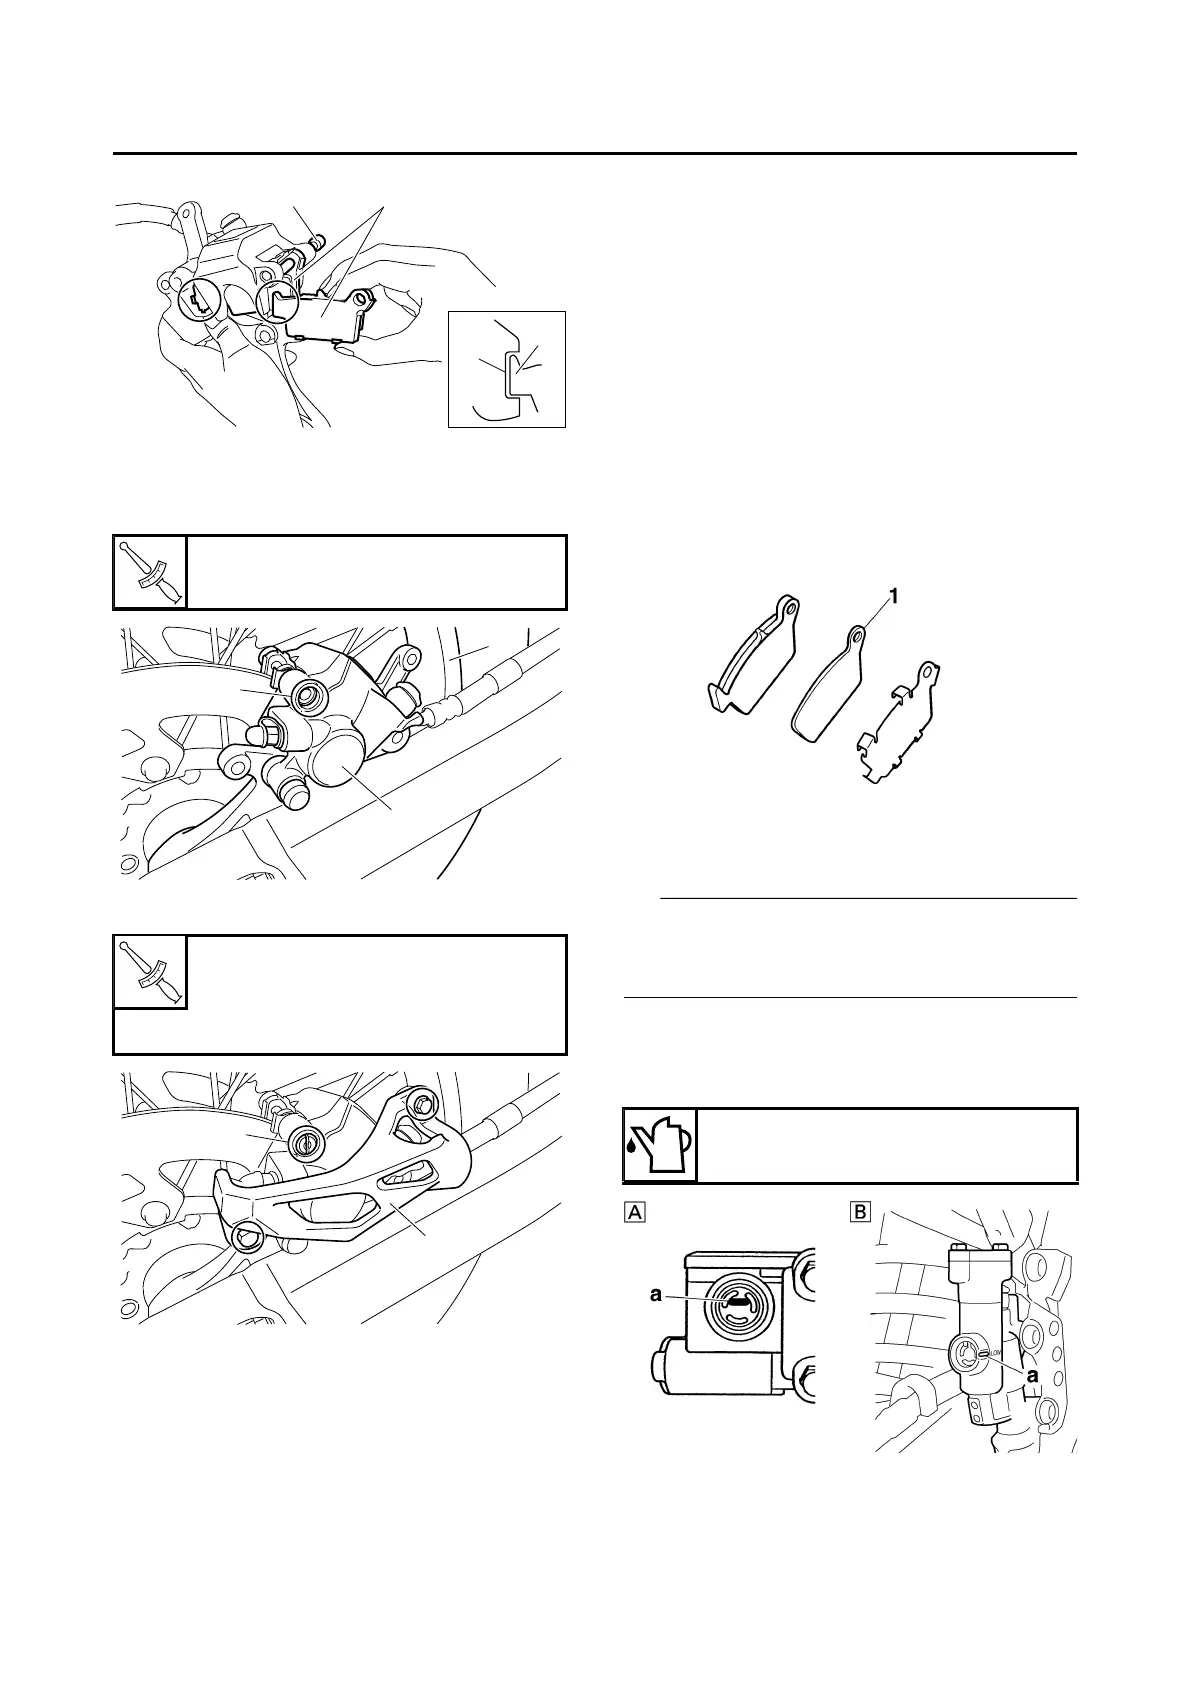
i. Install the brake caliper “12” and the rear
wheel “13”.
Refer to “REAR WHEEL” on page 4-7.
j. Tighten the pad pin “14”.
k. Install the pad pin plug “15” and the protector
“16”.
▲▲▲▲▲▲▲▲▲▲▲▲▲▲▲▲▲▲▲▲▲▲▲▲▲▲▲▲▲▲▲▲
3. Check:
• Brake fluid level
Refer to “CHECKING THE BRAKE FLUID
LEVEL” on page 3-26.
4. Check:
• Brake pedal operation
A softy or spongy feeling Bleed the brake
system.
Refer to “BLEEDING THE BRAKE SYS-
TEM” on page 3-21.
EAS1SM1096
CHECKING THE REAR BRAKE PAD INSU-
LATOR
1. Remove:
• Brake pads
Refer to “REAR BRAKE” on page 4-21.
2. Check:
• Rear brake pad insulator “1”
Damage Replace.
EAS1SM1097
CHECKING THE BRAKE FLUID LEVEL
1. Stand the vehicle upright on a level surface.
In order to ensure a correct reading of the brake
fluid level, make sure that the top of the brake
fluid reservoir is horizontal.
2. Check:
• Brake fluid level
The minimum level mark “a” or below
Add.
Pad pin
17 Nm (1.7 m·kgf, 12 ft·lbf)
Pad pin plug
2.5 Nm (0.25 m·kgf, 1.8 ft·lbf)
Bolt (protector)
7 Nm (0.7 m·kgf, 5.1 ft·lbf)
Recommended brake fluid
DOT 4
A. Front brake
B. Rear brake