SHIFT SHAFT
5-49
EAS1SM1255
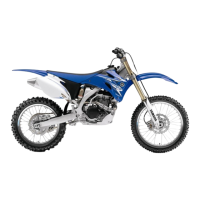
REMOVING THE SHIFT GUIDE AND SHIFT
LEVER ASSEMBLY
1. Remove:
• Bolt (shift guide)
• Shift guide “1”
• Shift lever assembly “2”
Make sure that the shift lever assembly is re-
moved together with the shift guide.
EAS1SM1256
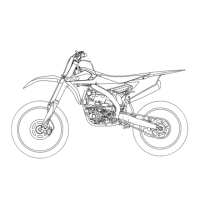
REMOVING THE SEGMENT
1. Remove:
• Bolt (segment) “1”
• Segment “2”
Turn the segment counterclockwise until it
stops and loosen the bolt.
ECA1DX1021
If the segment gets an impact, it may be
damaged. Take care not to give an impact to
it when removing the bolt.
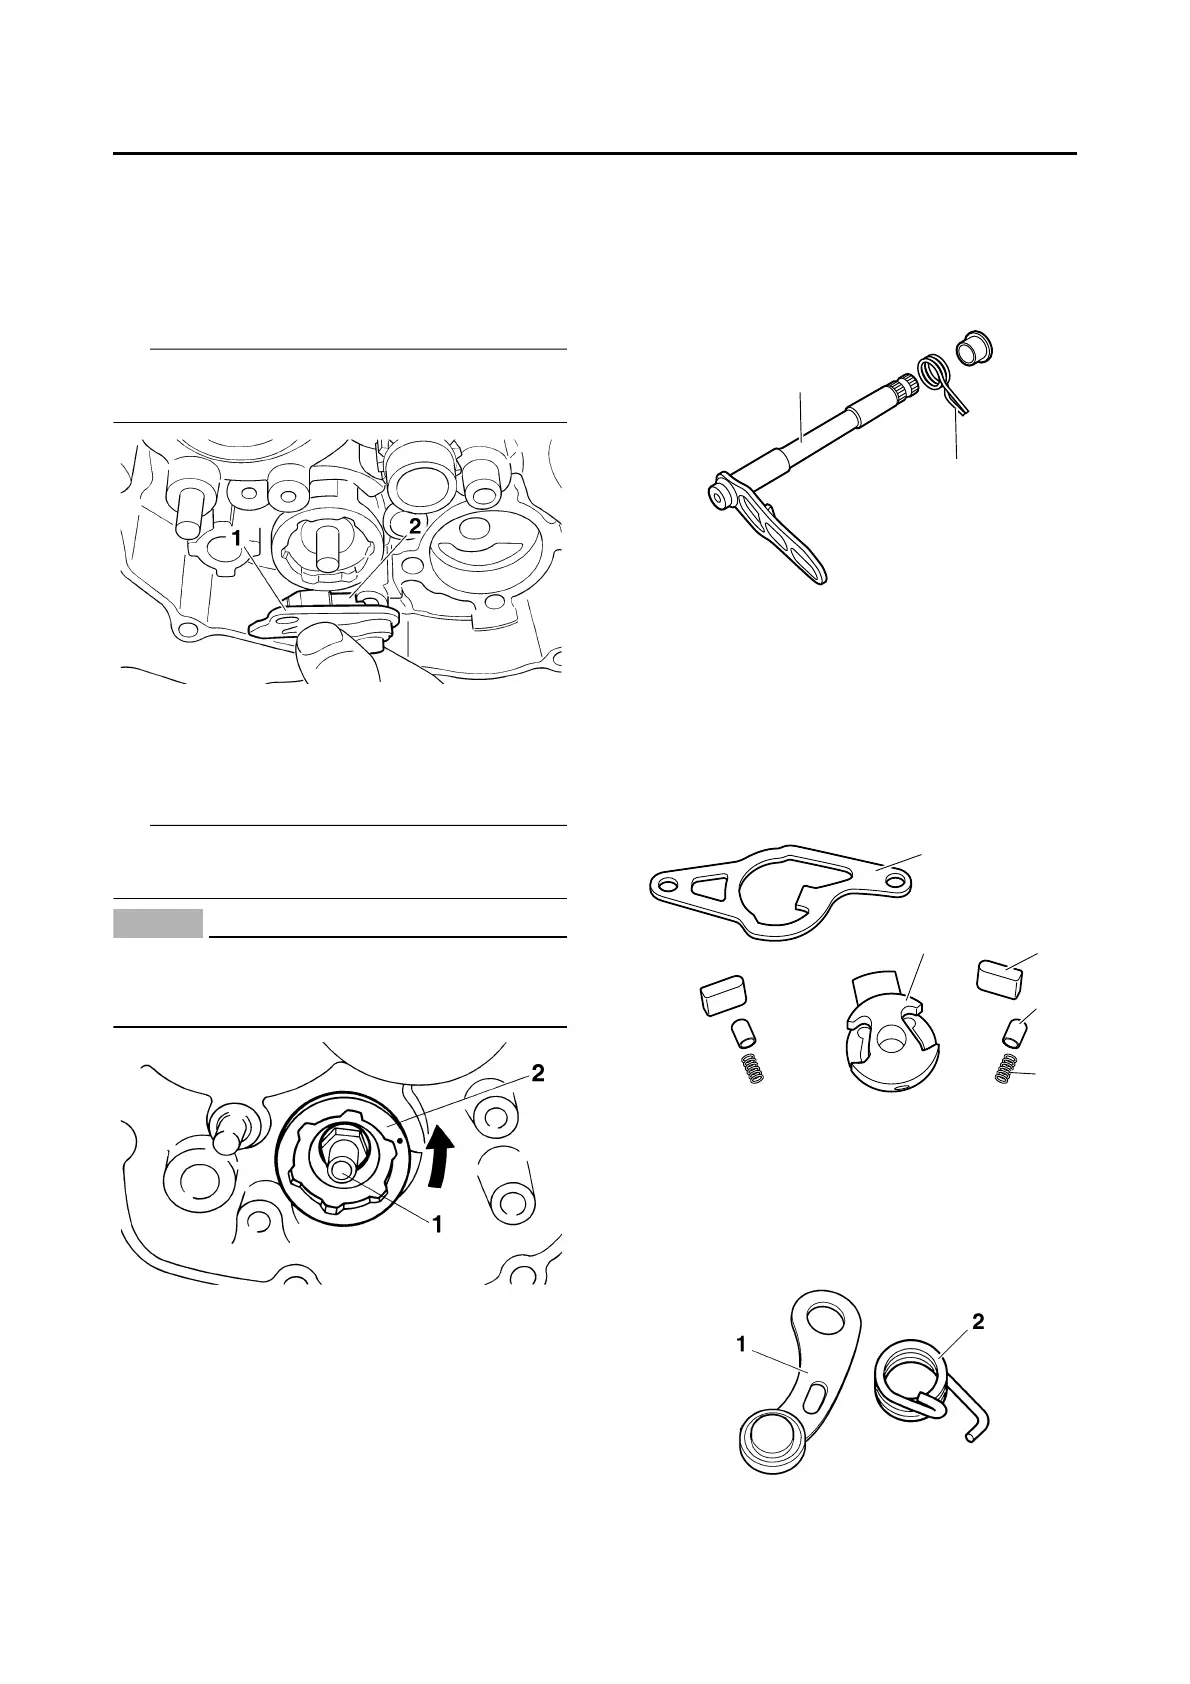
EAS1SM1257
CHECKING THE SHIFT SHAFT
1. Check:
• Shift shaft “1”
Bends/damage/wear Replace.
• Shift shaft spring “2”
Damage/wear Replace.
EAS1SM1258
CHECKING THE SHIFT GUIDE AND SHIFT
LEVER ASSEMBLY
1. Check:
• Shift guide “1”
• Shift lever “2”
•Pawl “3”
• Pawl pin “4”
• Spring “5”
Wear/damage Replace.
EAS1SM1259
CHECKING THE STOPPER LEVER
1. Check:
• Stopper lever “1”
Wear/damage Replace.
• Torsion spring “2”
Broken Replace.
EAS1SM1260