u
Performing Auto-Tuning
n
Auto-Tuning Procedure
Auto-Tuning should generally be performed in the following steps.
1.
Refer to Before Auto-Tuning the Drive on page 101.
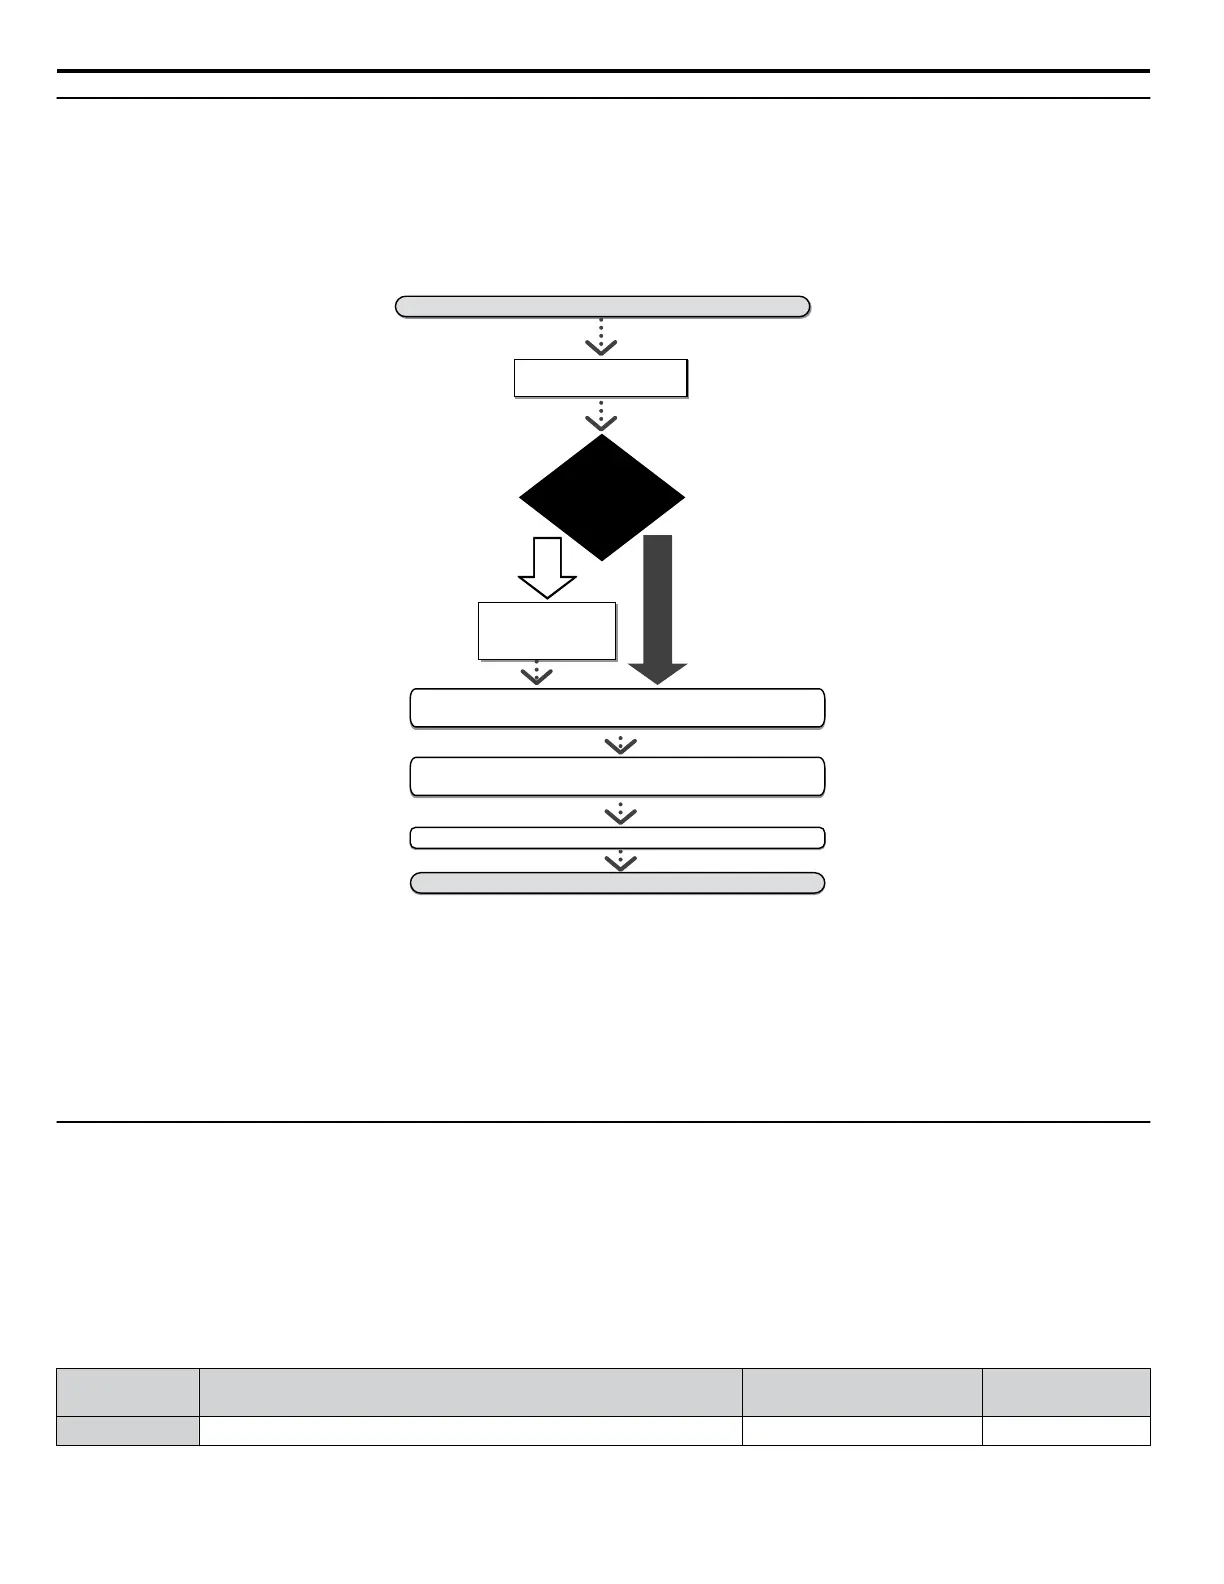
2. Determine which type of Auto-Tuning best fits the application requirements following Figure 4.18.
Run the motor without the load.
Fine tune parameters if needed.
Connect the load and run the motor.
Fine tune parameters if needed.
Verify system operates as required.
Is the cable
between the motor
and drive longer
than 50 m?
NO
YES
Auto-Tuning finished.
Stationary Auto-Tuning for
Line-to-Line Resistance
(T1-01 = 2)
START
Select a V/f pattern
E1-03
NO
Figure 4.18
3. Enter the type 2 of Auto-Tuning to parameter T1-01.
4. Enter the motor nameplate data.
5. Start the Auto-Tuning process when prompted by the drive.
6. If Auto-Tuning was successfully performed, do a test run without the load and make any necessary parameter adjustments.
7. If the test run was successful, do a test run with the load connected and make parameter adjustments if necessary.
u
Input Data for Auto-Tuning
The T1-oo parameters are used to set the Auto-Tuning input data.
Note: 1. Cycling power to the drive will reset any values set during the Auto-Tuning process to factory defaults.
2. For motors that are to be operated in the field weakening range, first perform the Auto-Tuning with the base data, i.e. the frequency at
which the motor is operating with its rated voltage (base frequency). After Auto-Tuning is complete, change the maximum frequency
E1-04 to the desired value.
n
T1-01: Tuning Mode Selection
Sets the type of Auto-Tuning to be used.
Refer to Stationary Auto-Tuning on page 101 for details on Stationary Auto-Tuning.
No. Name Setting Range Default
T1-01 Auto-Tuning Mode Selection 2 (V/f) 2 (V/f)
Setting 2: Stationary Auto-Tuning for Line-to-Line Resistance
4.9 Auto-Tuning
102
YASKAWA TOEP YAIQPM 03B YASKAWA AC Drive - iQpump Micro User Manual

 Loading...