User Guide for the SIP-T54S Media IP Phone
68
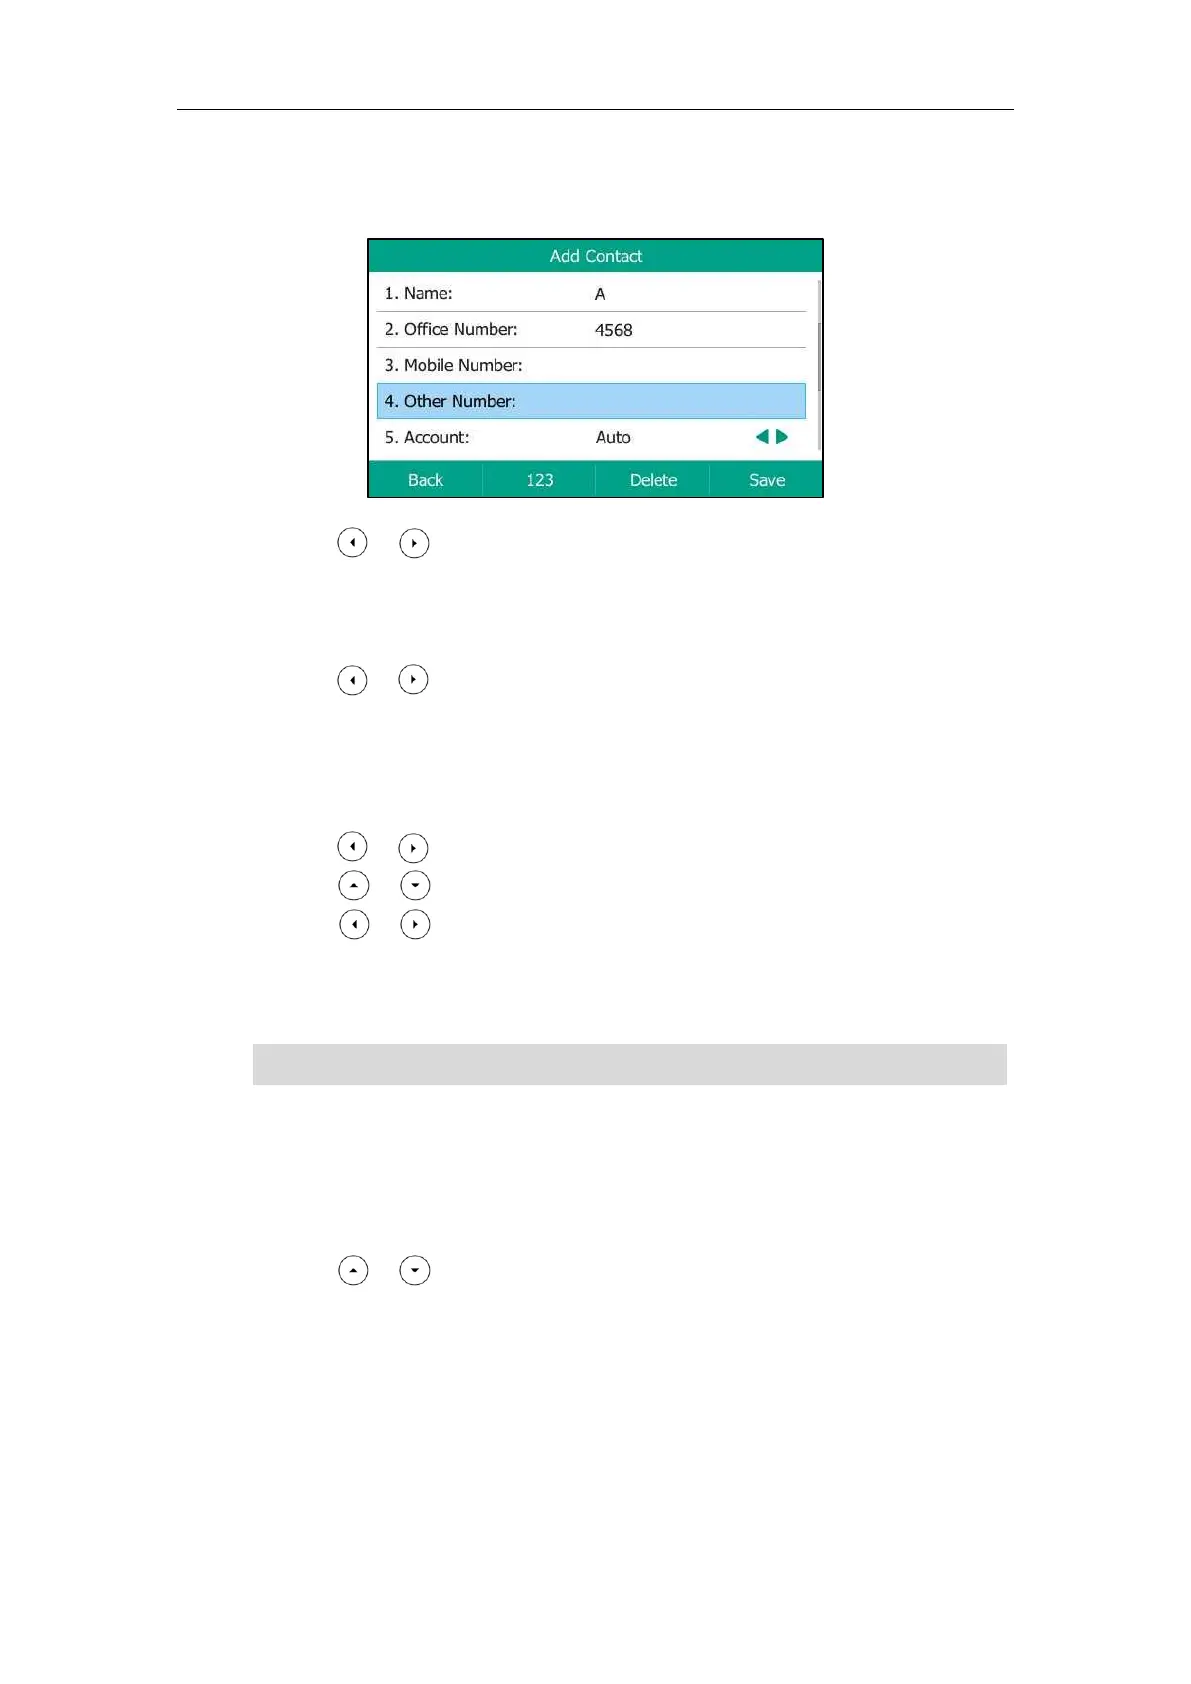
3. Press the Add soft key.
4. Enter the name and the office, mobile or other numbers in the corresponding fields.
5. Press or , or the Switch soft key to select the desired account from the Account
field.
If Auto is selected, the phone will use the default account when placing calls to the contact
from the local directory.
6. Press or , or the Switch soft key to select the desired ring tone from the Ring
field.
If Auto is selected, this contact will use the ring tone according to the priority: Group ring
tone (refer to Adding Groups) >Account ring tone (refer to Ring Tones) >Phone ring tone
(refer to Ring Tones).
7. Press or , or the Switch soft key to select the desired group from the Group field.
8. Press or to select Photo field and then press the Enter soft key.
9. Press or , or the Switch soft key to select the desired photo from the Photo field.
You can upload custom photos, refer to Uploading Contact Photos).
10. Press the Save soft key to accept the change or the Back soft key to cancel.
Note
Adding Contacts from Call History
To add a contact to the local directory from call history:
1. Press the History soft key.
2. Press or to highlight the desired entry.
If the contact already exists in the directory, the LCD screen will prompt “Contact name existed!”.

 Loading...