INSTALLATION INSTRUCTIONS AND FIRST-TIME SET-UP
Axio Observer Fitting the holder with LCD display on 5, 5 materials stand ZEISS
12/2016 431004-7244-001 41
4.6 Fitting the holder with LCD display
on 5, 5 materials stand
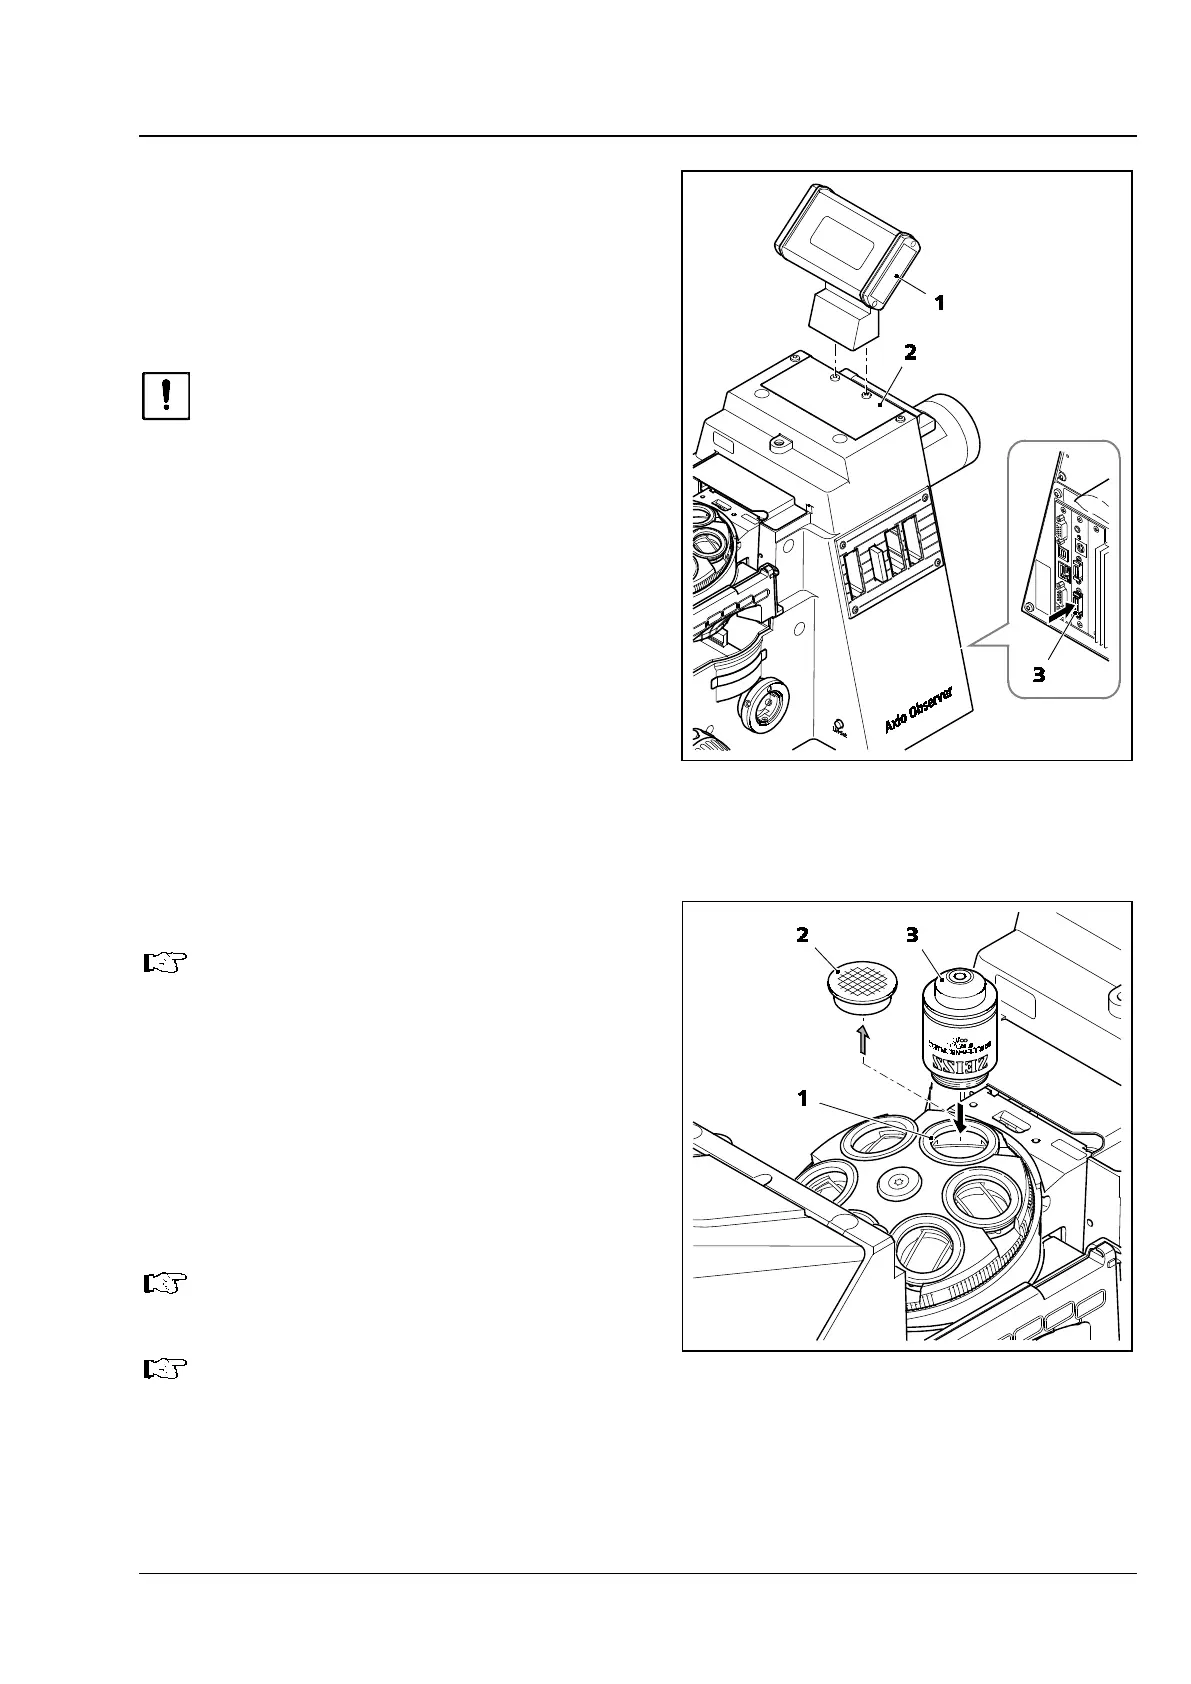
The holder with LCD display (Fig. 18/1) has a
magnetic base. It can be placed on a microscope if
this is not equipped with a transmitted light
illuminator or beside it.
Before connecting the LCD
the stand, switch the instrument off to
prevent damage (to the electronic
components)!
• Place the holder with the LCD display (Fig. 18/1)
in position on the cover plate (Fig. 18/2) of the
transmitted light illuminator contact surface so
that the two recesses are positioned on top of
the two screws.
• Insert the LCD display plug into the socket
(Fig. 18/3) for the display (carrier for
transmitted-light illumination) on the rear of the
5 materials stand.
4.7 Screwing in the objectives
If Aqua Stop II is used, first refer to
section 4.8.
• Remove the dust caps (Fig. 19/2) from the
openings in the nosepiece.
• Remove the objectives (Fig. 19/3) from the case
and screw them into the nosepiece (Fig. 19/1),
starting with position 1 (see engraved number),
in increasing order of magnification. Ensure that
the objectives are screwed in correctly and
securely.
Always replace the dust caps on any
empty positions on the nosepiece.
When using autocorr objectives, observe
the quick start guide “Installation and
configuration of autocorr objectives”
(420852-7144-001).
Fig. 18 Fitting the holder with LCD display
Fig. 19 Screwing in the objectives