INSTALLATION INSTRUCTIONS AND FIRST-TIME SET-UP
Axio Observer Connecting the microscope to the mains ZEISS
12/2016 431004-7244-001 63
4.18 Connecting the microscope to the mains
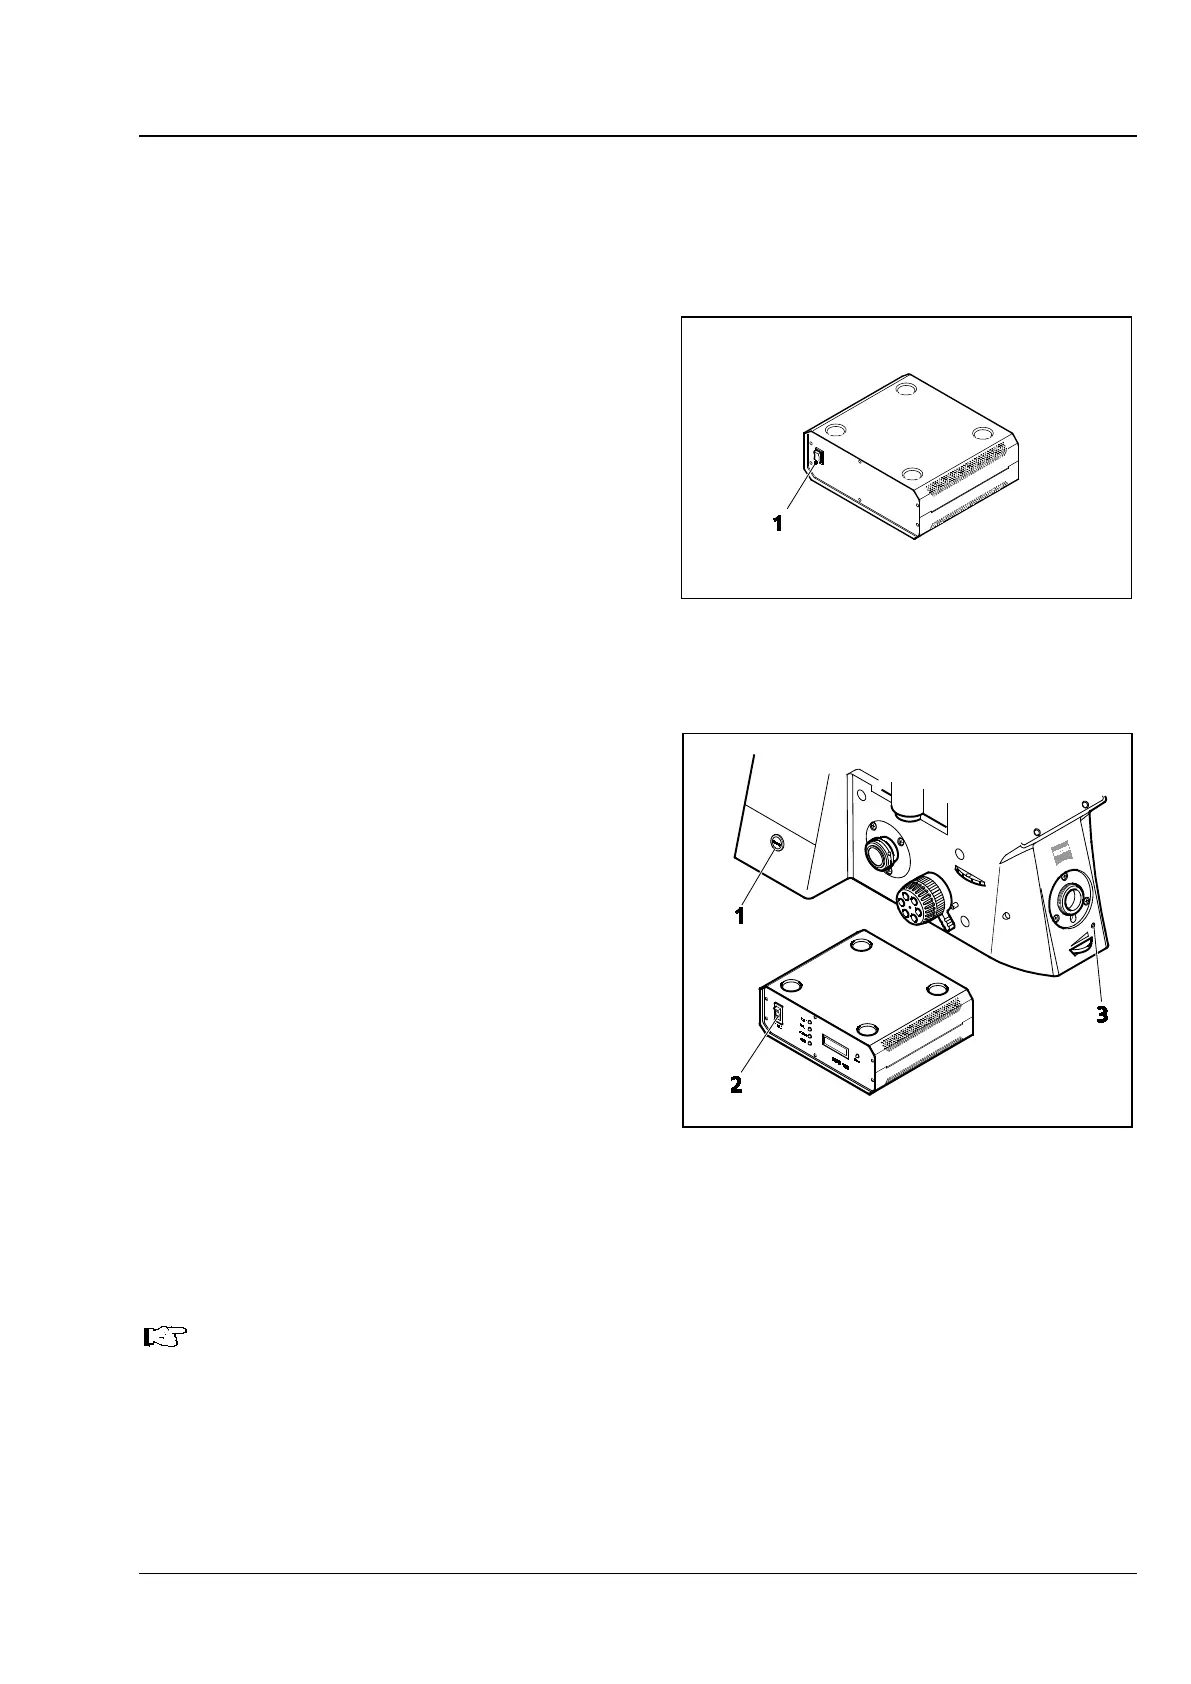
• Plug the power supply cable into the power socket of the Axio Observer 3, 3 materials or
Axio Observer 5, 5 materials.
The Axio Observer 7, 7 materials is supplied with
voltage from the external power supply unit
VP232-2.
• Insert the connecting plug of the power supply
unit VP232-2 into the corresponding socket
(Fig. 45/2) on the rear side of the stand.
• Plug the power supply cable of the power
supply unit VP2322 into a power outlet.
4.19 Switching the microscope and the
power supply (ballast) unit for the
HBO 100 on and off
Axio Observer 3, 3 materials:
• Switch the microscope on and off using the
power switch (on the left of the stand,
Fig. 48/1).
Axio Observer 5, 5 materials:
• Switch the microscope on and off using the
standby button (Fig. 48/1).
Axio Observer 7, 7 materials:
• Switch on the external power supply unit
VP232-2 using the power switch (Fig. 47/1).
• Start up the microscope using the standby
button (on the left of the stand, Fig. 48/1).
• To switch the microscope off, press the standby button then switch off the external power supply unit.
The monitoring LED (Fig. 48/3) lights up when the microscope is switched on.
Power supply unit (ballast unit):
• If a fluorescence illuminator (e.g. HBO 100) is connected, switch the power supply unit on (Fig. 48/2)
and off using the power switch.
Fig. 47 External power supply unit VP232-2
for Axio Observer 7, 7 materials
Fig. 48 Axio Observer and power supply
unit (ballast unit) for HBO 100