84 85
ENGLISH
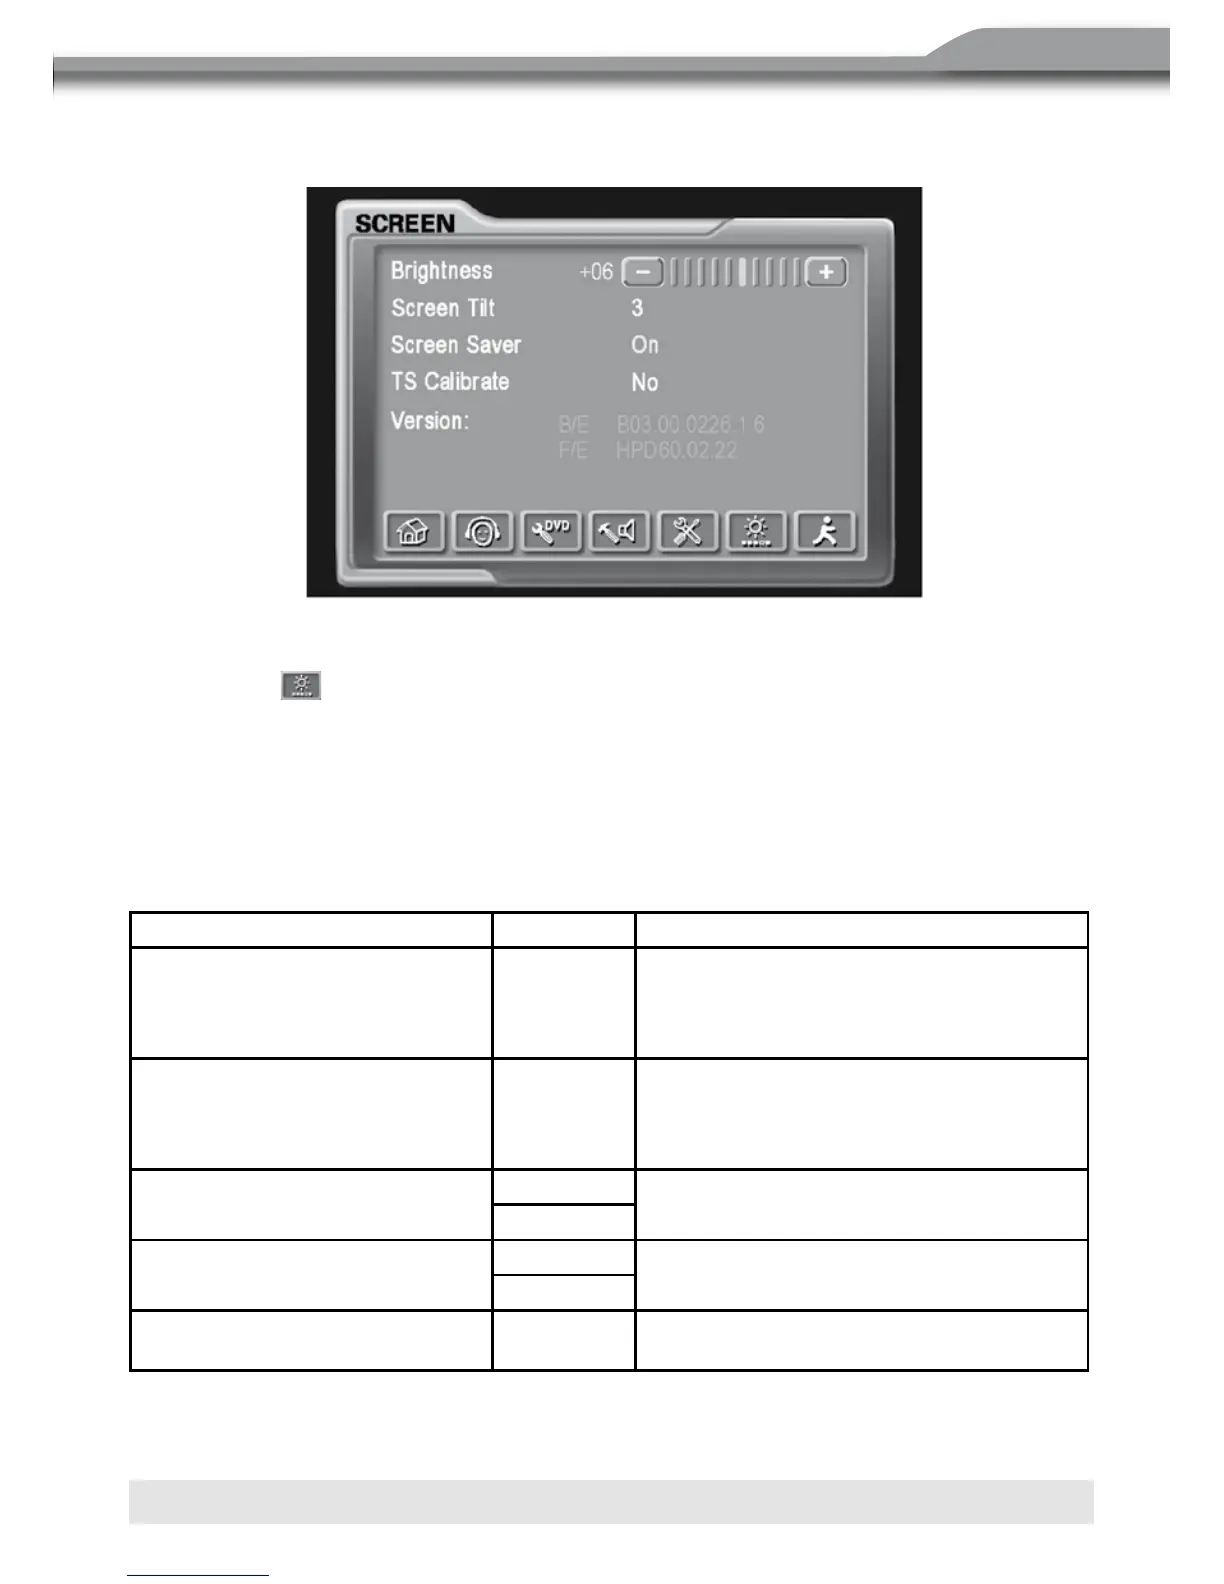
SCREEN ADJUSTMENT
Accessing the screen setup menu
■ Press the M.. on the front panel or press the (MENU) button on the remote control to
access MAIN menu.
■ Select the button on the screen to access the screen setup.
Selecting a feature for adjustment
■ Press the [5] or [6] button on the remote control to select a feature to be adjusted.
■ Rotate SMART DIAL clockwise/anticlockwise to select a feature to be adjusted.
■ Touch the options on the screen directly to select a feature to be adjusted.
Adjusting a Feature
Setting Options Function
Brightness –10 to +10
Press the
[3]/[4] buttons on the remote
control or rotate the SMART DIAL
clockwise/anticlockwise to adjust the
brightness to the desired setting.
Screen tilt 1 to 6
Press the
[3]/[4] buttons on the remote
control or touch the (1 to 6) number on
the screen directly to adjust the tilt of
the screen to the desired degree.
Screen saver
ON Touch to activate/deactivate the screen
saver.
OFF
TS calibrate
No Touch “Yes” to enter the touch screen
calibrate mode.
Yes
Firmware version Displays on screen the firmware version
of this unit.
18
Selecting a Feature for Adjustment
Press the ( / ) buttons on the remote to select a feature to be adjusted.
Rotate SMART DIAL clockwise/anticlockwise to select a feature to be adjusted.
Touch directly the options on the screen to select a feature to be adjusted.
Adjusting a Feature
noitcnuF snoitpO gnitteS
Brightness
-10 to +10
Press the (
/ ) buttons on the remote or rotate
the SMART DIAL clockwise/anticlockwise to
adjust the Brightness to the desired setting.
Screen Tilt 1 to 6
Press the (
/ ) buttons on the remote or touch
the (1 to 6) number on the screen directly to adjust
the tilt of the screen to the desired degree.
On
Screen Saver
Off
Touch to activate/deactivate the Screen Saver.
No
TS Calibrate
Yes
Touch “Yes” to enter the touch screen calibrate
mode.
Version
Displays on screen the firmware version of this
unit.
General setup Menu
Accessing the General Setup Menu
· Select the
button on the bottom of the touch screen to access the General setup.