27
OsmoTECH XT Single-Sample Micro-Osmometer User Guide
Chapter 3: Configuring settings
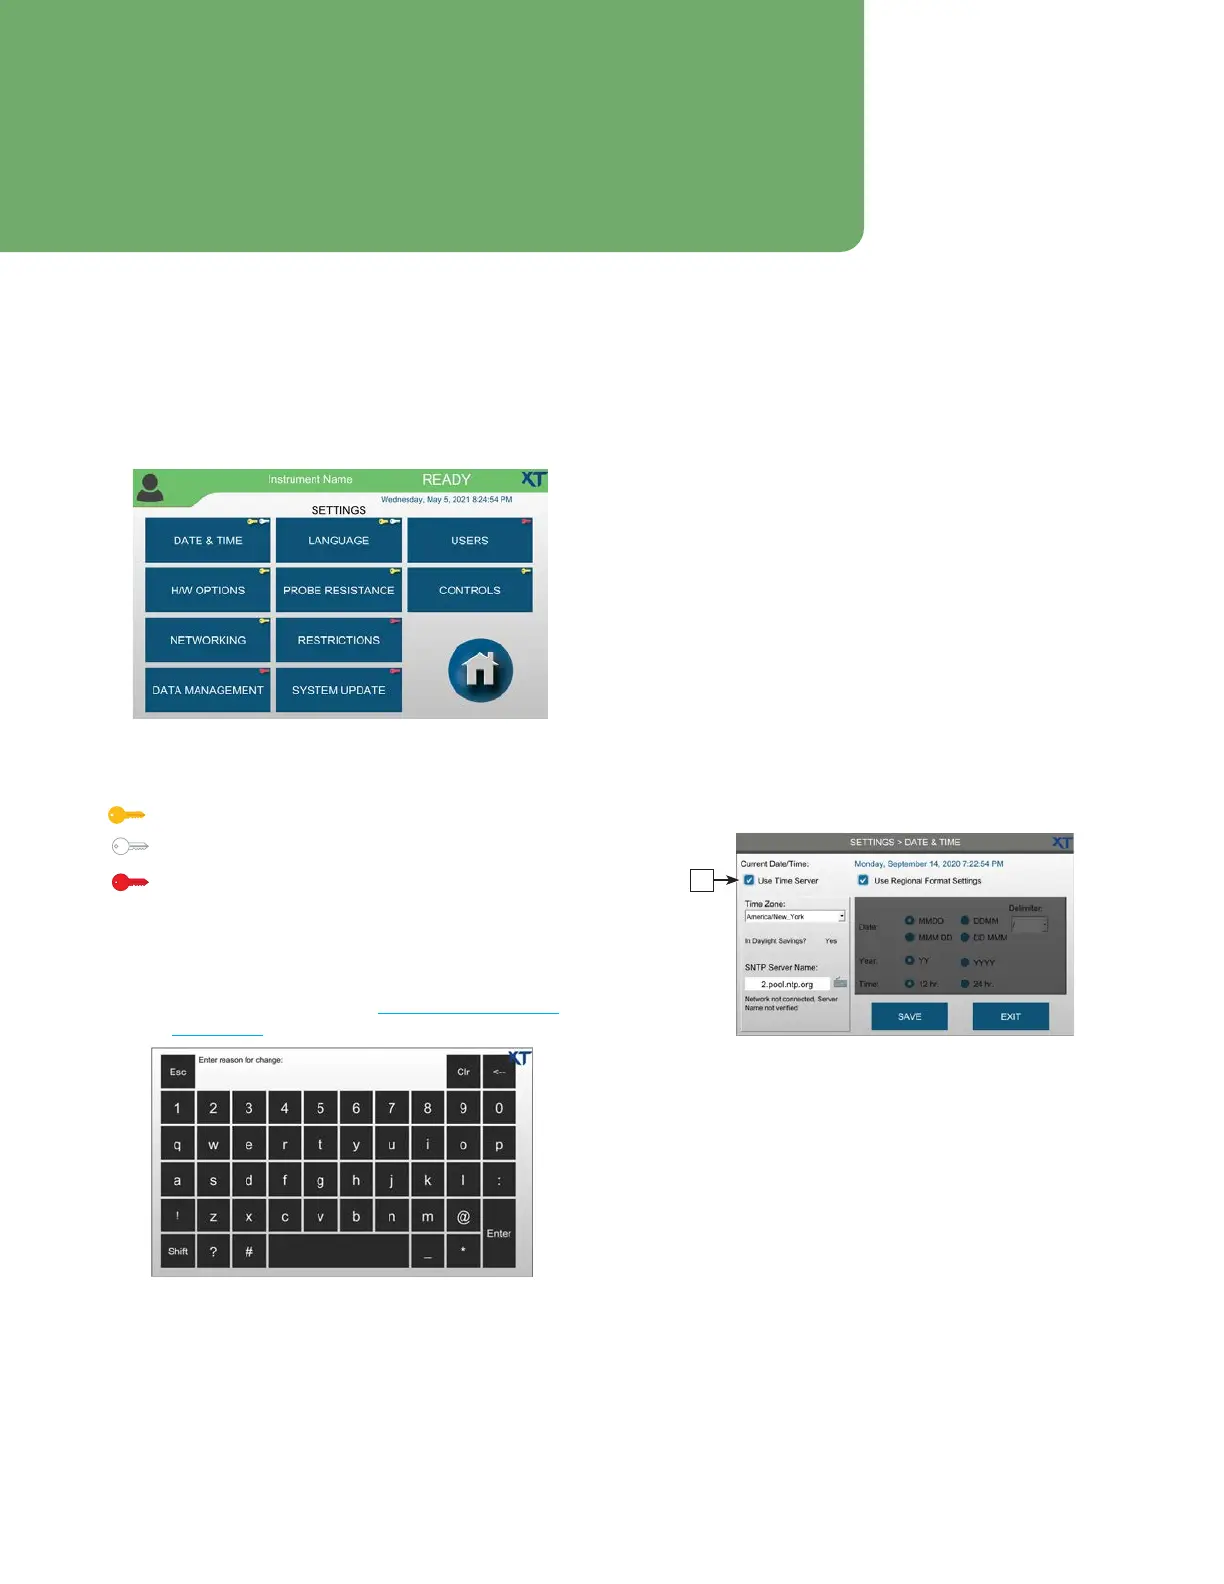
3.1 The Settings screen
Use the Settings screen to customize your instrument.
Use the default Administrator account to set up your
instrument using the functions shown.
Function access is indicated by key color:
- Yellow Key: Supervisor
- White Key: Operator
- Red Key: Administrator (can log in to any screen)
NOTE: If Require reason for all change in Settings is
enabled on the RESTRICTIONS>AUDITING tab,
users are required to enter the reason for each
change made from the SETTINGS screen before
the change is saved (see Configuring audits of
test results.
3.2 Setting the date and time
The instrument has a built-in real time clock (RTC) to
keep track of the current date and time.
You can synchronize the time to a network time server or
set the time manually for each instrument.
Synchronizing to a network time server
The Simple Network Time Protocol (SNTP) synchronizes
the clock to a server synchronized to a source, such as a
radio, satellite receiver, or modem. The server sends a
timestamp in Coordinated Universal Time (UTC), and
needs time zone information to set the correct local
time.
1. Press DATE & TIME and log in.
2. Select the Use Time Server checkbox [A] to
synchronize the instrument time with the server.
A
3. Select a Time Zone.
4. Enter the SNTP Server Name.