Chapter 3 Configuring settings
39
OsmoTECH XT Single-Sample Micro-Osmometer User Guide
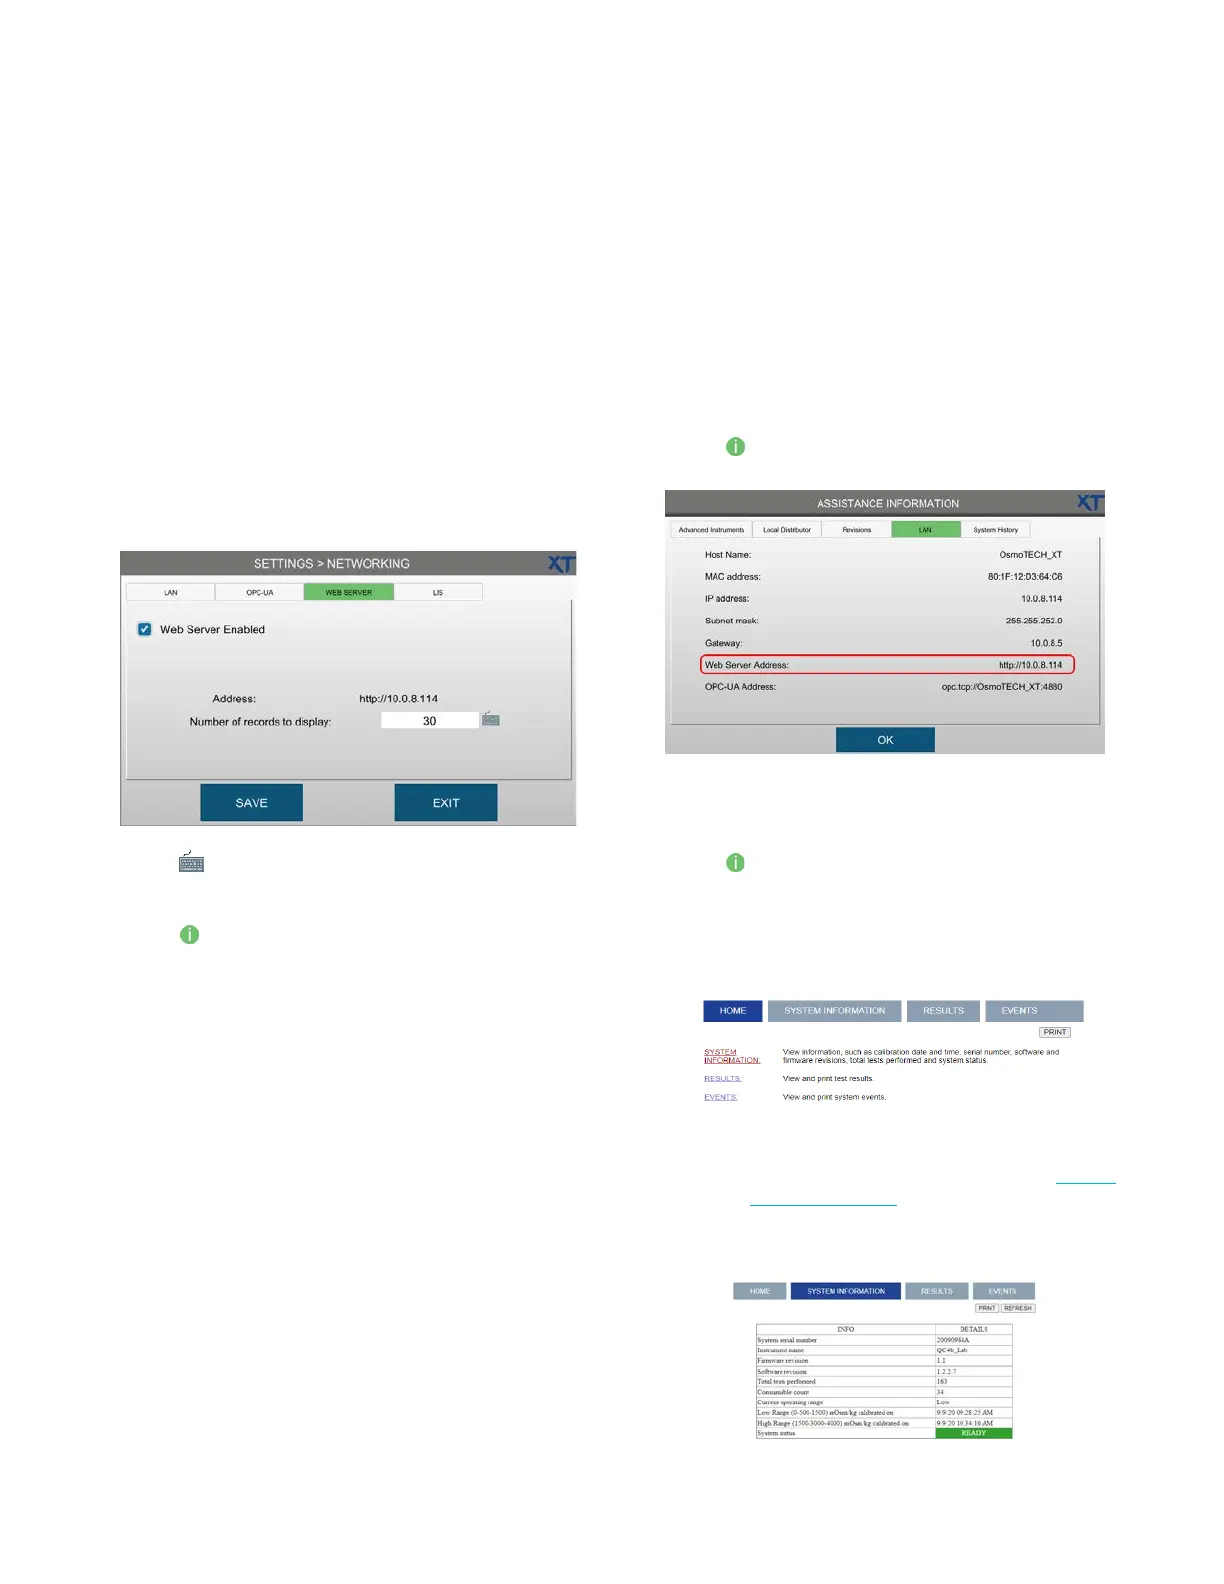
Enabling the web server
Use the embedded web server to view and print
information—such as results, status, and data logs—from
a network computer or mobile device.
1. Connect the instrument to the network using an
Ethernet cable.
2. Press NETWORKING and log in.
3. Press the WEB SERVER tab.
4. Select Web Server Enabled.
5. Press to change the number of records (5-1000)
to display and press SAV E.
6. Press and select LAN to display the web server IP
address.
7. Enter the IP address into the address bar of any web
browser to display, save, and print the data.
Viewing and printing data from the webserver
NOTE: Data can only be viewed, filtered, and printed
from the web server. Data cannot be edited or
deleted.
To open the instrument web server page to view and
print instrument data, complete the following steps:
1. Press on the Home screen and select the LAN tab
to display the web server IP address.
2. Enter the IP address into the address bar of any web
browser to display, save, and print the data.
3. Press and select LAN to display the web server IP
address.
4. Enter the IP address into the address bar of any web
browser to display, save, and print results and event
data on a computer or mobile device.
NOTE: The date format used on web server screens
are based on the system setting (see Setting
the date and time).
– Click on SYSTEM INFORMATION to display this
information about the instrument.