Chapter 3 Configuring settings
34
OsmoTECH XT Single-Sample Micro-Osmometer User Guide
Setting up warnings for a control
Administrators and supervisors can configure the system
to issue a warning or stop the entire test run if a sample
result is outside the control limits.
NOTE: This works only if you use Sample IDs during
testing.
1. From the CONTROLS screen, press ACTION.
2. Select Issue Warning.
3. Select the range limit for action (1SD, 2SD, 3SD).
4. Press SAV E.
The system issues a warning if a sample result falls
outside the range limit.
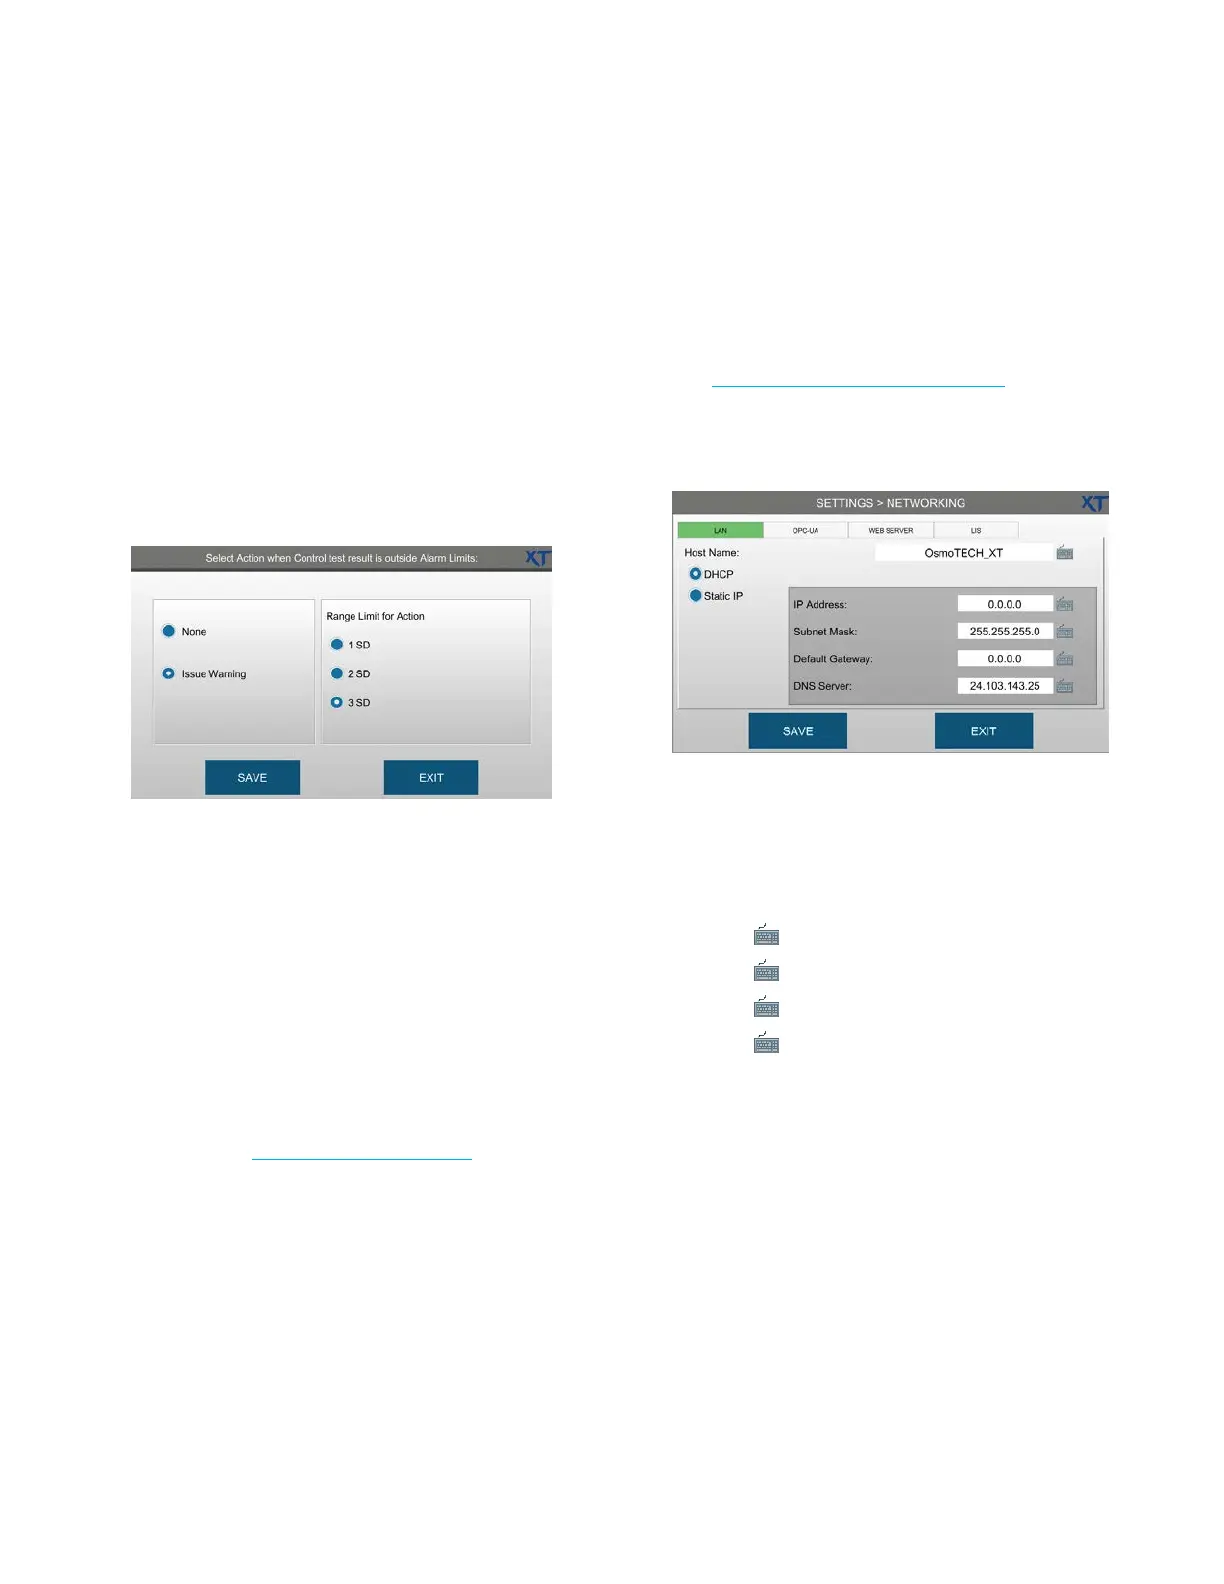
3.8 Setting up networking communications
Your network administrator can help you set up your
instrument to connect to a network in order to send
data, back up files, or use a network time server.
NOTE: Access to SETTINGS > NETWORKING depends
on the Change Network checkbox setting on the
SUPERVISOR ACCESS and OPERATOR ACCESS
tabs (see Assigning user restrictions).
Configuring a LAN connection
The instrument can connect to a computer or other
devices over a local area network (LAN).
1. Plug an Ethernet cable into the Ethernet connector
(see Connecting to a network (optional)).
2. Press NETWORKING and log in.
3. Press the LAN tab.
4. Select one of the following network protocols:
• Static IP (recommended for best results): Assigning
an unchanging static IP address to the instrument
makes it easier for other devices to contact the
instrument over the network.
a. Press and enter the IP Address.
b. Press and enter the Subnet Mask.
c. Press and enter the Default Gateway.
d. Press and enter the DNS Server.
• DHCP (Dynamic Host Configuration Protocol): A
DHCP server dynamically assigns an IP address and
other network parameters to the instrument.
The IP Address, Subnet Mask, and Default
Gateway are entered automatically, and can
change each time the instrument connects to the
network.
5. Enter the host name (up to 32 characters)—especially
if more than one OsmoTECH XT is connected to the
network.
6. Press Save.