EasyManuals Logo
Home>Agilent Technologies>Test Equipment>54830 Series

Agilent Technologies 54830 Series Service Guide

Agilent Technologies 54830 Series
170 pages
To Next Page IconTo Next Page
To Previous Page IconTo Previous Page
Page #127 background imageLoading...
Page #127 background image
Chapter 6: Replacing Assemblies
To remove and replace the front panel assembly
6–18
8
Rem
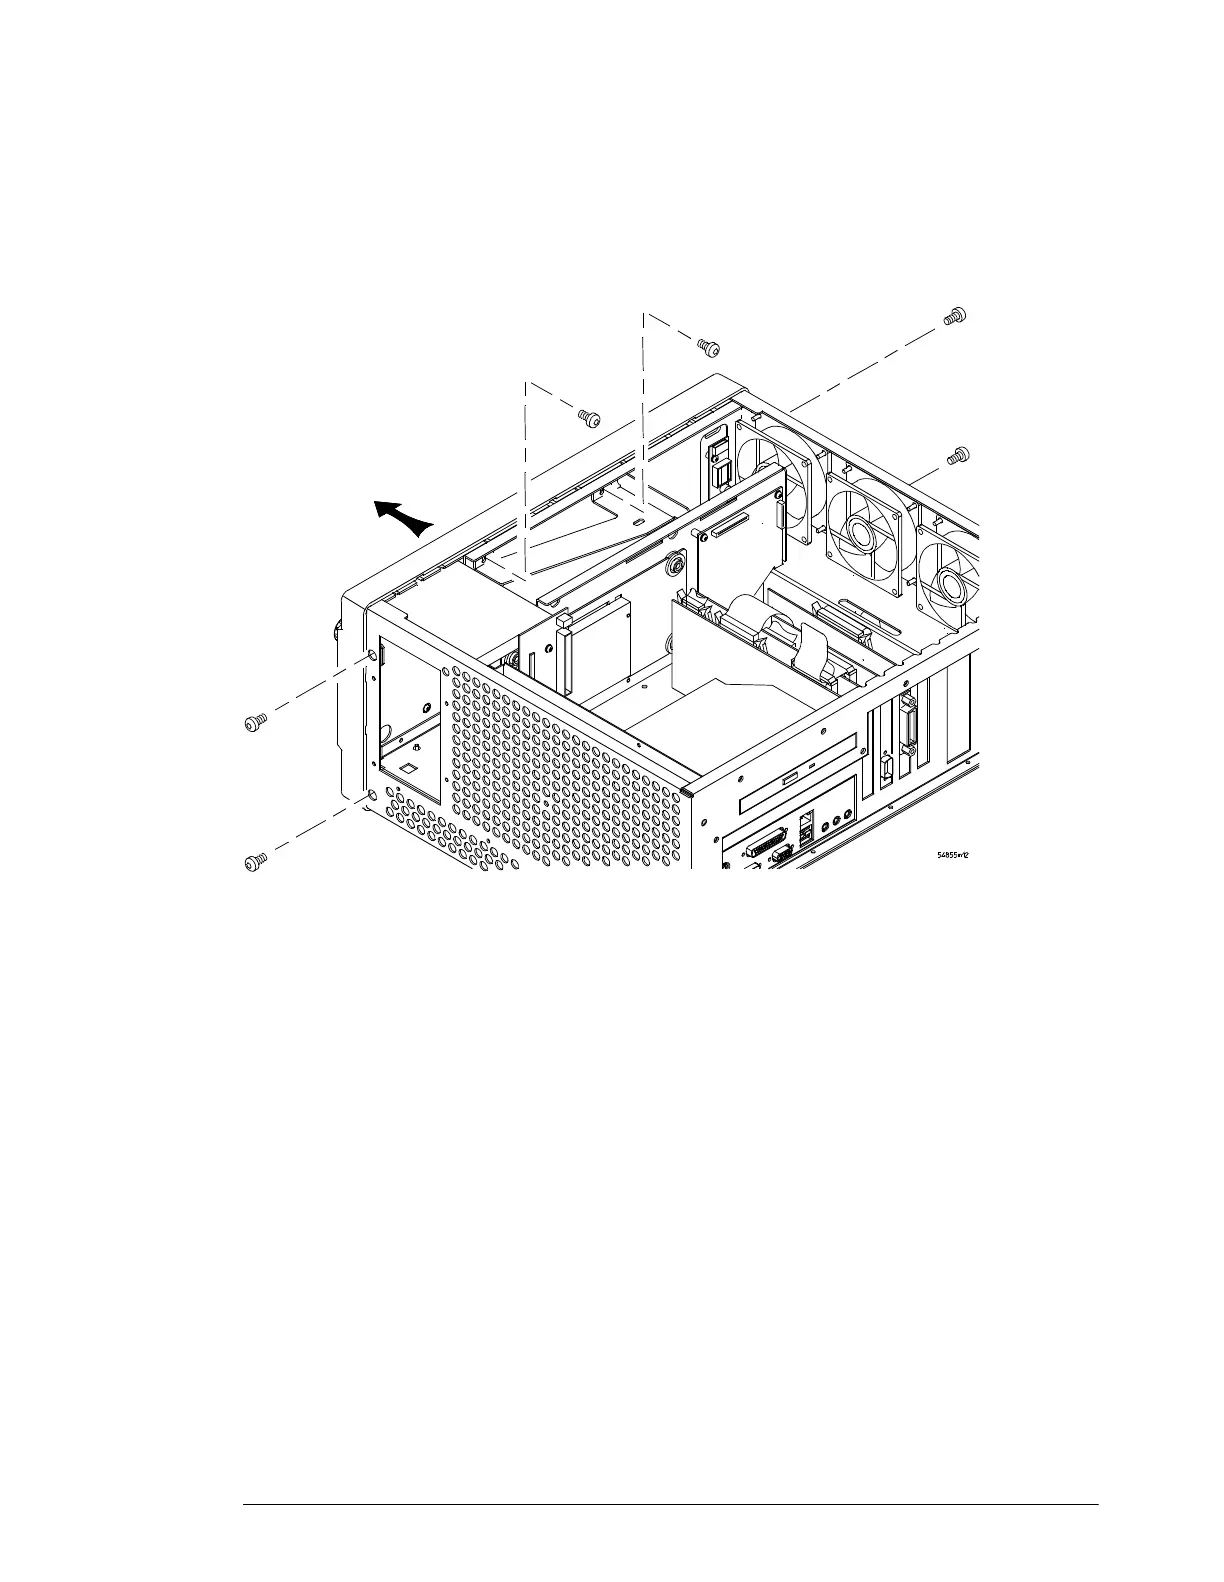
ove the four Torx T20 screws that secure the chassis sides to the front panel
assembly.
Figure 6-17
Front Panel Side Screws
9 Remove the two Torx T10 screws that secure the chassis front to the front panel
assembly.
10 Pull the front panel assembly away from the chassis, being careful to feed the ribbon
cables W11 and W12 out through the slot in the front of the chassis and not to damage
the backlight inverter board.
11 To replace the front panel assembly, reverse the above procedure.
Ensure that you observe polarity designations when reconnecting the ribbon cables.
T20 Torx
Screws
T20 Torx
Screws
T10 Torx
Screws

Table of Contents

Other manuals for Agilent Technologies 54830 Series

Questions and Answers:

Question and Answer IconNeed help?

Do you have a question about the Agilent Technologies 54830 Series and is the answer not in the manual?

Agilent Technologies 54830 Series Specifications

General IconGeneral
BrandAgilent Technologies
Model54830 Series
CategoryTest Equipment
LanguageEnglish

Related product manuals