Chapter 6: Replacing Assemblies
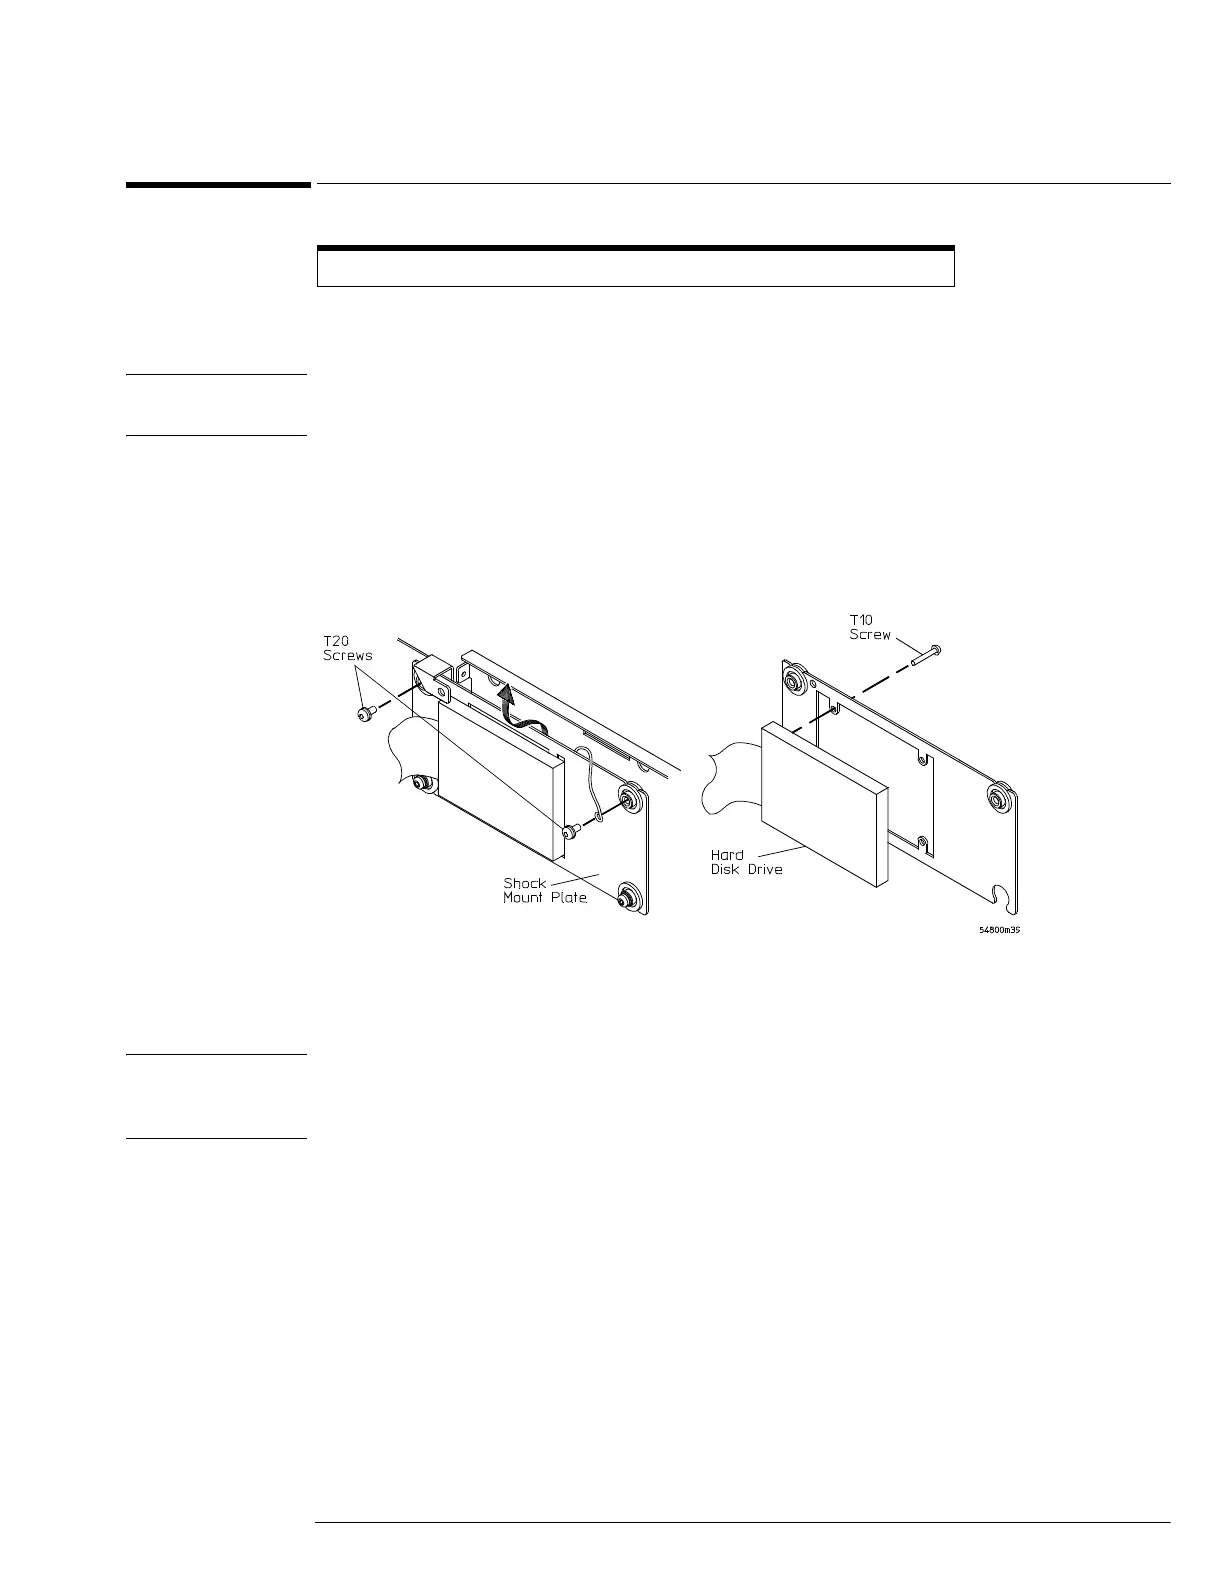
To remove and replace the hard disk drive
6–27
To remove and replace the hard disk drive
1 Disconnect the power cable and remove the top sleeve.
2 Remove the hard drive IDE cable.
CAUTION DO NOT LET THE DISK DRIVE FALL!
Support the drive while removing the screws so that the drive does not fall.
3 Using a T20 driver remove the two screws holding the shock mount in place.
4 Tilt the disk drive assembly forward and lift up to remove.
5 Using a T10 remove the four screws holding the disk drive onto the shock mount.
Figure 6-26
Removing the Hard Disk Drive
6 To replace the hard disk reverse, the above procedure with a new hard drive.
CAUTION DO NOT OVER TIGHTEN THE SCREWS!
Do not overtighten the T10 screws that secure the Hard Disk Drive to the bracket. Torque to 3
in-lb.
No internal hard disk drive is installed in oscilloscopes with option 017 installed.
 Loading...