Chapter 6: Replacing Assemblies
To remove and replace the front panel assembly
6–15
5
Lif
t the backlight inverter board out through the top of the chassis.
6 To replace the backlight inverter board, reverse the assembly procedure.
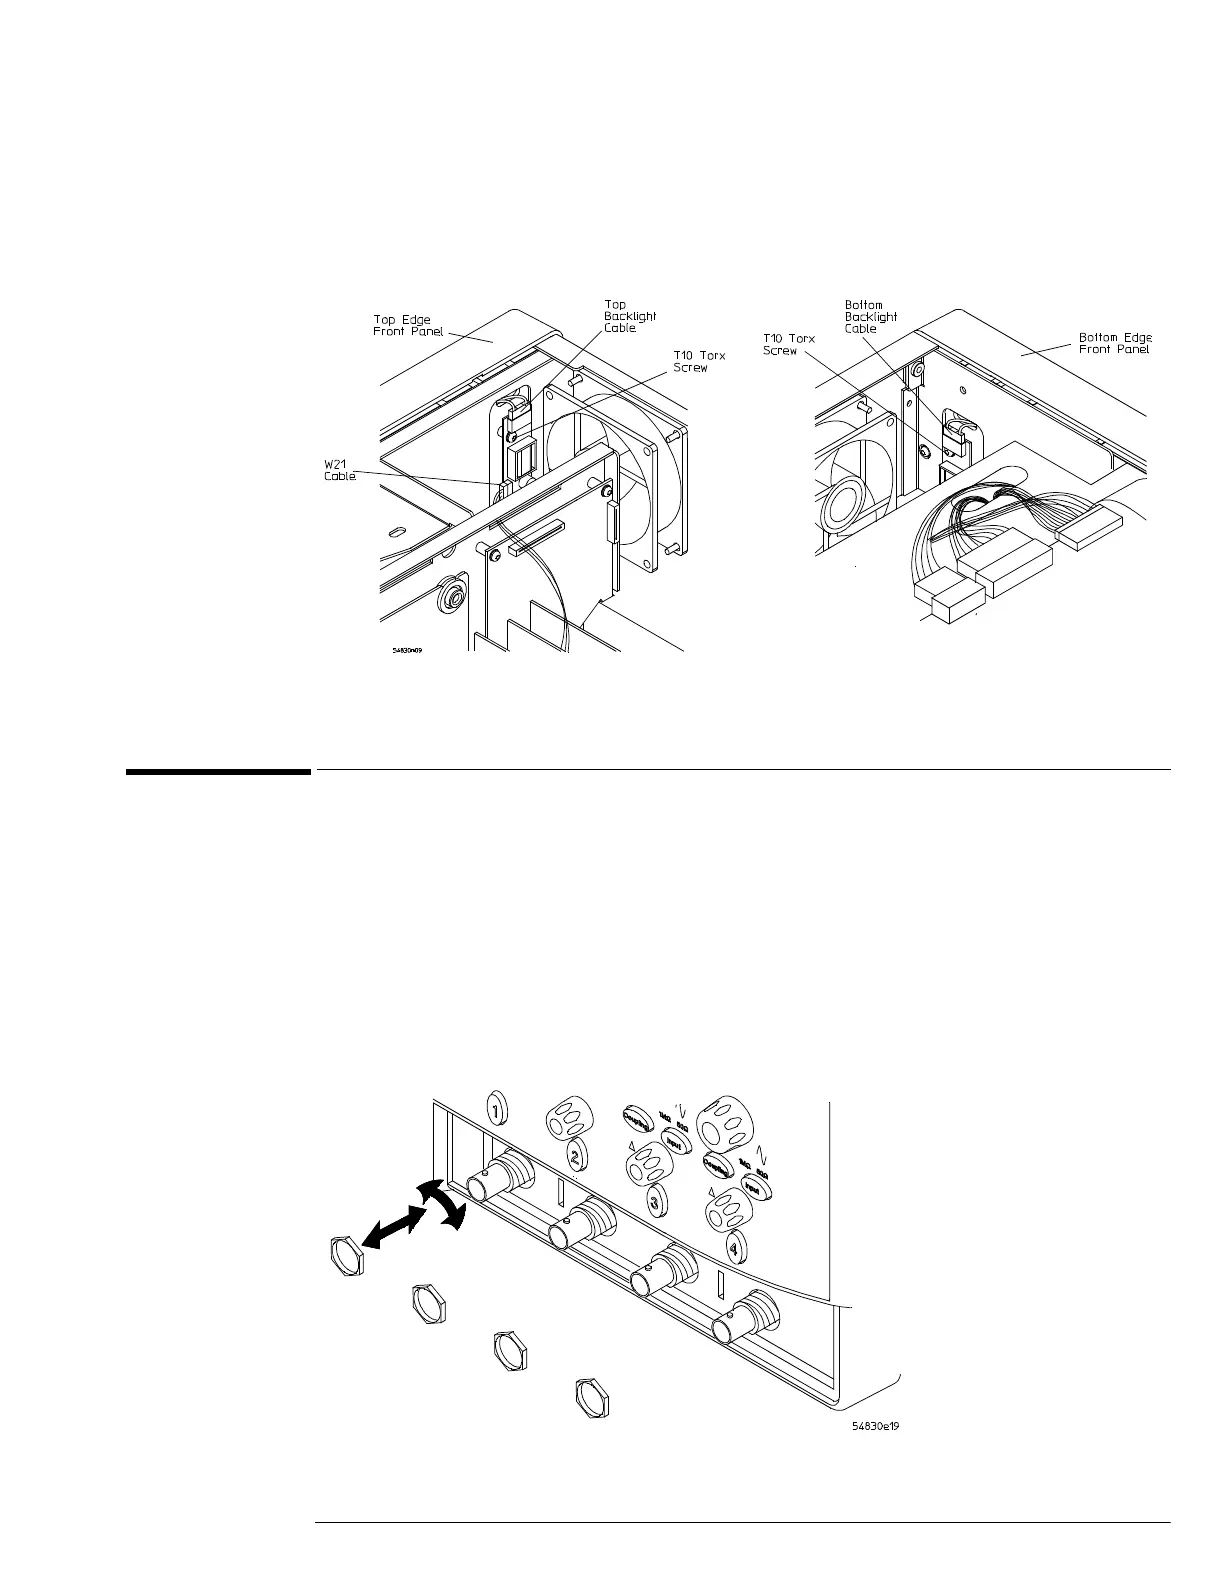
Figure 6-13
Removing the Backlight Inverter Board
To remove and replace the front panel assembly
Use these steps to remove and replace the front panel assembly. When necessary, refer to other
removal procedures.
1 Disconnect the power cable and remove the cover.
2 Remove the AutoProbe assembly A16 and Mylar flex cable W8.
3 Remove the W24 Internal digital cable if you have an MSO model oscilloscope.
4 Remove the hex nuts that secure the BNC connectors to the front panel.
Use a 9/16” nut-driver to remove the hex nuts.
Figure 6-14
Removing the BNC Nuts
 Loading...