Chapter 6: Replacing Assemblies
To remove and replace the power supply
6–30
4
Rem
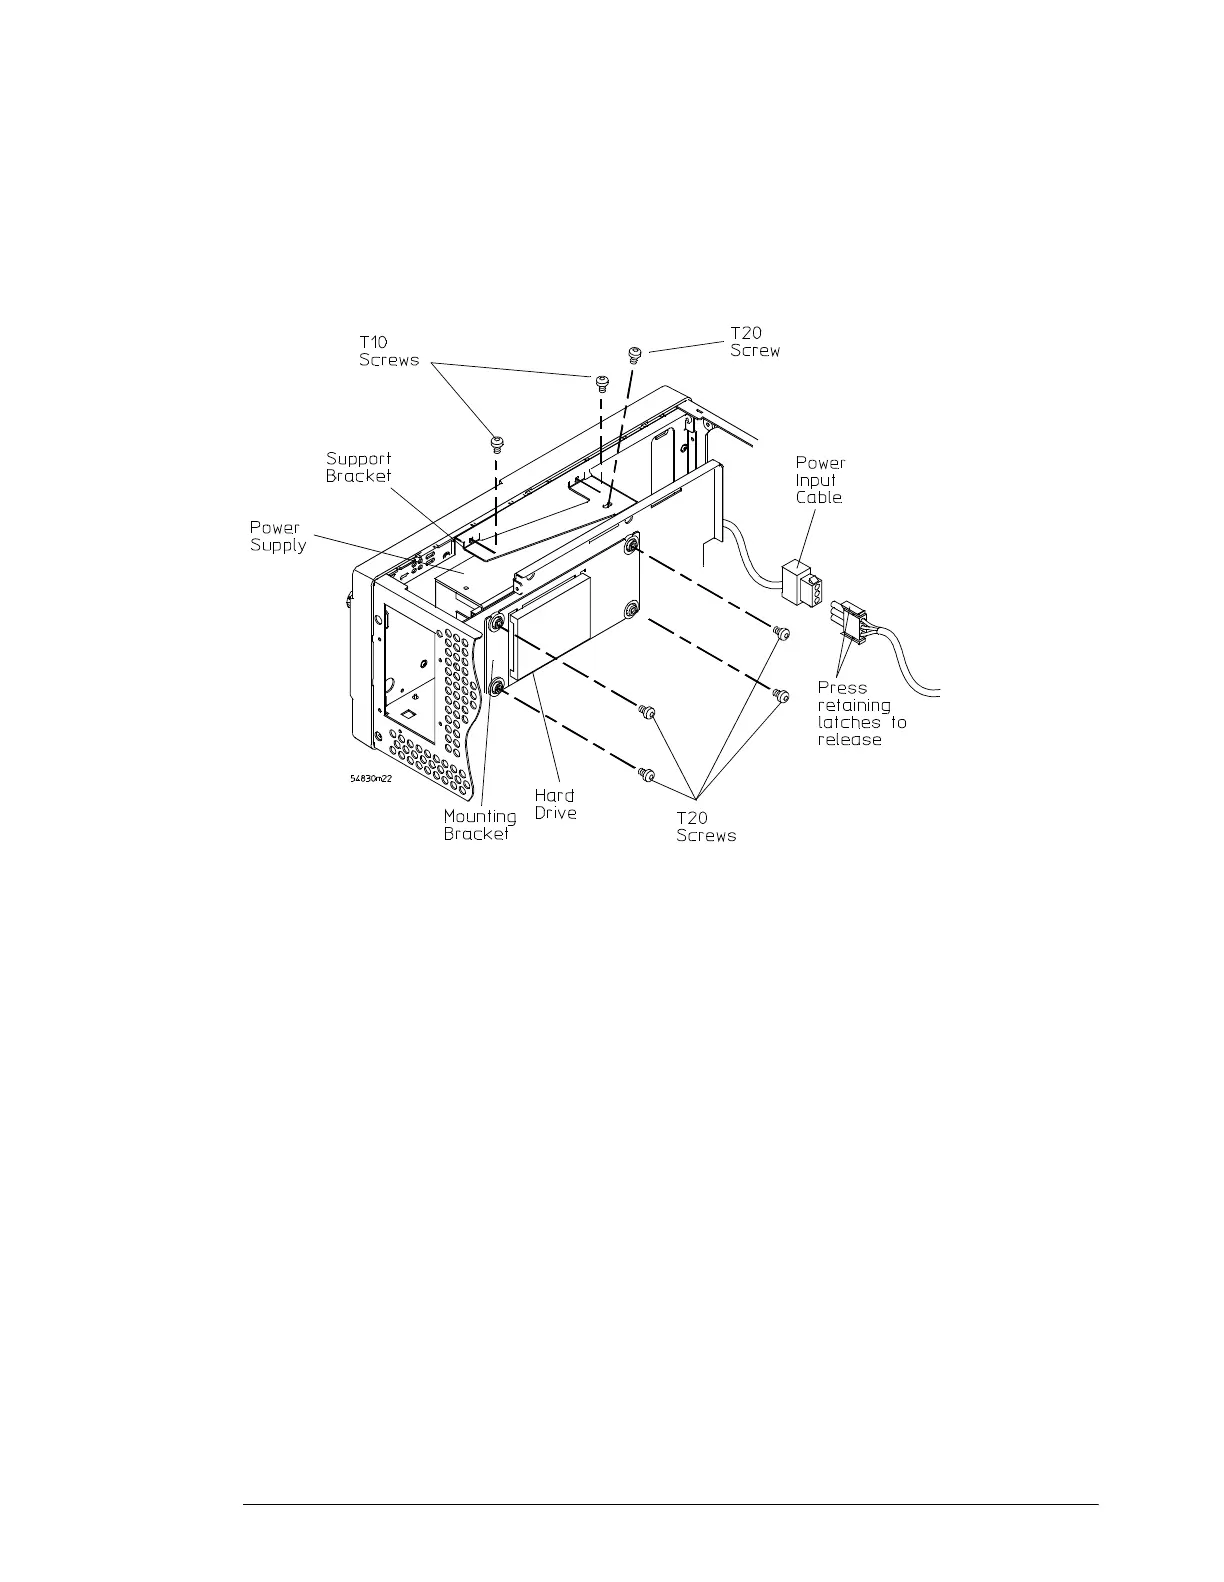
ove the Torx T20 screw that secures the power supply support bracket to the
power supply.
5 Remove the two Torx T10 screws that secure the support bracket to the chassis.
6 Remove the four Torx T20 screws that secure the hard drive to the mounting bracket.
Figure 6-29
Removing the Motherboard Subassembly Torx Screws and Cables.
7 Separate the power input cable from the cable assembly to the power supply.
8 Lift the supply up and out of the chassis.
9 To replace the supply, reverse the installation procedure. Ensure that the AC power
connector is aligned with the cutout in the rear panel, that the supply chassis rests on
the two tabs in the oscilloscope chassis, and that the ground wire is routed through the
notch at the rear of the power supply chassis.
Cable W2, which is the middle connector in front, connects to the pins toward the top of the
supply.
To ensure electrical safety, you must reconnect the ground wire to the chassis.
 Loading...