Agilent 1100 Series Fraction Collectors User’s Guide 65
Repairing the Fraction Collector 3
Simple Repairs
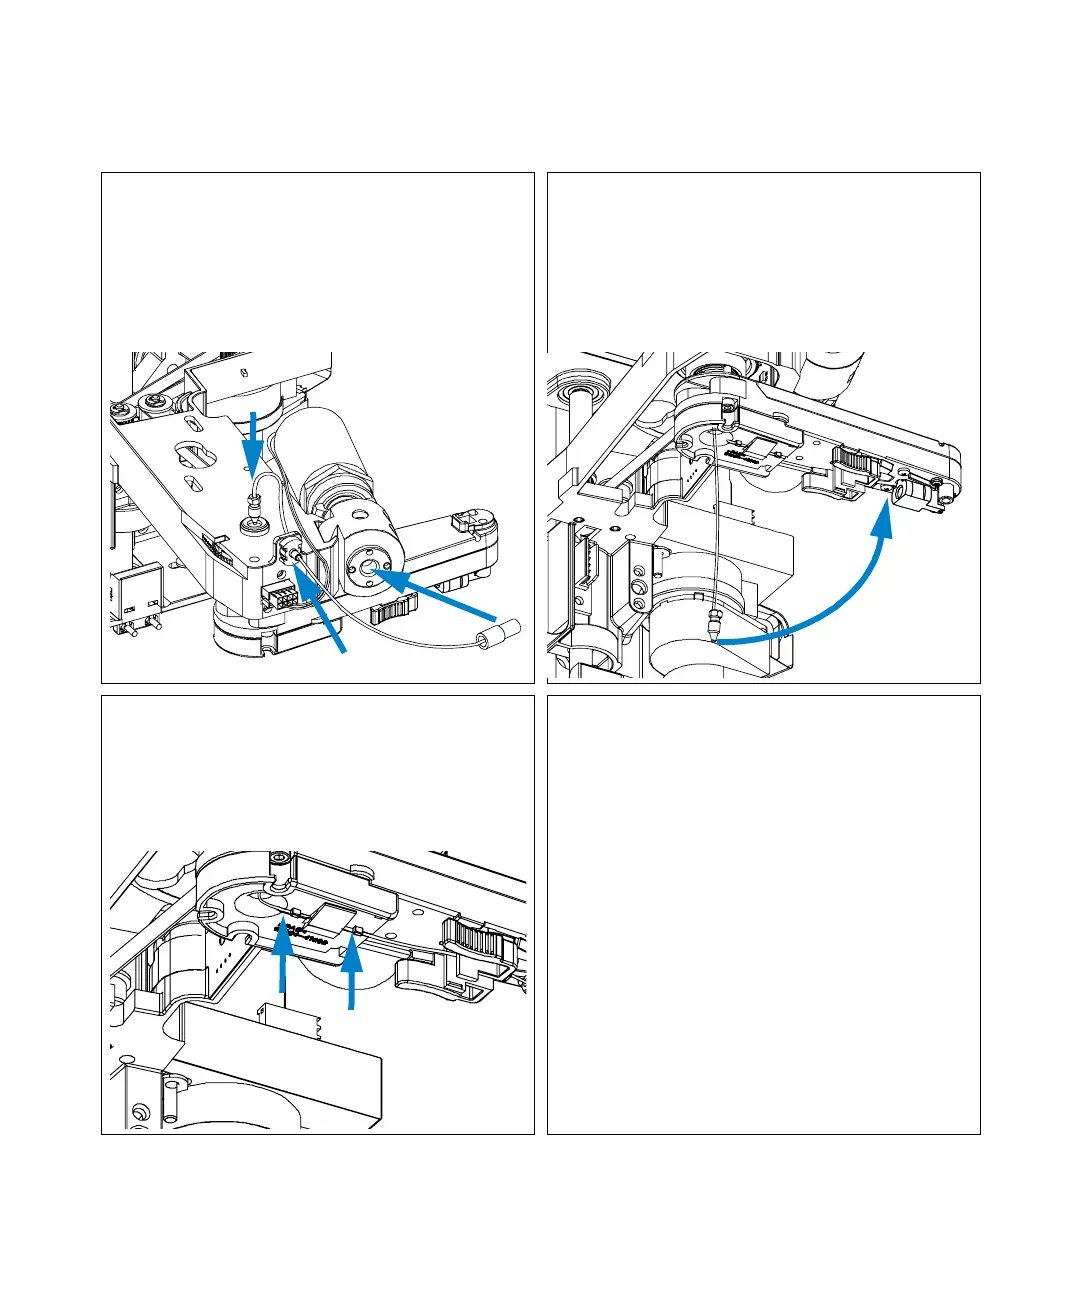
6 Install the new valve to needle tubing
assembly by clipping it in to the holder in the
z-arm assembly (1), Important!!!) and slide
it through the hole in the z-arm (2) and out
on the bottom of the needle carrier assembly
(top to bottom). Screw the finger-tight fitting
into the port of the diverter valve (3).
7 Using the 4 mm wrench and the
5/16“ wrench for counter-holding connect
the valve to needle tubing to the needle.
(Viewed from the bottom)
8 IMPORTANT: After fixing the screw clip
the tubing into the guide on the bottom of
the needle carrier assembly.
It is absolutely vital that the tubing is
installed as described, to maximize the
lifetime of the tubing.
On completion of this procedure:
• Re-install the needle to the needle carrier
assembly, if you previously removed it.
Make sure to slide the needle all the way to
the front of the needle carrier assembly
(clicks into position).
• Re-install the tray(s) in the tray base.
• Start the instrument.
• Close the front cover.
2
1
3

 Loading...


