68 Agilent 1100 Series Fraction Collectors User’s Guide
3 Repairing the Fraction Collector
Simple Repairs
Exchanging the Analytical Needle Assembly
Frequency When the needle is visibly damaged
When the needle is blocked or contaminated
Tools requi re d Wrench, open end, 4mm, PN 8710-1534 (supplied in accessory kit)
Wrench, open end, 1/4 – 5/16 inch, PN 8710-0510 (supplied in accessory kit)
Parts required Analytical needle assembly, G1364-87203
WARNING
To avoid personal injury, keep fingers away from the needle area during fraction
collector operation.
CAUTION
Regularly inspect the inlet / waste tubing assembly and the valve to needle tubing and
exchange them if they are worn out or show visible signs of damage.
Before beginning this procedure:
• Position the transport unit of the fraction
collector in the “Home Position” (see
“Maintenance Functions” on page 49).
• Remove all installed trays from the tray
base.
• Position the transport unit of the fraction
collector in the “Change Parts Position”
(see “Maintenance Functions” on page 49).
• Turn off the instrument.
• It might be more convenient to remove the
needle from its carrier before unscrewing
the needle tubing.
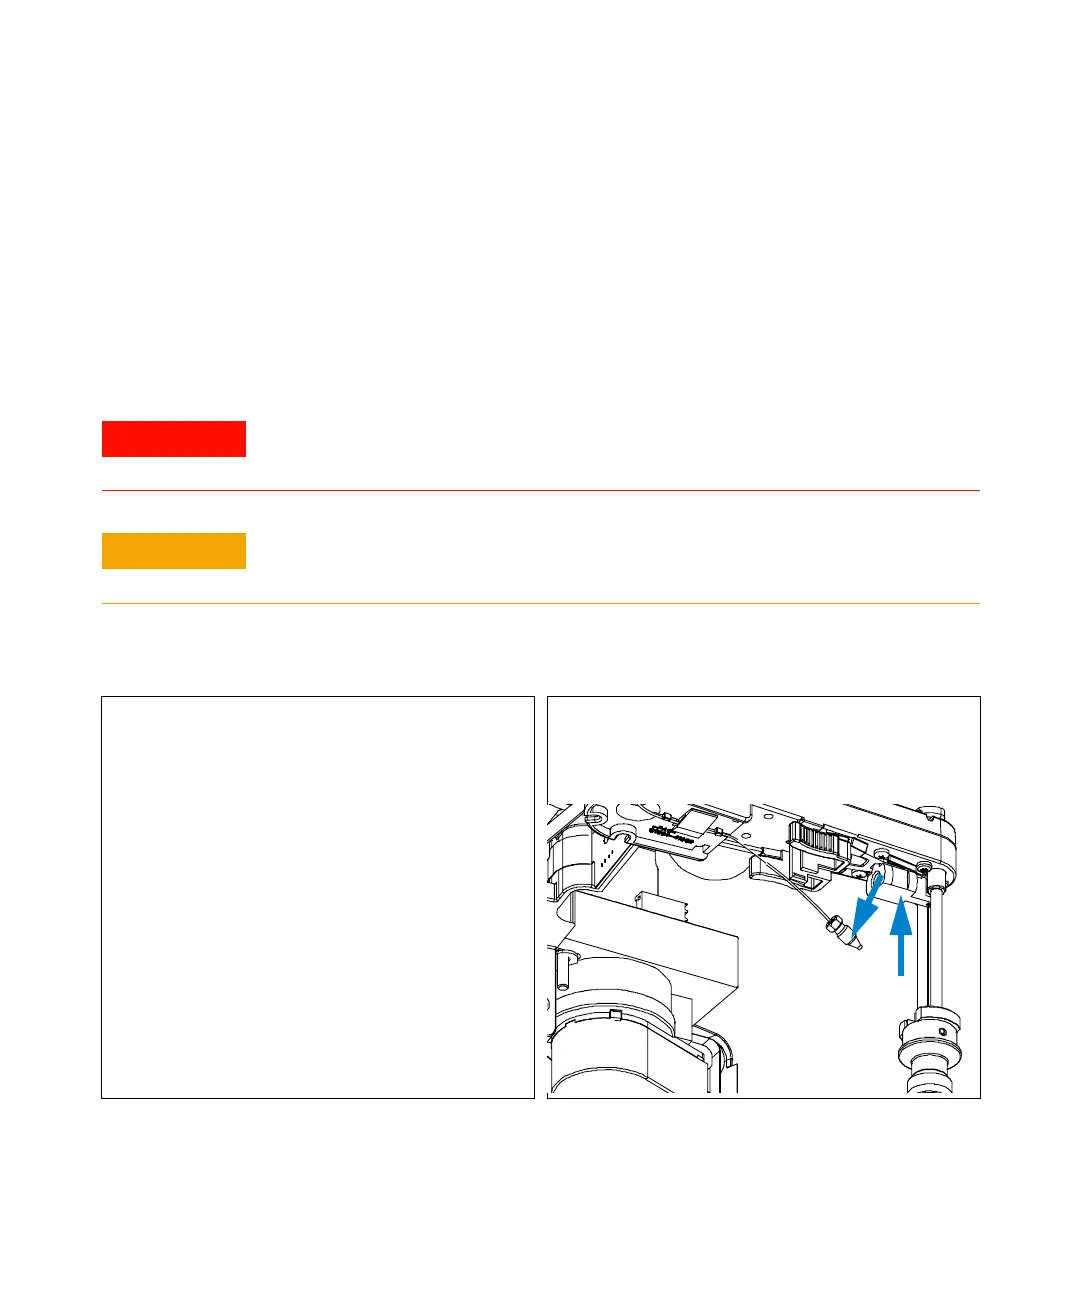
1 Use the 4 mm wrench and the 5/16” wrench
for counter-holding to unscrew the
valve-to-needle tubing from the needle
assembly. (Viewed from the bottom)
 Loading...


