ProST Hardware Installation User Guide
Page 43 Commercial in Confidence UWB-D00111 Rev L
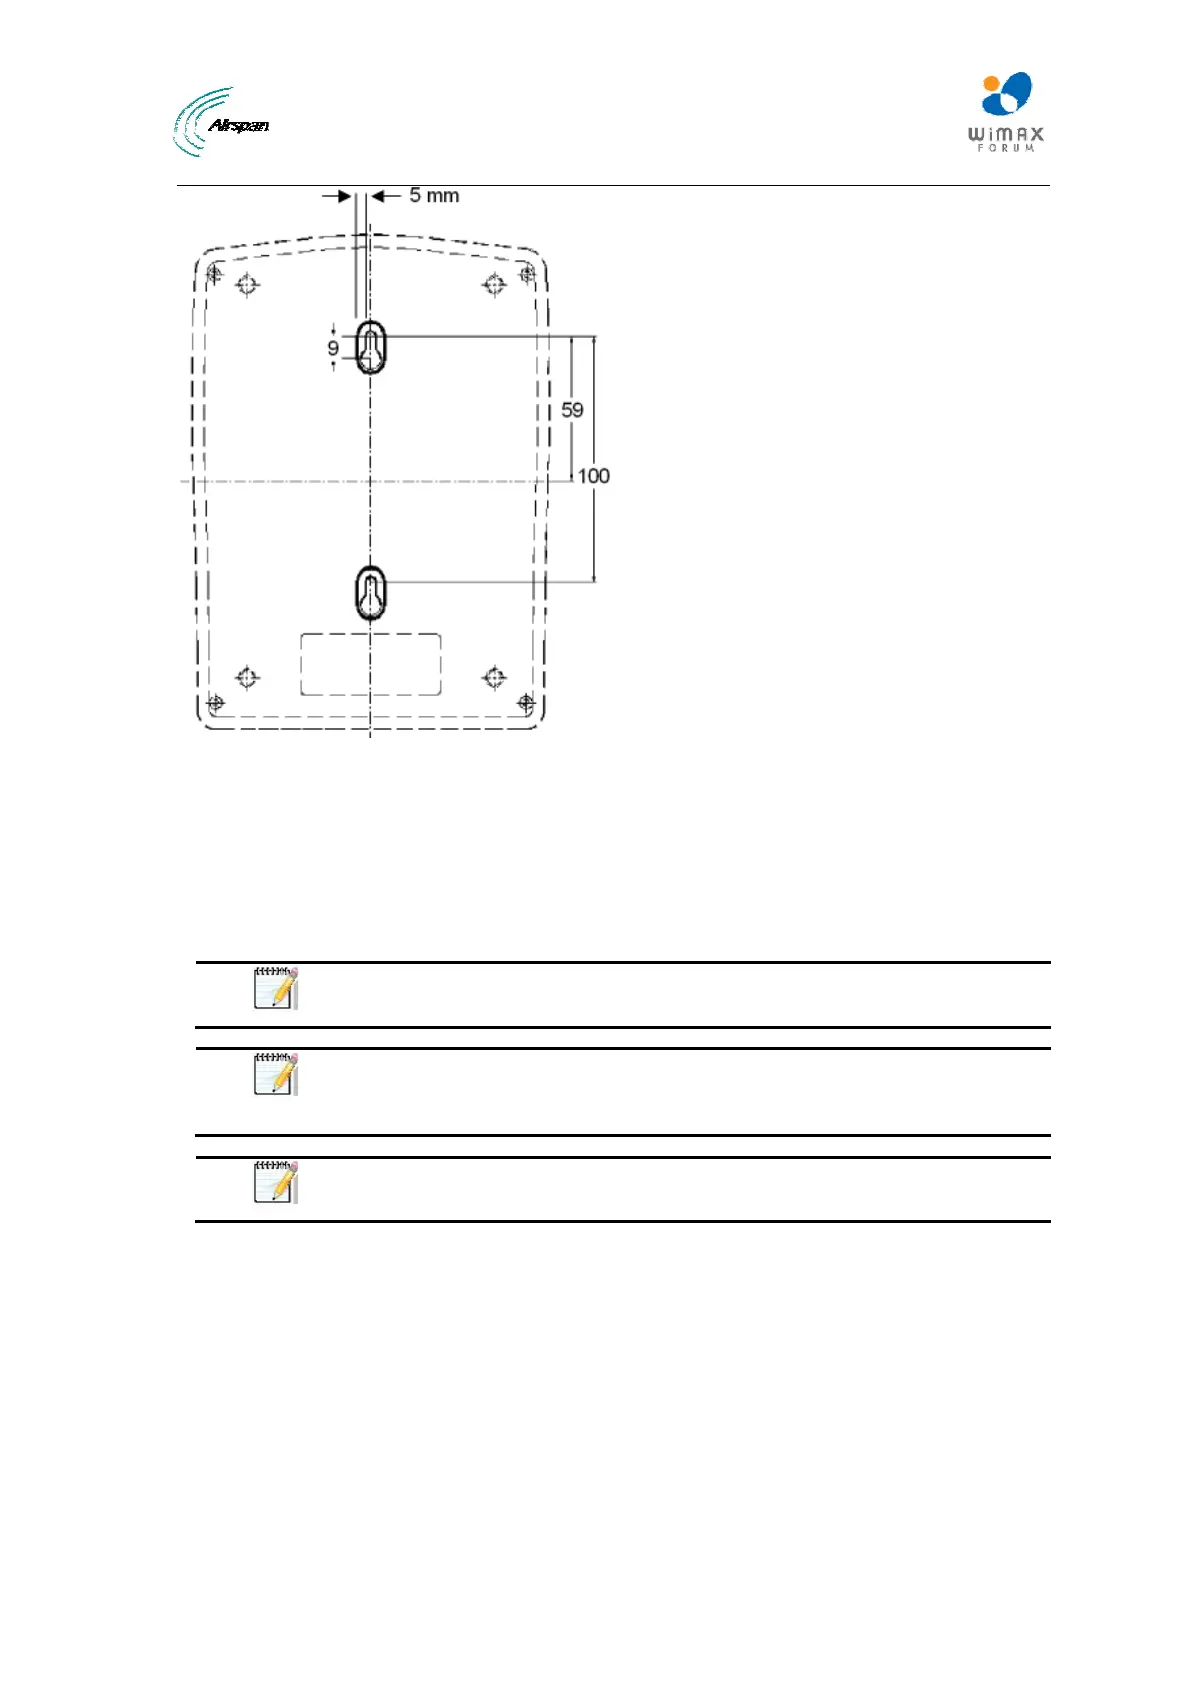
Figure31‐SDA‐4Smountingtemplate
2. Drill holes for each hole that you marked in the step above.
3. Insert wall anchors (supplied) into each of the drilled holes.
4. Insert the 9-inch screws (supplied) into the wall anchors. Ensure at least 2 mm of the screw
is exposed to allow insertion into the SDA-4S mounting holes.
5. Hold the SDA-4S with both hands, and align the entrance to the two mounting hooks with the
screws. Slide the screws into the mounting hooks, by lowering the SDA-4S onto the screws.
Note: For safety, both mounting hooks must be utilized when mounting the
unit.
Note: The SDA-4S is supplied with a 1-metre AC power lead assembly.
Therefore, ensure the unit is mounted within reachable distance to the
customer's mains power outlet.
Note: The maximum cable run between SDA-4S and ProST is 100 meters.
Therefore, ensure the unit is mounted within reachable distance.