RECORDING - 11
Version 2.00 - March, 1996 Page 59
EXT T/C RCV
EXT W/C RCV
TR1-8/_ TR9-16/. 1/A 9 2/B 10 3/C 11 4/D 12 5/E 13 6/F 14 7/G 15 8/H 16
1/N 9 2/O 10 3/P 11 4/Q 12 5/R 13 6/S 14 7/T 15 8/U 16EDIT/- REC/#
ALL/I CLEAR/J
ALL/V CLEAR/W
STORE/K G1/L G2/M
G3/X G4/Y G5/Z
HELP
NAME
RECORD/EDIT
PLAY GROUP
ABCD
NOW TIME
HOUR MIN SEC FRAME
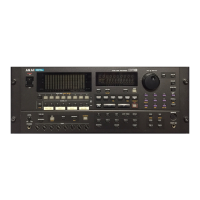
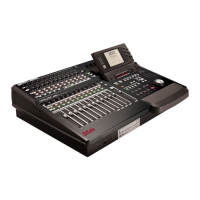
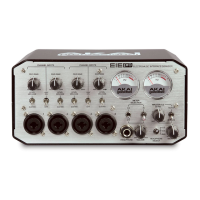
dl1500
REMOTE CONTROLLER
OUT BOUT A
^
EXT M/C SYSTEM
USER KEYS MACRO
MIXER DSP
SAVE DIRECTORY
SHIFT
AUTO REHEARSE
CYCLE PRE-ROLL
EXT. TIME
GRAB TIME
GOTO
EXIT UNDO EXECUTE
COPY CUT ERASE PASTE INSERT TRIM
EDIT CUE IN OUTSYNC SELECT CUE
CURSOR
JOG
SPOOL
NUDGE DATA ENTRY/NUDGE
ENABLE
LEVEL
PAN LINE OUT
HEADPHONE
LEVEL
OUT A
OUT B
SET
SET
SET
SET
SET
SET SET
SHOW
MACRO REC
OFFSET
REVERSE
> CUT DISCARD IN > NOW
REDO
STORE
JOG/SPOOL
ZOOM OUT ZOOM IN
TRACK ZOOM
F1 F2 F3 F4 F5 F6
L R MIN MAX
MI MAX
UTILITIES EDITAUTOLOCATOR NUMERIC ENTRY
PLAYSHEET
+12dB
0dB
PLAY
123
456
789
0
CLR
-/< +/>
00
FRO
LAST TO
OVER
IN
OUT
FROM
REC
LOAD
In the next three sections, we will see how to record and playback material as well as mark
locators and locate to specific points in a project.
The main keys we will be looking are highlighted in the above diagram although others
may be mentioned where appropriate.
BASIC RECORDING
Before we can do anything with the DD1500, we must first make a recording. Because the
DL1500 has many standard multi-track tape recorder (MTR) keys, recording on the
DD1500 is very simple. There are no special, separate record modes to encounter; simply
select a track (or tracks) for record and press PLAY and RECORD as you would on a
normal MTR. There are other aspects to recording but we will look at those a bit later on.
To select tracks for recording, first, press the top panel’s REC/# key - it will illuminate. You
may now use any of the lower RECORD/EDIT keys to select a track (or tracks) for
recording onto. Tracks 1-8 are selected using the TR1-8 key and tracks 9-16 (if you are
using a fixed hard disk) are selected using the TR9-16 key. When the track keys are
selected, they will flash indicating ‘record ready’. The monitor will show RECORD in red in
the track status display area.
 Loading...