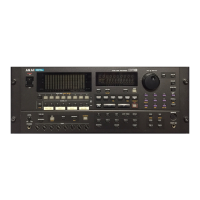
RECORDING - 11
Version 2.00 - March, 1996 Page 61
ADVANCED RECORDING
There is no ‘advanced recording’ mode as such - this section just tells you more about the
recording functions.
Recording is designed to be as simple as possible and you may, if you wish, make a
recording as described above. However, it is also possible to name recordings (although
recordings are given a default name so that you may avoid this process if you just want to
get on with the job and the recording can be renamed afterwards) as well as set other
parameters should you wish.
When you press the top panel REC/# key, you will see this screen:
The fields on this screen are:
RECORDING NAME Here, you may name the recording you are about to make.
To do this, press the NAME key and enter a name of up
ten characters. If you are using a computer keyboard to
input names, just start typing.
NOTE: The DD1500 has an ‘auto-increment’ function for names and so each new
recording you make will have a new name based on the ‘seed’ name you give it here. For
example, if you name a recording APPLAUSE, all subsequent recordings you make will be
automatically named APPLAUSE 1, APPLAUSE 2, etc., until you specify a new ‘seed’
name in this field
The autoname function does not work when performing a punch-out followed by a punch-
in. In this case, both recordings will have the same name. This is not a problem because
recordings can have the same name in a project. Recordings can be renamed if you wish.
RECORD MODE In this field, you may select whether the recording you are
about to make will be placed in the project only or in the
project AND in the library selected in the LIBRARY NAME
field (see below). When PROJECTS + LIBRARY is
selected, the recording will be recorded directly into the
project on the track(s) selected for record) and will also be
placed in a library (in the above screen example, in a library
called RECORDINGS). In this way, you have access to the
‘raw’ recording in its entirety (see the section ‘HOW IT
WORKS’).
You may also select PROJECT ONLY. With this selection,
new recordings will be placed only in the currently active
project.
NOTE: PROJECT + LIBRARY is the recommended selection so that, in the event of a
mishap, you always have access to your recordings. A possible ‘mishap, is that you have
made some recordings to PROJECT ONLY and forget to save the project. In this case,
those new recording would be lost.
You will note that no extra disk space is used when recordings exist in both a project and
a library.
PROJECT + LIBRARY is the default setting.
 Loading...