— 11 —— 10 —
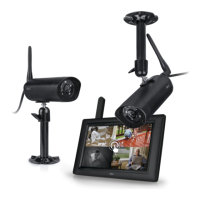
INSTALLATION
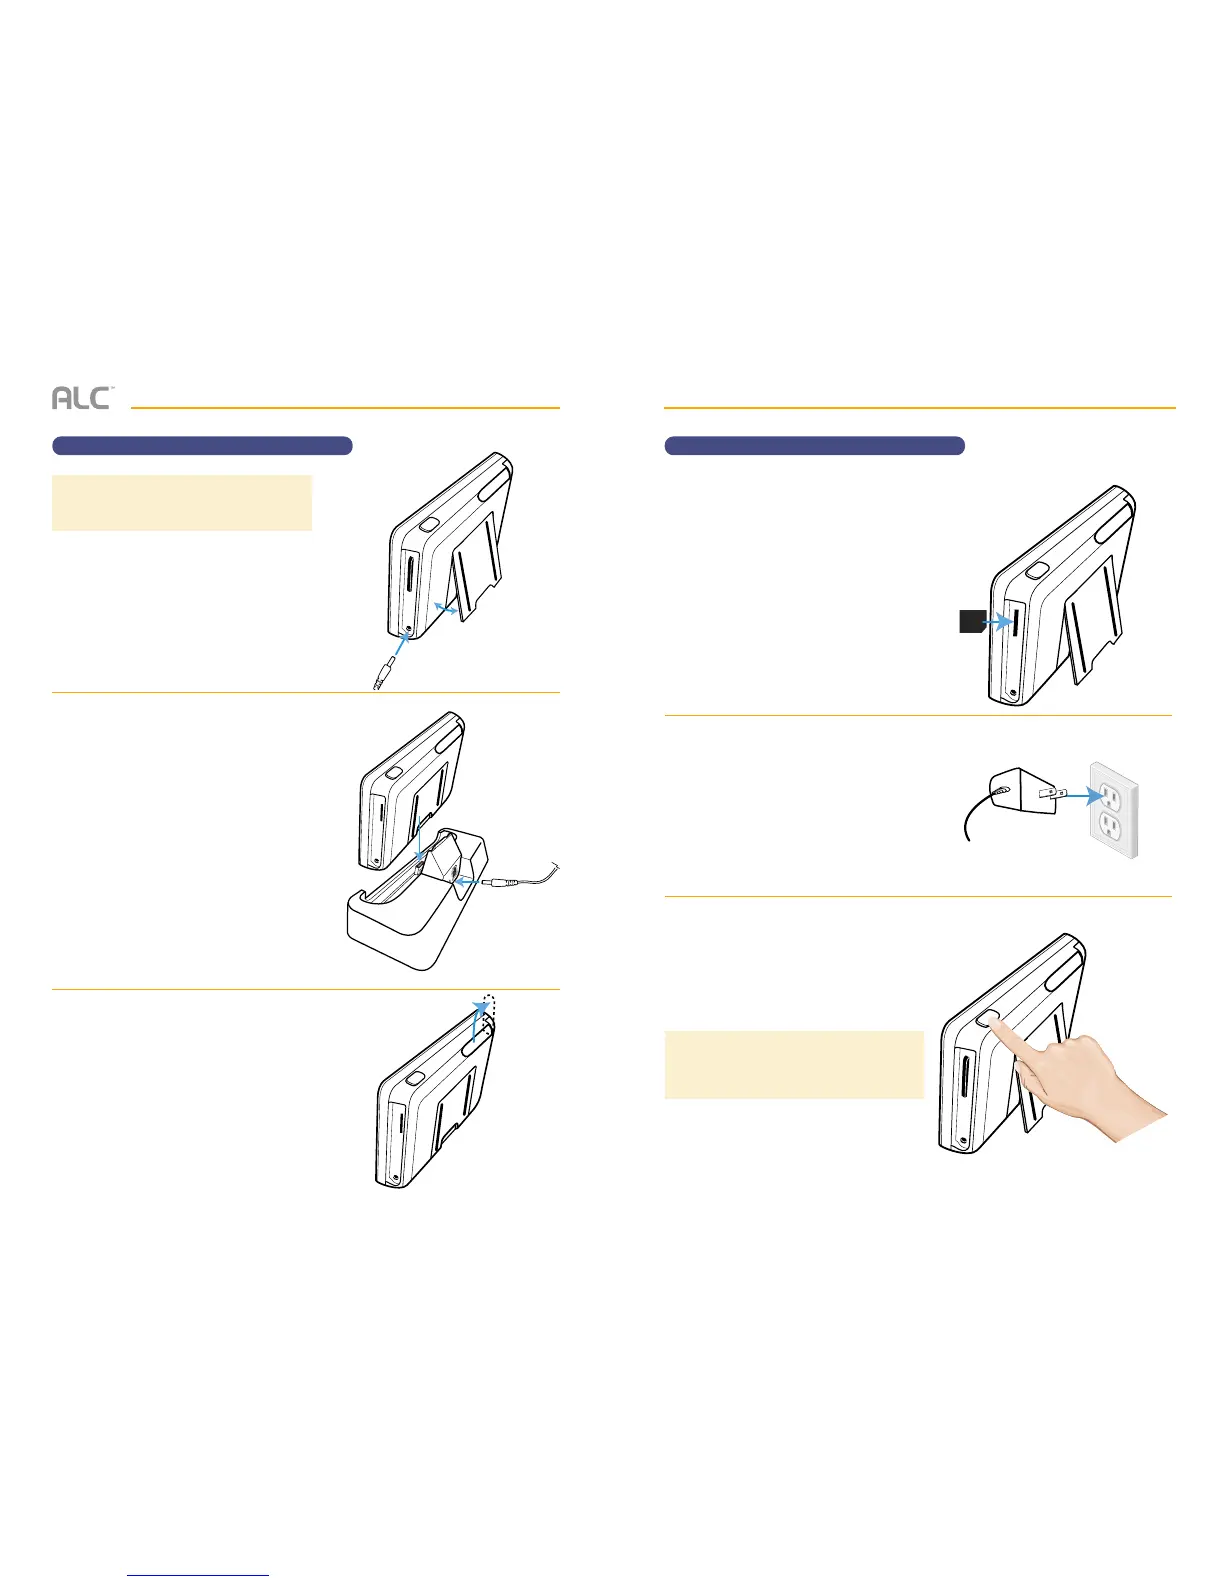
Setting Up the Monitor
w
Insert an SD Card (up to 32GB) into
the SD Card Slot. This will allow you to
record videos.
x
Connect the other end of the adapter to
a 120 volt AC (standard indoor) power
outlet.
When connected to an AC Outlet, the
rechargeable battery will be charged.
y
Press and hold the Power button on the
top of the monitor for 3 - 4 seconds to
power it up.
The monitor displays the Welcome screen
for a few seconds and then transitions to
the Live Quad view.
Connect the camera(s) as shown on the
next page.
Front of
the card
TO DISABLE TOUCH SCREEN: To disable
the touch screen (icons will disappear), press the
Power button. To enable the touch screen again,
press the Power button.
INSTALLATION
u
Stand Alone Unit: If you are using the
monitor as a stand-alone unit, flip out
the stand on the back of the monitor.
Connect the AC adapter to the Power
Jack on the side of the monitor.
In Docking Station: If you are using
the monitor in the docking station, insert
the monitor into the docking station and
connect the AC adapter to the Power
Jack on the back of the docking station.
v
Put the Antenna up.
TIP: You can skip the AC adapter step if the unit
is charged and you want to use the unit using the
rechargeable battery.
Setting Up the Monitor