— 15 —— 14 —
SYSTEM INTRODUCTION
Live Screen and Menu
TIP: The system always defaults to the Live screen in Quad mode after being idle for two minutes while in
most other system screens. This default ensures that the system is ready to record video even if you forget to
return to the Live Screen Quad mode. The system can only start a recording while in Live Screen Quad mode.
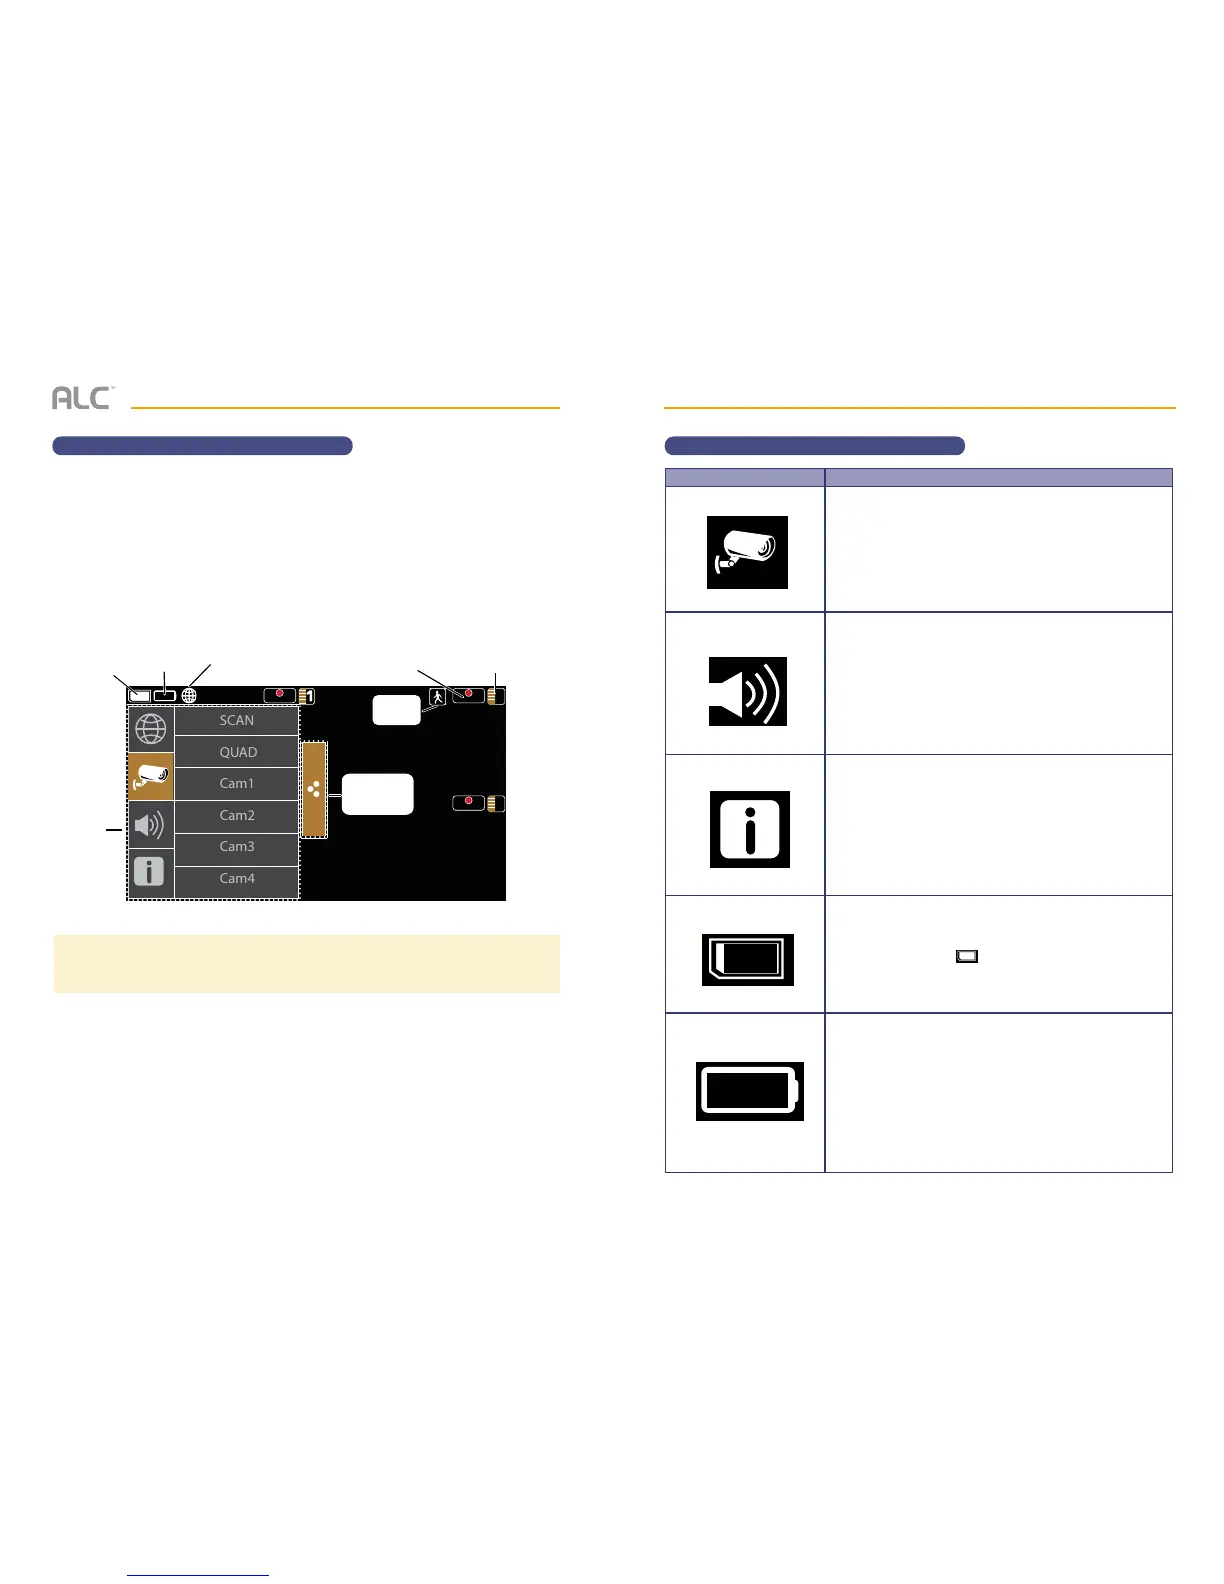
Your monitor’s system software operates through a series of screens that let you choose
groups of operations. For example, when you tap on the camera icon in the Pop-up menu, you
can set how you want the main viewing screen (“Live screen”) to display images from the paired
cameras. You can scan between cameras, show all cameras on a single screen (Quad view), or
only display a specic camera.
The Live screen lets you view the camera transmissions. It also lets you set up your screen
display and make adjustments to it. Icons on the screen itself let you monitor power and
camera status.
See the following page for descriptions of the icons.
Pop up
menus
REC REC
2
REC
4
SCAN
QUAD
Cam1
Cam2
Cam3
Cam4
SD
card status
Battery
status
Record
status
Camera number/
Signal strength
Pop up
menu tab
Motion
status
connection
status
SYSTEM INTRODUCTION
Description of Icons
Icon
Camera Mode
Volume
System Settings
SD Capacity
Battery Capacity
Icon Description
Select how you want the Live screen to display camera
input:
SCAN: Scan between cameras (5 seconds)
QUAD: Quad view (all paired cameras display)
Cam1-Cam4: Full view (1 camera displays on full screen)
Adjust the volume level.
See page 50 for details.
Tap to access the System Software Operation screens
or view recorded events.
Details of this icon start on page 21.
Indicates memory capacity remaining.
A blank card icon ( ) indicates no card is inserted.
See page 11 for details.
Displays battery capacity. This graphic shows battery at
nearly full.
This icon will blink when the battery needs recharging.