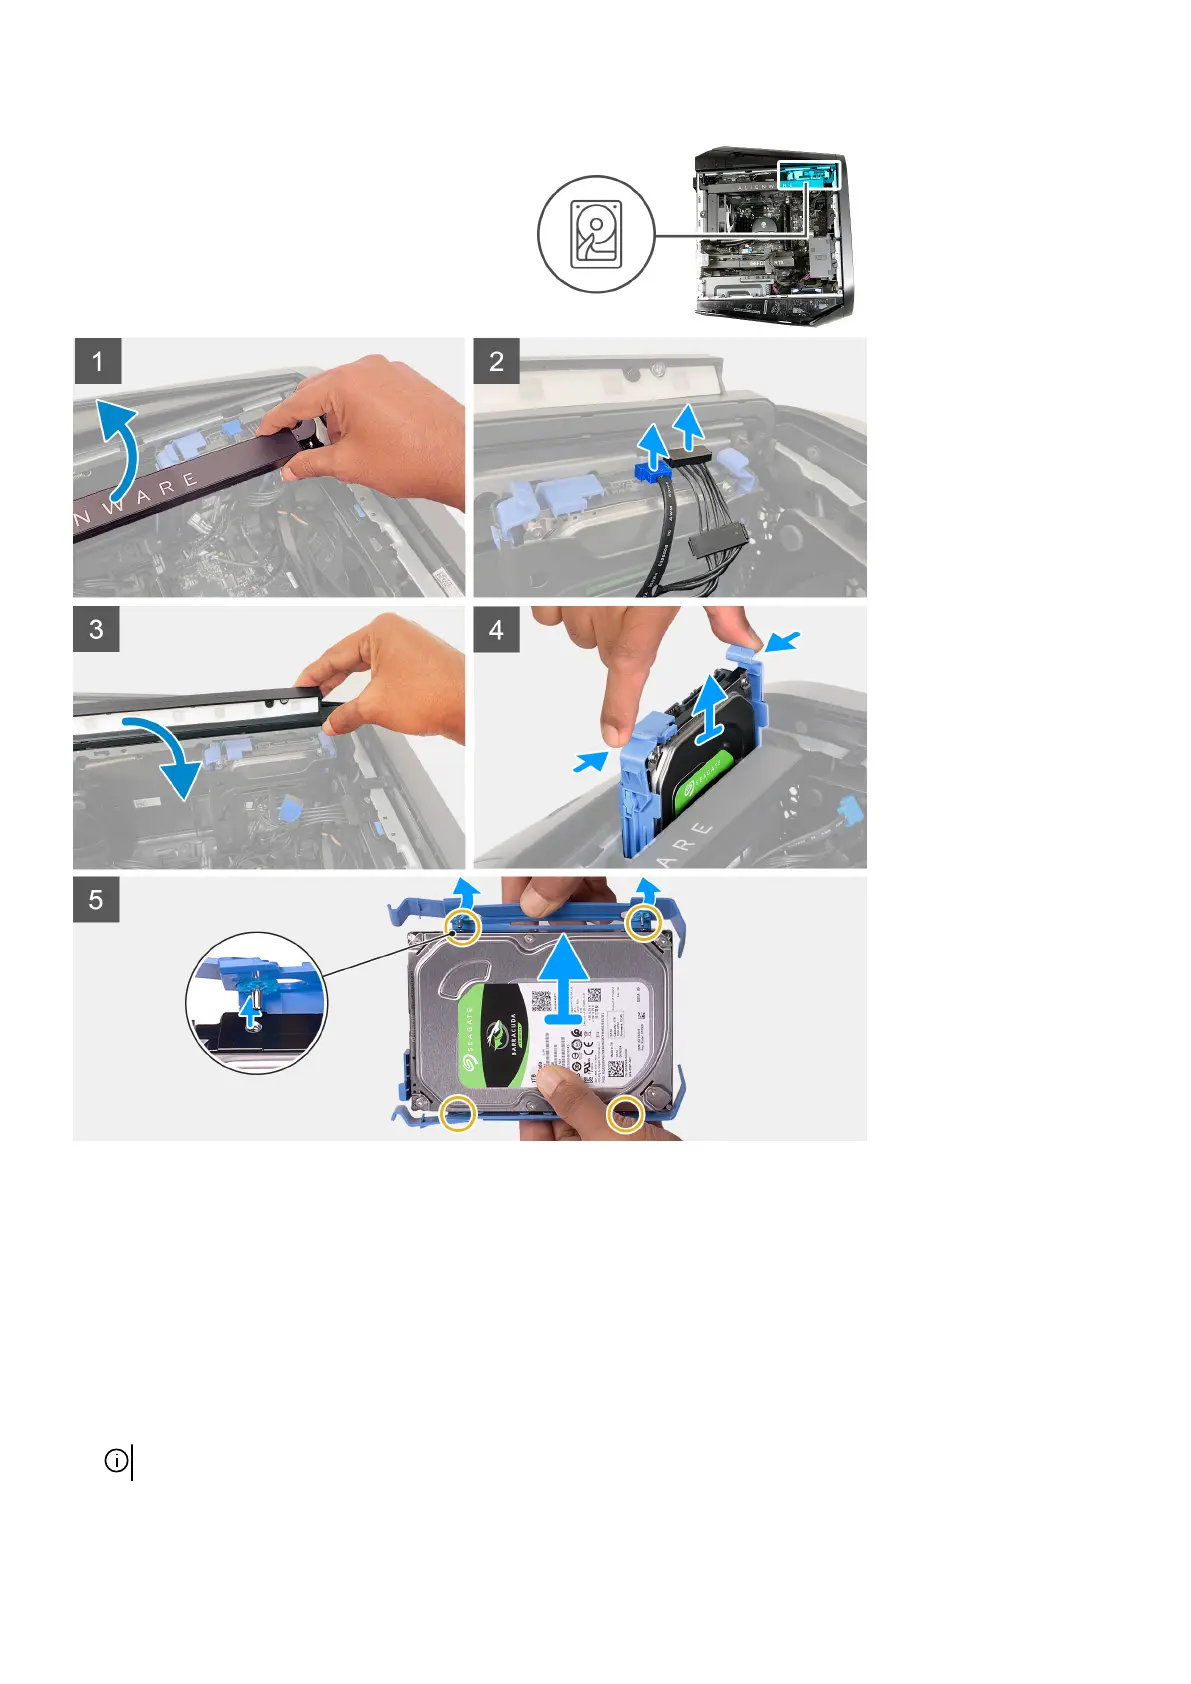
Steps
1. Lift the side light bar to reach the hard-drive data and hard-drive power cables of the hard drive.
2. Slide your finger under the hard-drive power cable as close as possible to the power cable plug, and pull the hard-drive power
cable to disconnect the cable.
3. Slide your finger under the hard-drive data cable as close as possible to the data cable plug, and pull the hard-drive data cable to
disconnect the cable.
4. Push the side light bar down.
5. Press the release tabs on the hard-drive carrier and slide the hard-drive carrier out of the hard-drive cage.
6. Pry the hard-drive carrier to release the tabs on the carrier from the slots on the hard drive.
7. Lift the hard drive out of the hard-drive carrier.
NOTE: Note the orientation of the hard drive so that you can replace it correctly.
30