NOTE: Depending on the configuration ordered, your computer may support either a 2230 solid-state drive or a 2280
solid-state drive in SSD slot one.
If you want to replace your 2230 solid-state drive with a 2280 solid-state drive, see Installing the 2280 solid-state drive in SSD slot
one.
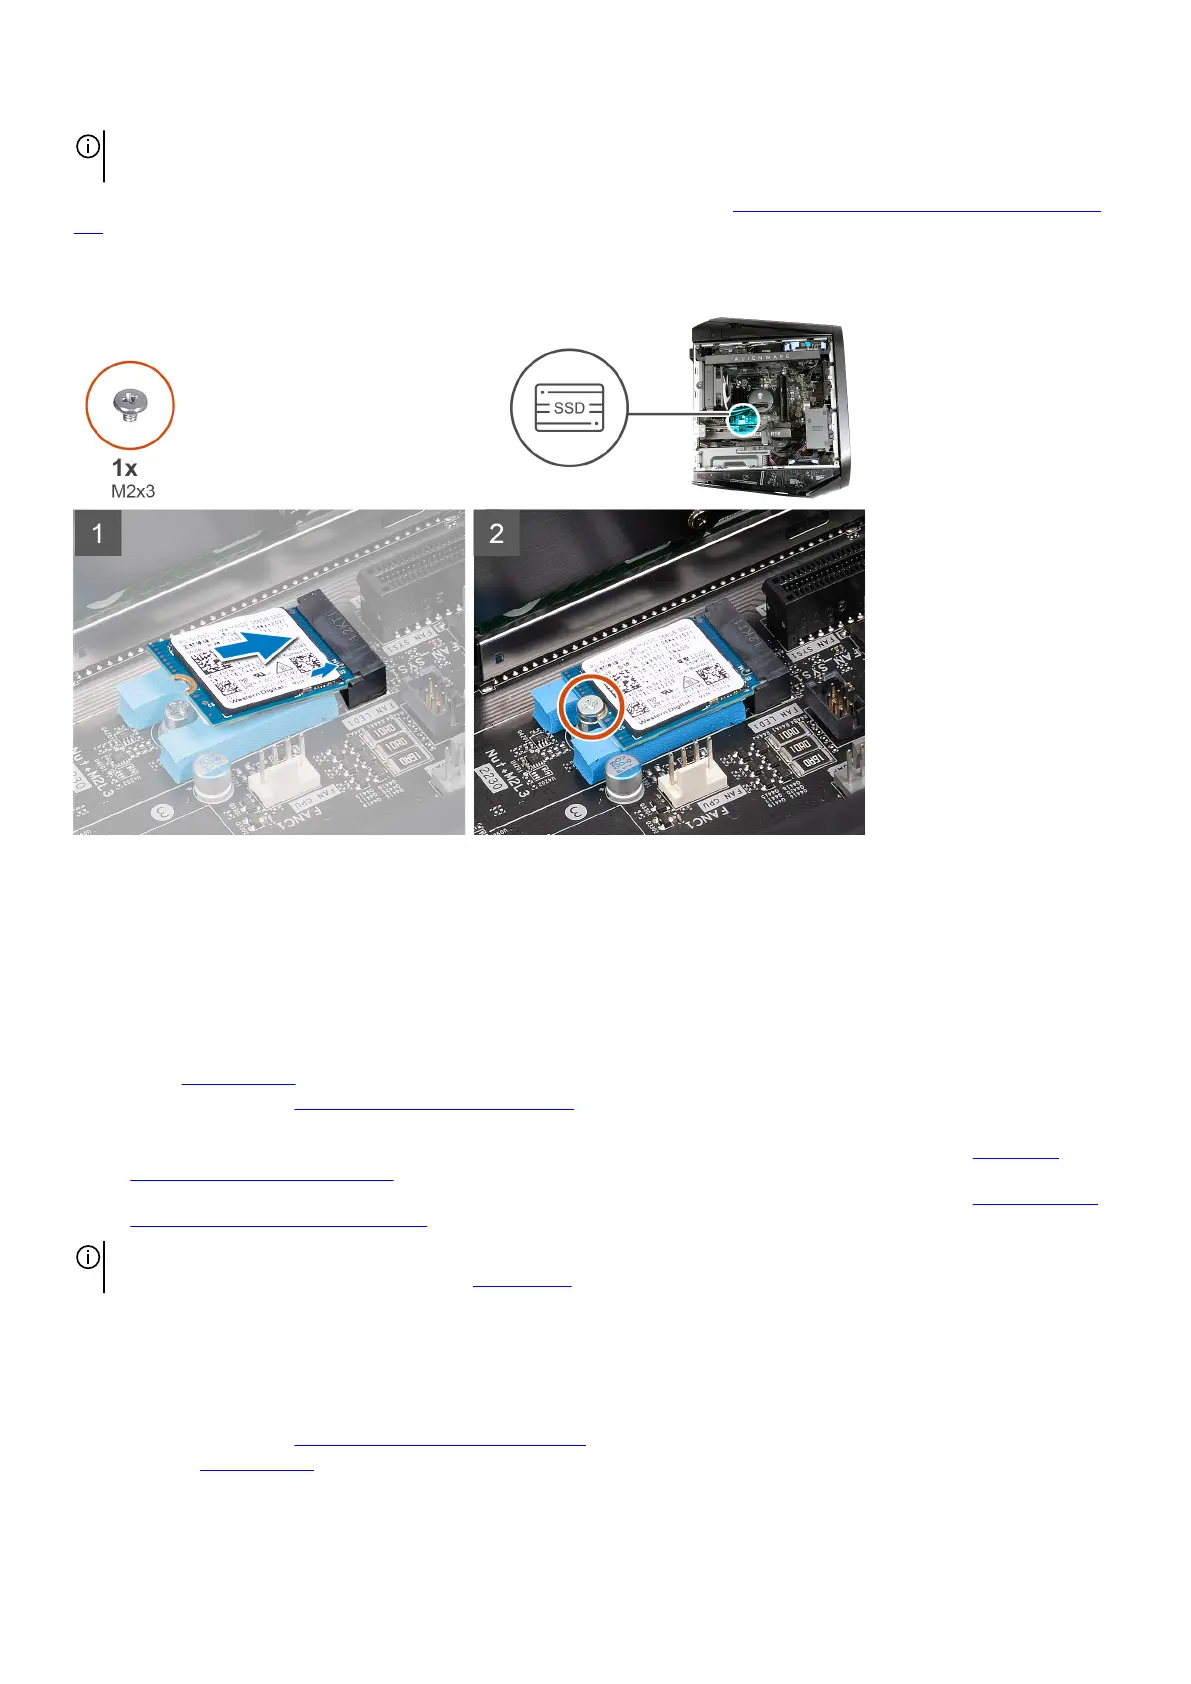
The following images indicate the location of the 2230 solid-state drive that is installed in SSD slot one and provide a visual
representation of the installation procedure.
Steps
1. Align the notch on the 2230 solid-state drive with the tab on the SSD slot one on the system board.
2. Insert the 2230 solid-state drive at a 45-degree angle into the system board.
3. Press the other end of the 2230 solid-state drive down and replace the screw (M2x3) that secures the 2230 solid-state drive to
the system board.
Next steps
1. Install the
left-side cover.
2. Follow the procedure in After working inside your computer.
3. Verify if the storage device is installed correctly (optional):
a. If you are replacing a storage device which does not have the operating system installed, follow the steps in
Identifying
storage device in device manager.
b. If you are replacing a storage device which does not have the operating system installed, follow the steps in Identifying your
storage device in system setup (BIOS).
NOTE: To install the operating system on to your storage device, see Reinstall Windows to the Dell factory image using
recovery media in the knowledge base article 000176966.
Removing the 2280 solid-state drive in SSD slot one
Prerequisites
1. Follow the procedure in Before working inside your computer.
2. Remove the left-side cover.
45