L0118G
5-1
5.0 TRAY ADJUSTMENT AND CONFIGURATION
The trays in AMS Sensit 3 vendors are highly
configurable. Practically any combination of wide and
narrow columns can be set up on a tray. Before
changing the configuration of your trays, make sure to
order the parts you will need, such as new helices,
dividers or additional motors.
5.1 SNACK, CANDY, AND FOOD TRAY
Removal
1. To remove the tray, start with the tray
pushed to its rearmost position. Lift the back
of the tray up and pull the tray forward about
ten inches. Reposition your hands to grasp
the tray at its sides and slide the tray out. If
the tray is spaced close to the tray above, it
may be helpful to raise the front of the tray
as you pull it free.
2. When removing a tray, it is not necessary to
disconnect the tray harness. The harness is
long enough that it will allow a removed tray
to be placed on the floor without having to be
disconnected.
Installation
1. To install the tray, place the tray on top of
the rails and slide the tray all the way to the
rear. It will automatically drop into position.
Make sure the harness slack is draped over
the outside of the rail.
5.2 BOTTLE TRAY
Removal
1. Disconnect the harness inside the right
column in the cabinet. The connections are
labeled corresponding to the number of the
tray (1-7). Push the connector out through
the hole in the back of the column.
2. Pull the tray out until it stops. Carefully pull
the harness up on top of the tray.
3. Locate the slide rail release levers on both
sides of the tray. There should be an arrow
indicating which way to push to release the
levers. Note that the lever direction on the
right side is opposite the direction on the left
side. Push the release levers in the
directions indicated and simultaneously pull
on the tray.
4. Be sure to push the extended slide rails back
into the cabinet before closing the door.
Otherwise the slides will be damaged.
Installation
CAUTION: An incorrectly installed tray can
disengage from the rails and fall
when extended! It is
recommended that installation
be performed by two people!
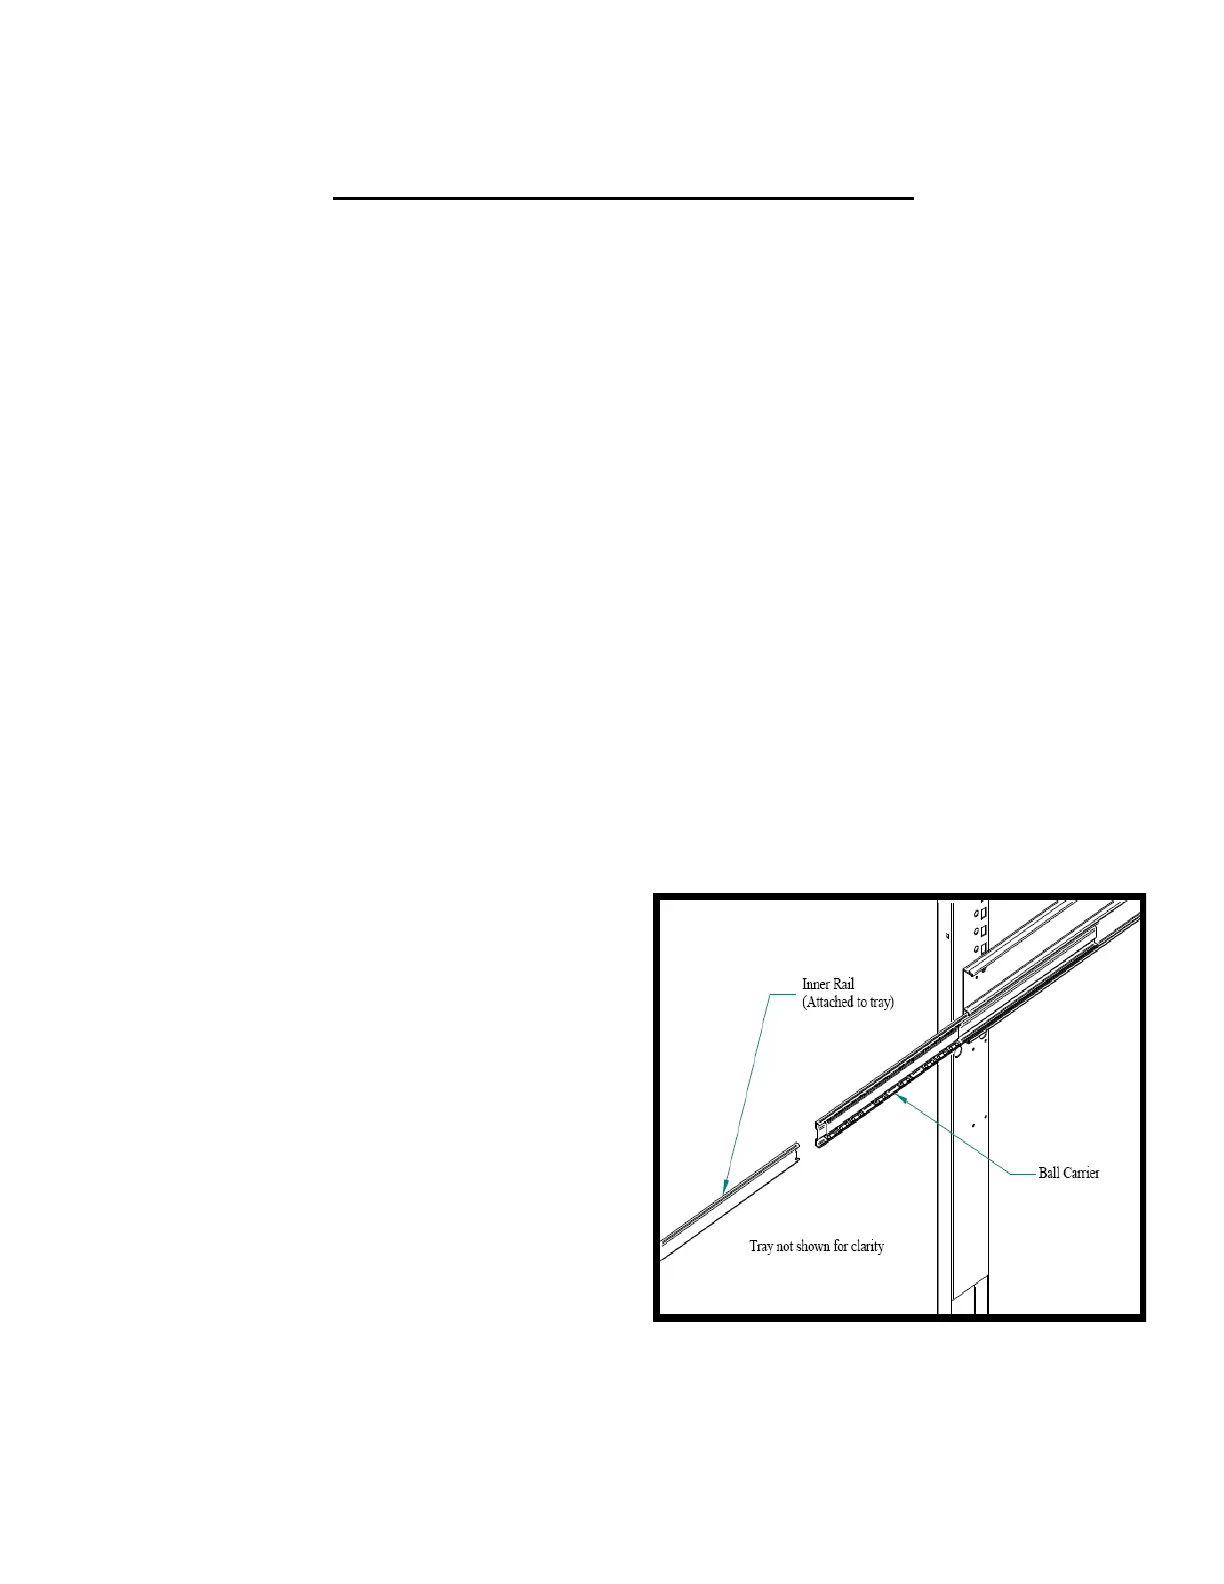
1. Fully extend the slide rails in the cabinet
and hold in position.
2. Move the ball carriers out to the ends of
the slide rails (Refer to Figure 5.1) and
hold in position.
3. Align the rails on the sides of the tray with
the extended slide rails and insert.
Continue to hold the ball carriers and slide
rails in place until the rails on the tray are
firmly engaged in the ball carriers.
4. Push the tray in completely to lock the rails
together.
5. Carefully extend the tray to check for
proper installation. Support the tray to
prevent falling if the rails are not properly
engaged. Visually inspect the rails, and
gently pull the front of the tray side to side
to make sure the rails will not disengage.
6. Route the tray harness over the rail in the
cabinet and into the right column. Connect
the tray harness to the appropriate
receptacle.
Figure 5.1 Bottle Tray Rails