L0118G
6-5
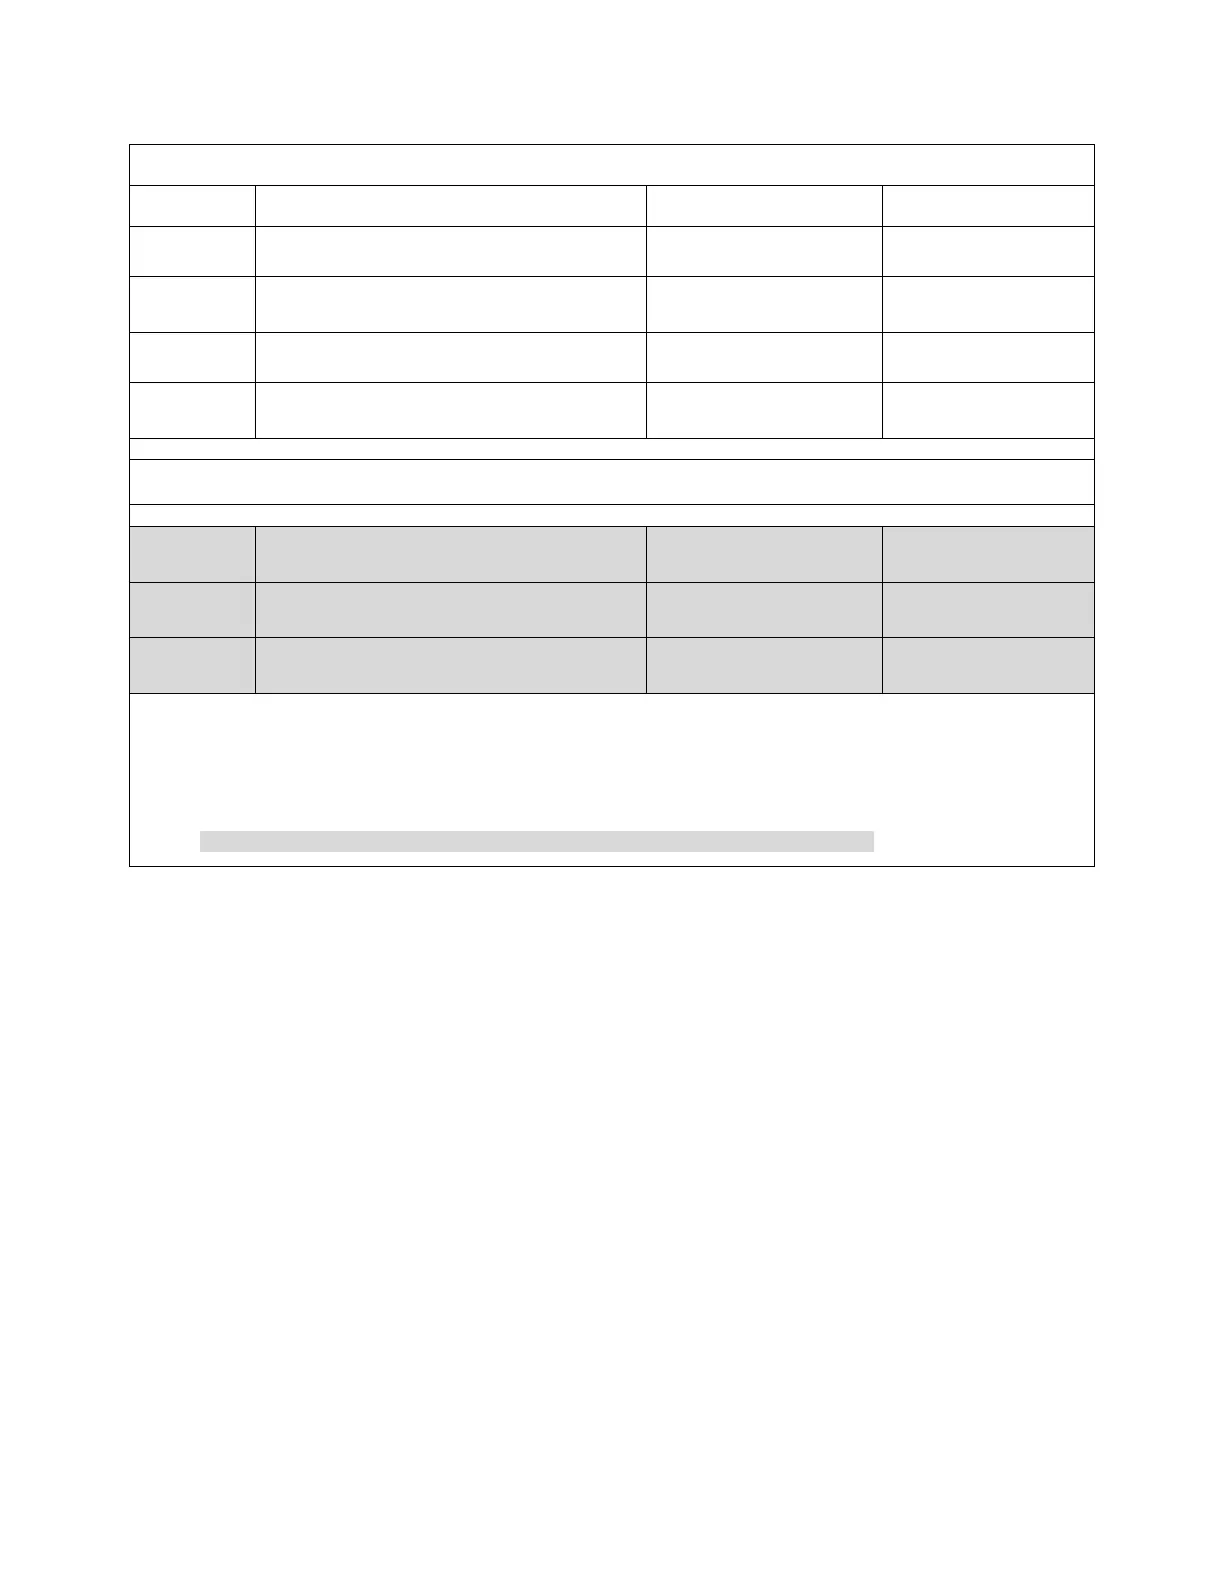
MOTOR TYPES
ITEM DISPLAYED OPTION MOTOR STOP CREDIT DEDUCTION
1 SENSIT Sensor* Sensor
2 HOME/SENSOR/3 Home Sensor
3
HOME/SENSOR +/3
(FACTORY DEFAULT)
Home + Extra** Sensor
4 HOME_ONLY/3 Home Home
(S2 WITH HOMING) MOTOR TYPES
5*** HOME/SENSOR/2 Sensor Sensor
6*** HOME/SENSOR +/2 Home + Extra** Sensor
7*** HOME_ONLY/2 Home Home
* If S3 motors are used: the switch function is ignored, and homing & coupling are not available.
** "Extra" means that if a drop is not detected by the home position, the motor will move 2 additional
increments to try to vend the product.
*** These are settings for use only with vendors equipped with Sensit 2 with Homing.
5 - Letter / Number
Allows use of either keyboard format. The control
board/software default is for the NUMERIC, 12-key
keypad. This setting should be changed to “Letter” if
the vendor is equipped with 20 pushbutton keypads
(with alphabetic characters). Depending on the
setting, the top tray is designated “1” or “A”, and
downward with numbers (2-8) or letters (B-H).
6 - Configure Motors
Configure Motors moves each switched motor to the
home position (moving the motor only if it is not at
home) in addition to detecting connected motors.
Since the vendor will not vend from a given helix
when the motor is missing, jammed or has home
switch problems, this selection MUST BE RUN after
any change in the arrangement and/or the number
of motors.
The configuration of connected motors is stored in
memory. If a configured motor is later found to be
missing during a vend, an error message will be
generated in service mode to alert the service person
that the motor is disconnected. (Motors cannot be
auto-configured as in earlier Sensit 2 systems.)
7 - Coupled Motors
Configurations to vend extra wide product can be
made by using the coupled- motors feature (Refer to
Section 1.5). The coupled motor feature works by
coupling together a set of two motors. One motor
turns counter-clockwise, and the other motor must
turn clockwise – corresponding CW and CCW helices
must be used as well. Both motors turn for the same
length of time. Trays may have multiple coupled
motors.
From the Tray Setup menu, press “7”, then enter the
first selection to couple (for example 24).
Press “9” to edit, then enter the column number of
the second motor to couple. For this example, press 7
to couple selections 24 and 27. The second column
could also be 5 or 6 for this set. In this example, the
display will read COUPLE 24,27.
Press the “*” to save these selections and move to the
next selection.
If the “*” button is pressed the display will move to the
next selection. Entering the desired number will also
take you to another selection.