L0118G
8-1
Important! All Files on the microSD Card
must be saved in the top level (or ‘root’)
Directory. The Control Board will not look into
other Folders for the files it needs.
8.0 MAINTENANCE
8.1 FIRMWARE UPDATES
Occasionally it may be necessary to take advantage
of new software features. The software can be
upgraded by using a micro SD card, available at most
electronics retailers.
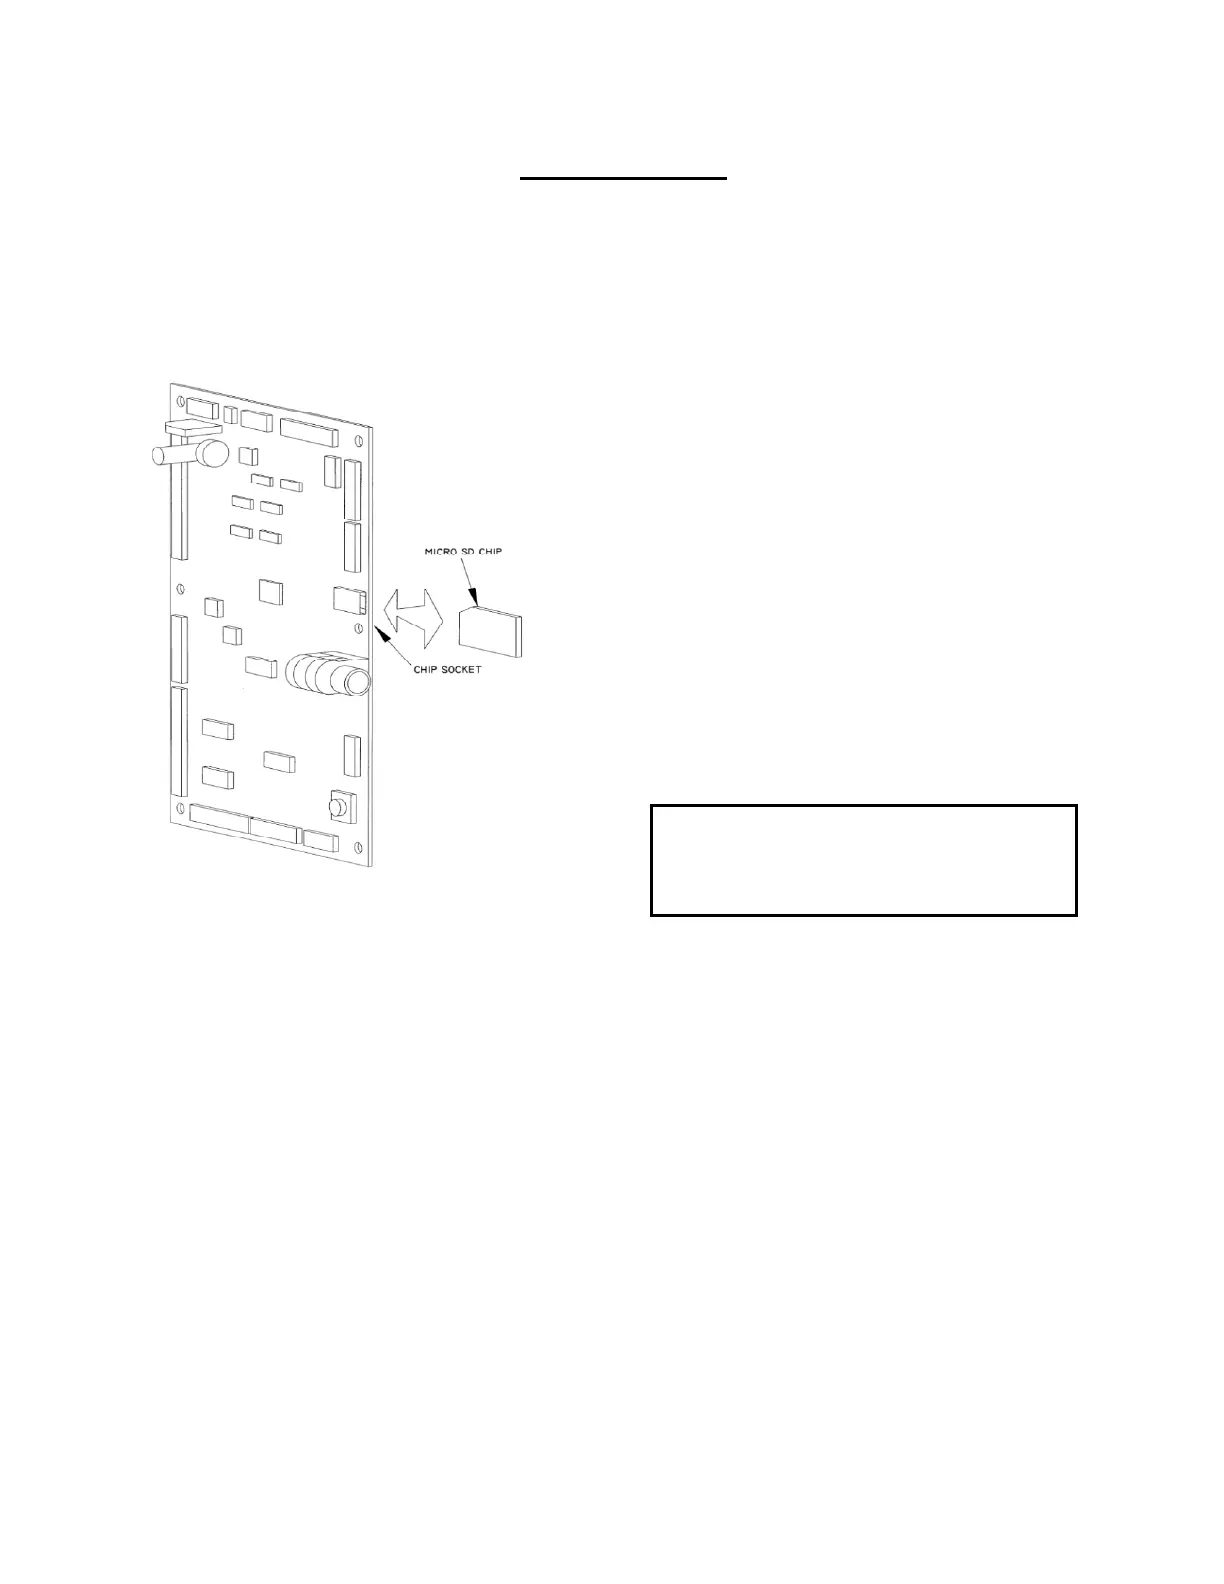
Figure 8.1 Loading Control Firmware
About SD Cards
International Standards for SD Cards do vary, and
some cards do not work properly in the Sensit 3
Board.
These Cards are known to work properly:
Kingston: 512MB, 2GB and 4GB
SanDIsk: 1GB, 4GB
RiData: 4GB
Transcend: 8GB
These Cards are known to have problems:
PNY: 2GB 4GB and 8GB
SanDIsk: 2GB
Transcend: 2GB
We will add to these lists as we become aware of
other devices. Please check our website for updates.
8.2 UPGRADING FIRMWARE
Occasionally AMS releases new software which adds
features or functions that you might want to use to
enhance your operation. Additionally there may be
times you want to convert a board from chilled to non-
chilled or to add Health & Safety operation. In these
cases you will have to install new firmware in your
board.
These machines operate with one of three different
software programs, depending on the operating
temperatures and Health & Safety requirements of the
machines:
P/N 3425: Is for chilled and non-chilled snack
vendors and allows you to set the operating
temperature down to 60°F.
P/N 3426: Is for low temperature machines that vend
non-perishable foods and beverages. The operating
temperature can be set as low as 40°F, but there is
no Health & Safety Control for perishable foods.
P/N 3427: Is for low temperature machines that vend
perishable foods and beverages. The operating
temperature can be set as low as 40°F. If the
temperature is set at 42°F or higher, the Health &
Safety system is disabled. See Section 6.6.6.
To upgrade firmware, you must first obtain the new
file from the AMS website and store it in a micro SD
card. Then follow the steps below to transfer that new
firmware into the Control Board’s memory.
1. Open the Front Door and leave the machine
turned ON. Please read the note on DEX data
below.
2. Locate the socket for the micro SD Card (Refer to
Figure 8.1).
3. Insert the micro SD Card firmly into the socket (it
will only fit one way). Some models may latch it in
place.
4. Press the yellow Mode button. After a few
seconds, three software options will scroll on the
display.
5. Press “3” for NEW FIRMWARE, then the “*” key
to scroll through the files.
6. When the desired software version is shown on
the display press the “ # “ key.
7. The selected software will be loaded and verified
(this will take about 30 seconds).
8. After the software has been loaded the vendor
will re-boot, and display will show the new
software number, version and name.
9. Remove the chip – some boards have push-push
sockets and others will require you to pull the
micro SD Card out with a fingernail.