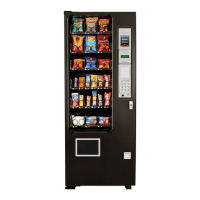
L0118G
6-3
6.7 PRICE SETTINGS
Before setting prices, install a coin changer and/or bill
validator so that the control will recognize the proper
scaling factor for your currency.
1. SET PRICES - Enter the tray then the column for
the first selection to be priced. The current price for
the selection will be displayed. Press 9 to edit, then
enter the new price, making sure to enter all digits
after the decimal point. The decimal is placed
automatically based on the scaling factor from the
changer.
Example: For a price of $1.50, enter 1 5 0.
The user can choose to apply the new price to that
selection (**), all selections on the tray (*1), or all
selections in the vendor (*2). It is usually faster to set
all selections to the most common price in the vendor
(*2), then change individual trays or items that have a
different price.
2. VALUEVEND - ValueVend starts with the prices
that were set using SET PRICES. Using ValueVend,
two selections are grouped together and offered at a
reduced price. This is possible with any possible pair
of selections in the vendor, including pairing a
selection with itself.
Up to 10 such groups are available. For example, in
one group, soup and crackers are offered individually
at full price, but if one is purchased along with the
other the (total) price is reduced.
In addition, a “Global” feature allows all selections (if
priced the same) to get the second selection at a
reduced price.
The vending machine operator should advertise the
special combinations and prices.
1. RESPOND TIME is used to set the number of
seconds (20 to 99) the customer has to make the
second selection before any remaining credit is
returned. Set the time to at least 30 if dual
languages are scrolled in the display.
1 – Press to increase the seconds.
2 – Press to decrease the seconds.
* -- Press to save the new setting and return to
the ValueVend menu.
2. CHANGE is used to select the group to change
(Group 1 through Group 10, or global). Pressing
the “*” button once each time will step the display
to the next group. Only one group at a time can
be set.
0 CLEAR – Clears all of the settings in the
current group. Use this key before
changing ValueVend settings. Using
CLEAR will not change the selection
price as set using SET PRICES.
1 EDIT – Enter the first selection, enter the
second selection, then enter the
discounted price for this grouping. The
discount will appear to the customer as
a discount on the second selection.
Selections can be any combination of
tray and column.
Press “*” to save and return to the
CHANGE display.
Press “#” to return to the CHANGE
display without saving.
* NEXT – Press to return to the CHANGE
display.
# EXIT – Returns to the ValueVend menu.
Operations Note:
If a bill is held in escrow when the first selection is
made, it will be returned if it is not needed for the
purchase of that first selection. Inserted coins will be
held as credit on the machine until the Response
Time is reached and if no selection has been made
those coins will be returned as well.
Even though the escrowed bill has been returned, it
can be re-inserted if necessary for use on the second
selection of the group and that second selection will
be made at the group price.
6.8 TRAY SETUP
This section is used to establish the presence of and
test the motors that are present in your machine as it
is configured. It is also used to program the motors to
operate per your preferences.
1 - Test Motors
Enter the selection number to be tested, or press * to
see the following options for testing multiple motors.
1- JOG TRAY – All motor positions on the
selected tray will be tested. The display will
show the number of the motor being jogged,
or it will show a message that a motor is
missing.
2- JOG ALL – All motor positions in the
vendor will be tested. Each motor will be
turned only a very small amount, so that
products loaded in the vendor will not be
dispensed. The display will show the number
of the motor being jogged, or it will show a
message that a motor is missing.
3-CHECK JAMMED – The control will
attempt to run each motor that has caused a
jammed motor error. The status of the motor
will be displayed afterward.