L0118G
8-3
8.4 CLEANING THE REFRIGERATION UNIT
AMS recommends cleaning the inside of the
refrigeration unit at least twice a year under normal
conditions, more often in dusty environments.
See next page for cleaning vendors with removable
bottom screen.
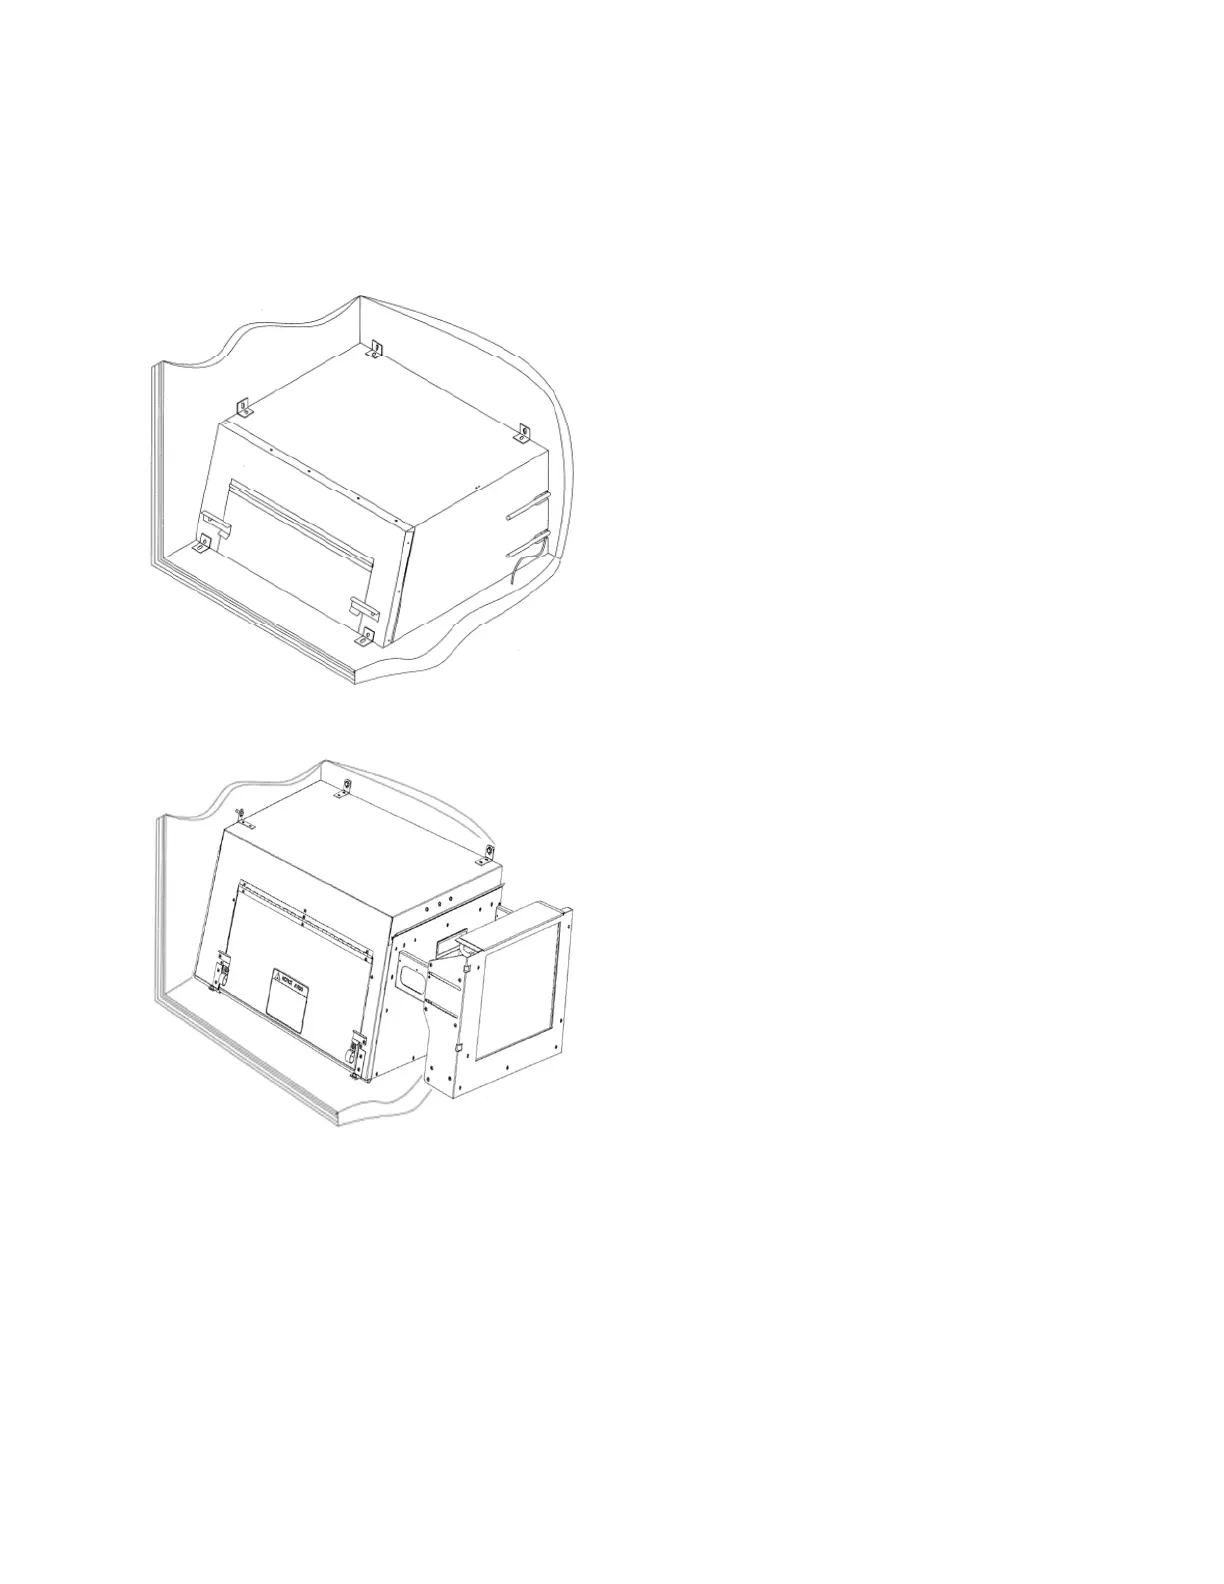
Figure 8.2 Refrigeration Unit Housing
Non-Energy Star Units
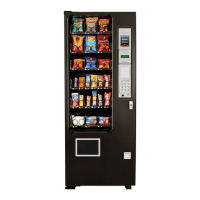
Figure 8.3 Refrigeration Unit Housing
Energy Star Units
CAUTION: Always wear eye protection and gloves
when cleaning vendor! Condenser fins are sharp!
1. Unplug the vendor.
2. Remove the temperature sensor from
refrigeration unit housing.
3. Remove the refrigeration unit housing (Refer
to Figure 8.2).
CAUTION: Condenser fins are sharp!
4. Remove dust from the condenser fins and
coils with a vacuum or stiff brush.
5. Remove dust from the inside of the rear
screen.
6. Remove dust from the outside of the bottom
screen.
7. Replace the housing. When reinstalling the
refrigeration unit housing, it is important to
seal the housing completely to prevent air
leaks. Outside air leaking into the cabinet
can cause condensation to form, which can
lead to water overflowing the drain pan or ice
build-up on the evaporator. Follow the
procedure below to ensure proper sealing.
a. Locate the notches on the back right
corner of the housing (Refer to Figure
8.2).
b. Remove any duct putty from the
notches. Do not discard the putty. It will
be reinstalled in a later step.
c. Set the housing in place, making sure
the drain line and power cord pass
through the lower notch. The insulated
copper tubing should pass through the
upper notch.
d. Push the housing tightly against the
back of the cabinet and visually check
that the foam gasket is making contact
on all sides.
e. Continue to push on the housing while
reinstalling the screws through the
mounting tabs. Be careful – do not
overtighten the screws.
f. Remove the screen from the outside
back of the cabinet.
g. Press the duct putty into the notches.
Make sure to seal completely around
the drain line, power cord, and insulated
copper tubing.
h. Reinstall the screen.
8. Reinstall the temperature sensor.
9. Plug in the vendor.
8.5 CLEANING THE BOTTOM SCREEN
Obstructions and lint blocking the air flow up into the
chiller condenser can damage the chiller. Clean
monthly to allow air to flow through the chiller
condenser.
A “Clean Screen” reminder has been added to help
keep the chiller working at maximum efficiency.
Approximately every 280 hours of chiller operation, a
beep/display reminder will occur when the vendor
door is opened. This represents approximately 1
month of use in an average indoor placement. Clear
the reminder by entering Service Mode.
Clean the rear screen as needed by using the
instructions given in Section 8.4, Cleaning the
Refrigeration Unit.