Installation and Setup
45
Instruction Manual – DXLink™ Twisted Pair Transmitters/Receiver
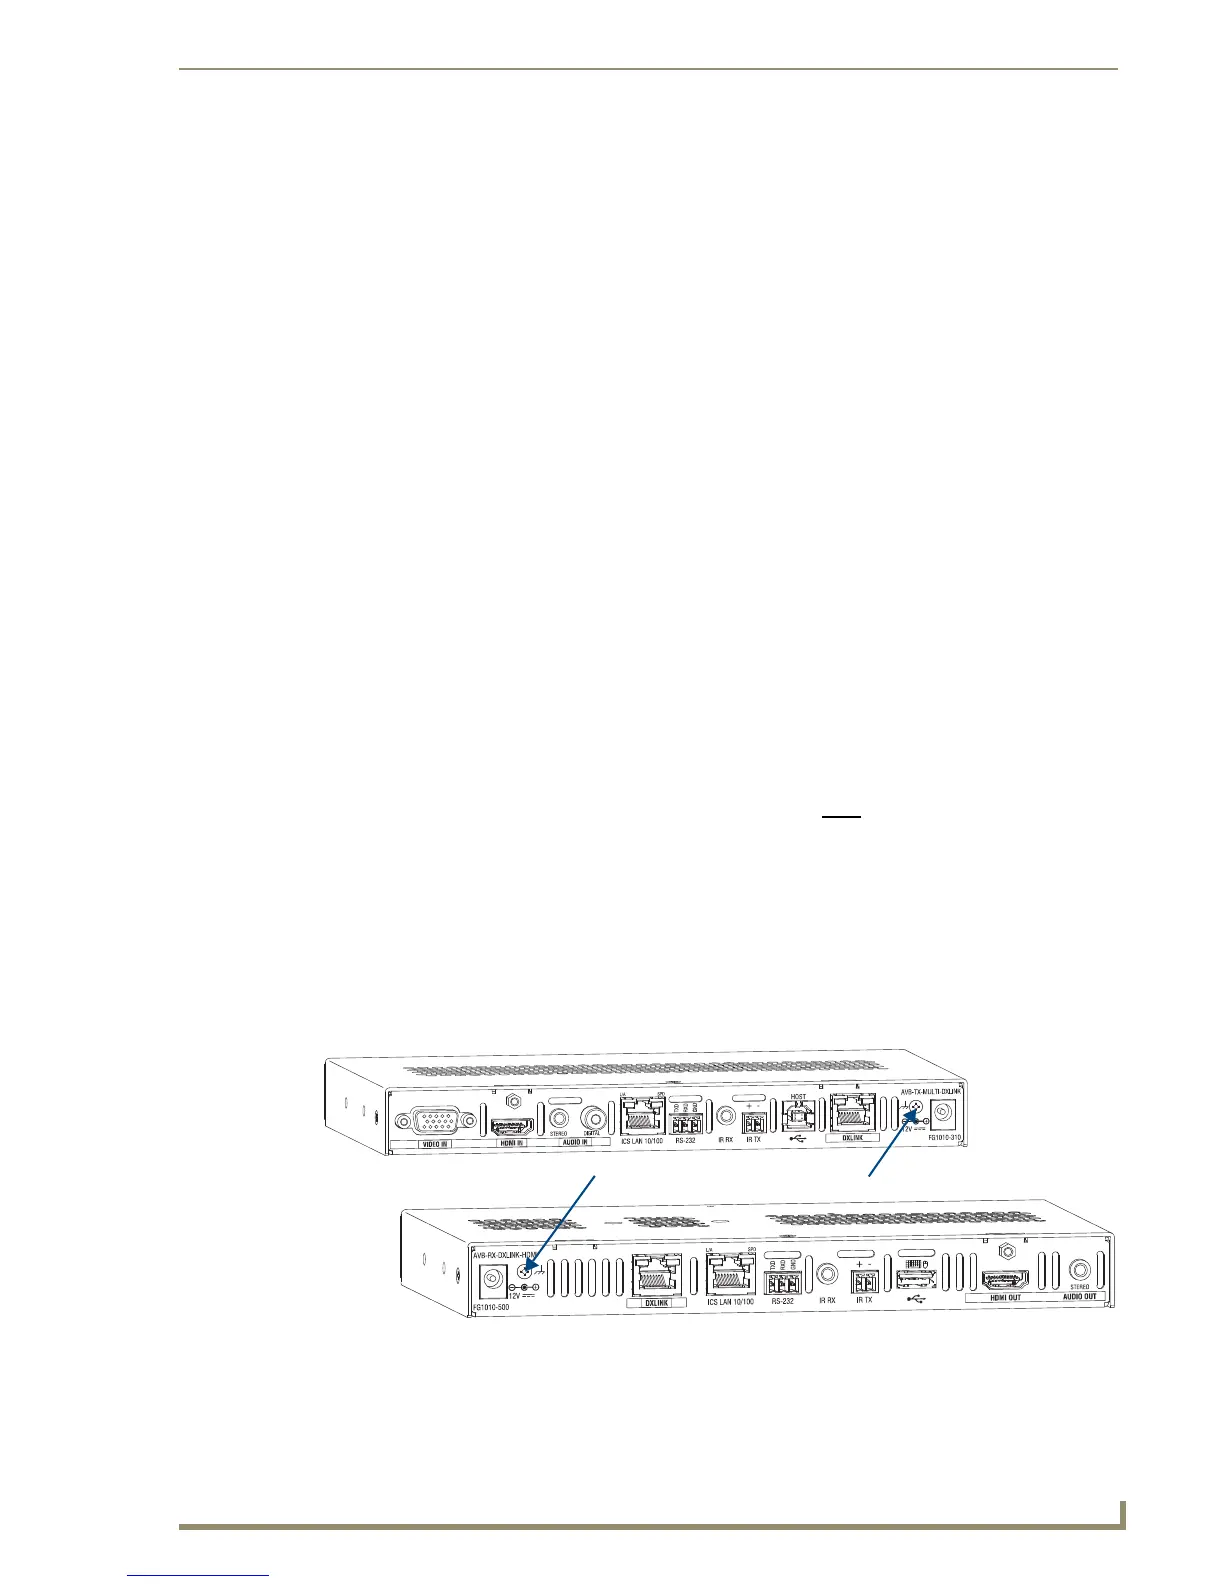
Attaching a Ground Wire to DXLink Transmitters/Receivers
Note: Technically this type of grounding is only required when a DXLink Transmitter or Receiver is
connected to an ungrounded device, but this added grounding measure can be used at the
discretion of the installer.
If the system is experiencing problems with delivery of DXLink signals to/from an Enova DGX Digital
Media Switcher or Enova DVX Solution, adding a ground wire from the TX/RX to the switcher may
improve performance. The problem is likely caused by the use of a single phase powered system that
does not provide an earth ground for a source or destination's chassis and shields. This can inject
unnecessary AC voltage on the HDMI cable shield that can lead to DXLink signal integrity issues. To
check for indications of this type of power in the system, look for a two pronged plug or a cord that has
only two wires.
Items Required
Phillips #1 screwdriver
6 foot ground wire with ring terminal ends (provided)
Note: Currently shipping DXLink Transmitters and Receivers provide a designated ground location
on the rear of the chassis for attaching a ground wire. For instructions on attaching a ground wire to
DXLink Modules without a designated ground location, see page 142.
Attaching a Ground Wire to a Common Earthed Ground
Connect the running end of the ground wire (fixed end attached to a DXLink Transmitter or Receiver) to
a common earthed ground (ideally, referenced to the Enova DGX Switcher or Enova DVX Solution).
Important: If one DXLink Transmitter or Receiver is grounded, any remaining ungrounded units that
are connected to the same board on the Enova DGX Switcher must
also be grounded.
Attaching Ground Wire to Module
Important: Before attaching the ground wire to the chassis, ensure all connectors are clear.
To attach a ground wire to a module:
1.
If powered, power down the DXLink Module.
2. Remove the designated ground screw and washer from the rear of the module.
3. Secure the ring terminal of the ground wire against the chassis with the ground screw and washer.
FIG. 22 Remove designated ground screw and washer
Designated ground screw and washer