5
THE INFORMATION CONTAINED HEREIN IS PROPRIETARY TO APPLANIX CORPORATION. RELEASE TO THIRD PARTIES OF THIS PUBLICATION OR OF
INFORMATION CONTAINED HEREIN IS PROHIBITED WITHOUT THE PRIOR WRITTEN CONSENT OF APPLANIX CORPORATION. APPLANIX RESERVES THE
RIGHT TO CHANGE THE SPECIFICATIONS AND INFORMATION IN THIS DOCUMENT WITHOUT NOTICE. A RECORD OF THE CHANGES MADE TO THIS
DOCUMENT IS CONTAINED IN THE REVISION HISTORY SHEET. COPYRIGHT © APPLANIX CORPORATION, 2021ALL RIGHTS RESERVED. NO PART OF
THIS PUBLICATION MAY BE REPRODUCED, STORED IN A RETRIEVAL SYSTEM OR TRANSMITTED IN ANY FORM OR BY ANY MEANS WITHOUT THE
PRIOR WRITTEN CONSENT OF APPLANIX CORPORATION.
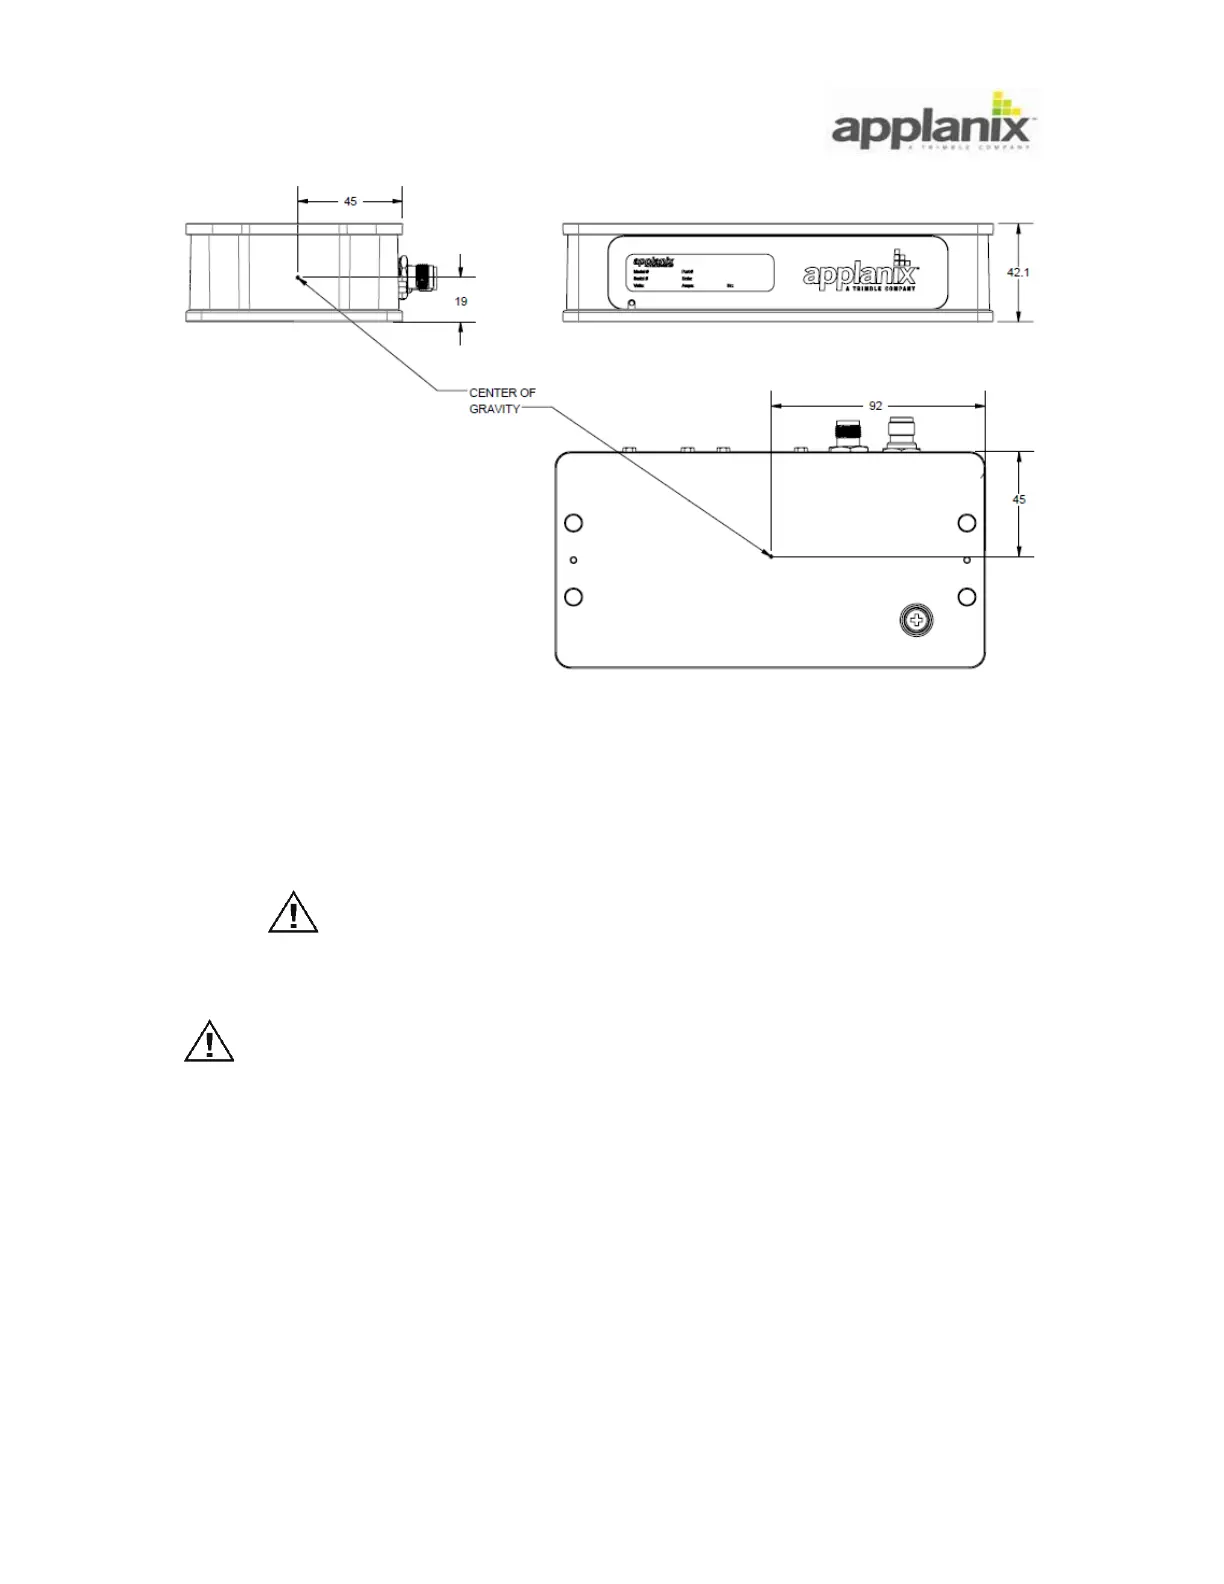
Figure 4: LVX Center of Gravity
3.2. DMI Installation
The Distance Measuring Indicator (DMI) functions on either rear wheel. Applanix
recommends mounting the DMI on the driver’s side rear wheel to facilitate visual
monitoring of the device.
Do not mount the DMI on a steered wheel, as the DMI will yield
incorrect information. Damage to the DMI and mounting
hardware may result.
Applanix recommends the installation of the Permanent DMI
Restraint Bracket kit. The (optional) Temporary DMI Restraint
Bracket kit is not suitable for use in permanent or long-term
installations. Failure of the temporary bracket components may
result in damage to the DMI assembly.
Each DMI is supplied with a Permanent DMI Restraint Bracket kit containing a bracket
and self-threading metal screws. Optional are extra collets, collet spacers and
replacement parts for the DMI sensor assembly (permanent DMI restraint and temporary
DMI restraint bracket kit). These optional items are available from Applanix.