8
THE INFORMATION CONTAINED HEREIN IS PROPRIETARY TO APPLANIX CORPORATION. RELEASE TO THIRD PARTIES OF THIS PUBLICATION OR OF
INFORMATION CONTAINED HEREIN IS PROHIBITED WITHOUT THE PRIOR WRITTEN CONSENT OF APPLANIX CORPORATION. APPLANIX RESERVES THE
RIGHT TO CHANGE THE SPECIFICATIONS AND INFORMATION IN THIS DOCUMENT WITHOUT NOTICE. A RECORD OF THE CHANGES MADE TO THIS
DOCUMENT IS CONTAINED IN THE REVISION HISTORY SHEET. COPYRIGHT © APPLANIX CORPORATION, 2021ALL RIGHTS RESERVED. NO PART OF
THIS PUBLICATION MAY BE REPRODUCED, STORED IN A RETRIEVAL SYSTEM OR TRANSMITTED IN ANY FORM OR BY ANY MEANS WITHOUT THE
PRIOR WRITTEN CONSENT OF APPLANIX CORPORATION.
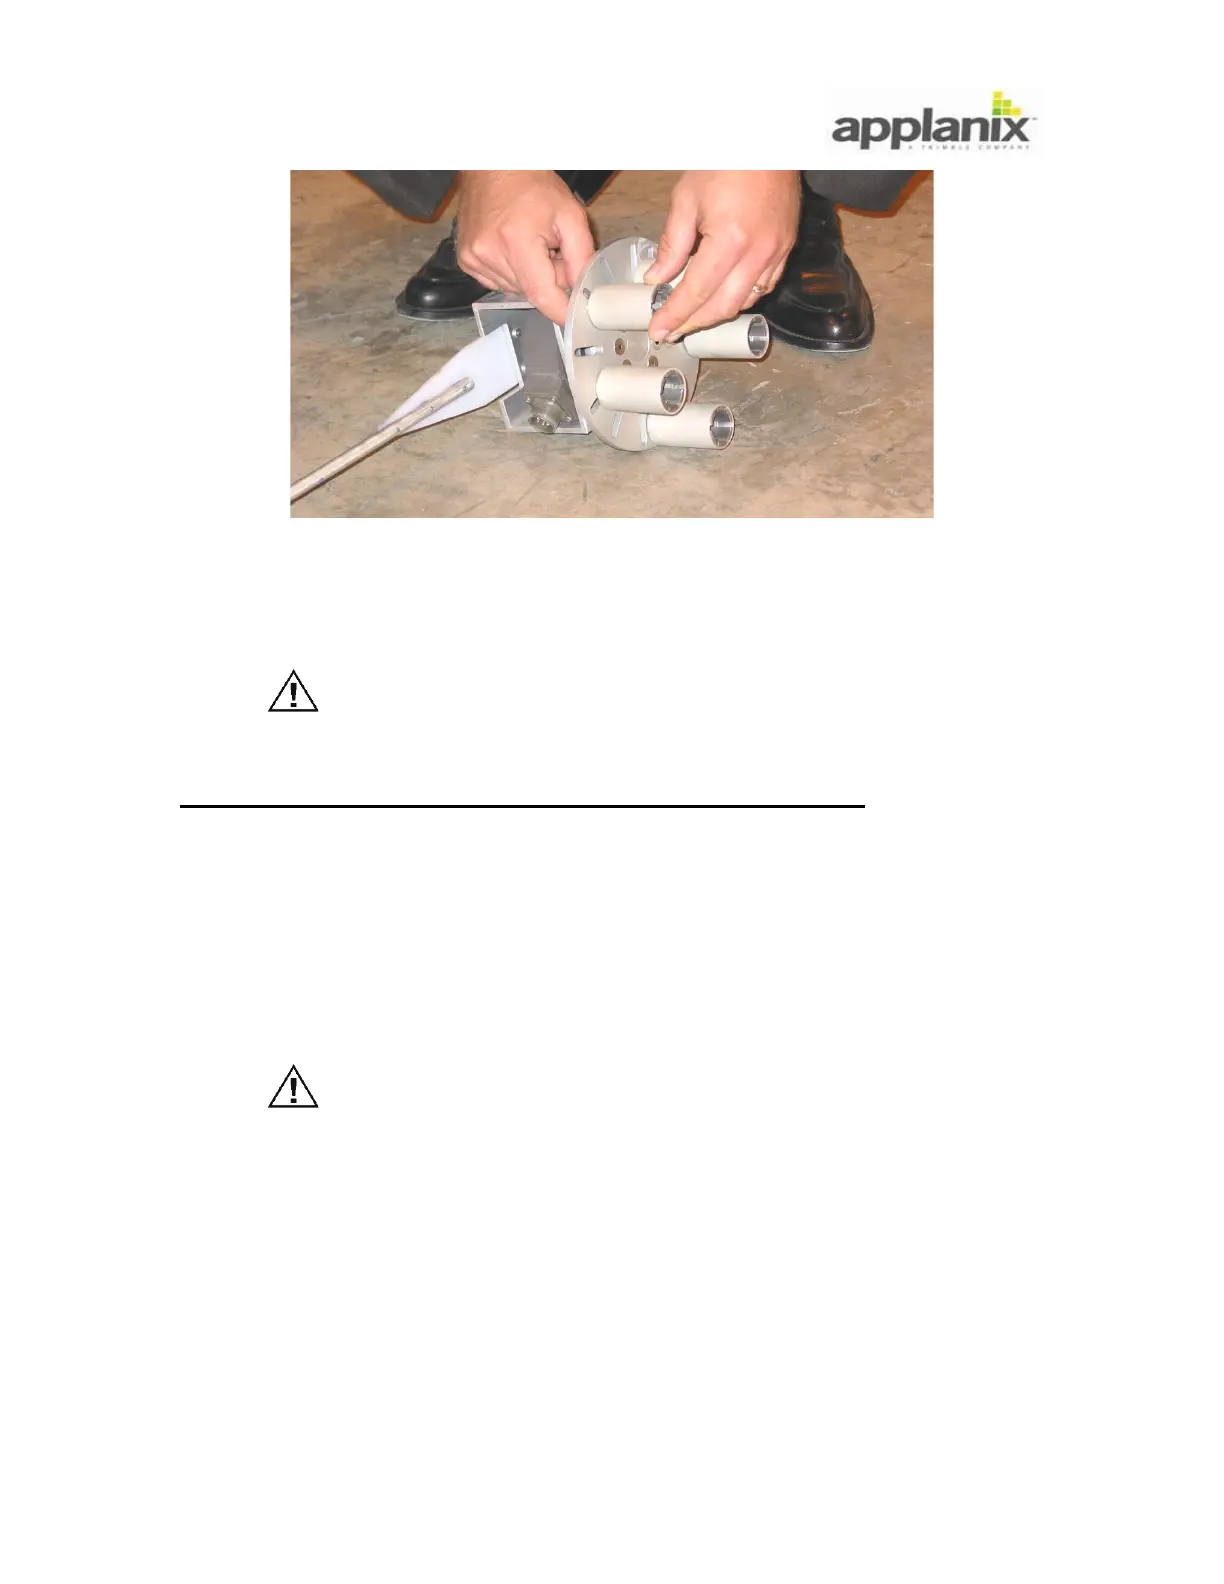
Figure 6: Attach Collets to Universal Hub Adapter
3.2.3. Install Distance Measuring Indicator
The collet grips the wheel nut as the collet bolt is tightened.
Failure of a collet may result in damage to the DMI components.
Thoroughly remove rust and dirt from each wheel nut. Replace
damaged or corroded wheel nuts.
To install the assembled DMI on the vehicle perform the following:
5. Slip collets over wheel nuts (Figure 7).
6. Use circular grooves etched on universal hub adapter so that collets are equal distance
from DMI encoder shaft; off-centre placement of universal hub adapter will increase data
noise and cause excessive mechanical vibration.
7. Apply thread-lock compound to collet bolt threads prior to insertion. For successful
bonding, knowledge of adhesive characteristics is essential.
Over tightening of the collet bolts may result in thread stripping.
Under tightening of the collet bolts may result in a poor
mechanical connection and subsequent damage to the DMI
assembly.
8. Tighten collet bolts in a uniform manner using supplied
7
/
16
in or
1
/
2
in nut driver - do not
exceed a torque value of 25 pound-force-inch (2.83 Newton metres) for the
1
/
4
in - 20
bolts and 50 pound-force-inch (5.66 Newton metres) for the
5
/
16
in - 18 bolts.
9. Slip (permanent or temporary) restraint bracket over restraint rod and position rod
perpendicular to road (Figure 8).