Page 27
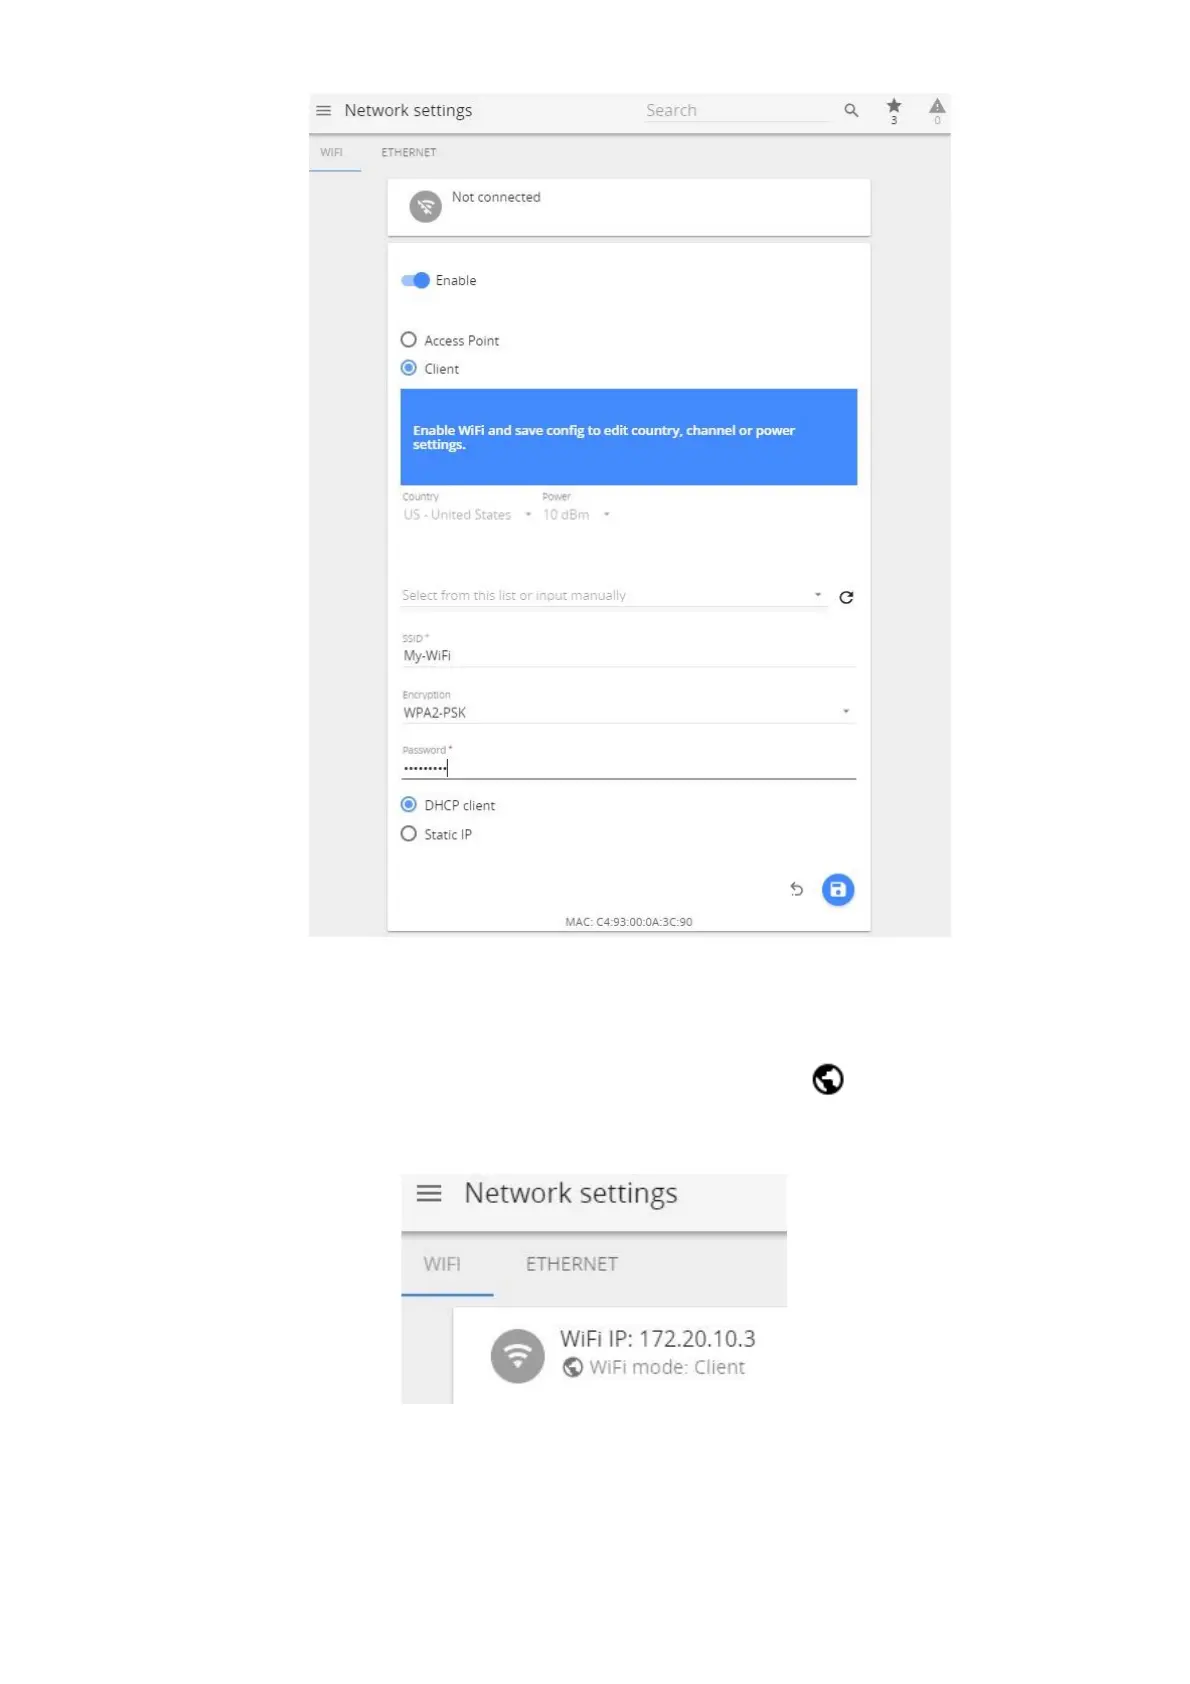
(8) After the new Wi-Fi settings on Aranet PRO/PRO+ are saved, web page will reload, and new IP
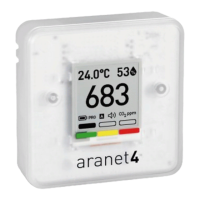
address will be assigned by the external Wi-Fi router. You can see the new IP address displayed like
shown in picture below (Wi-Fi IP: xxx.xxx.xxx.xxx). Note the globe symbol is not crossed, which
indicates successful connectivity to the Internet.
(9) Disconnect Ethernet cable.
(10) Make sure your PC and Aranet PRO/PRO+ are connected to same Wi-Fi network.
(11) In browser type the new IP address (Wi-Fi IP: xxx.xxx.xxx.xxx) and login to Aranet PRO/PRO+.