Page 28
2.3.2
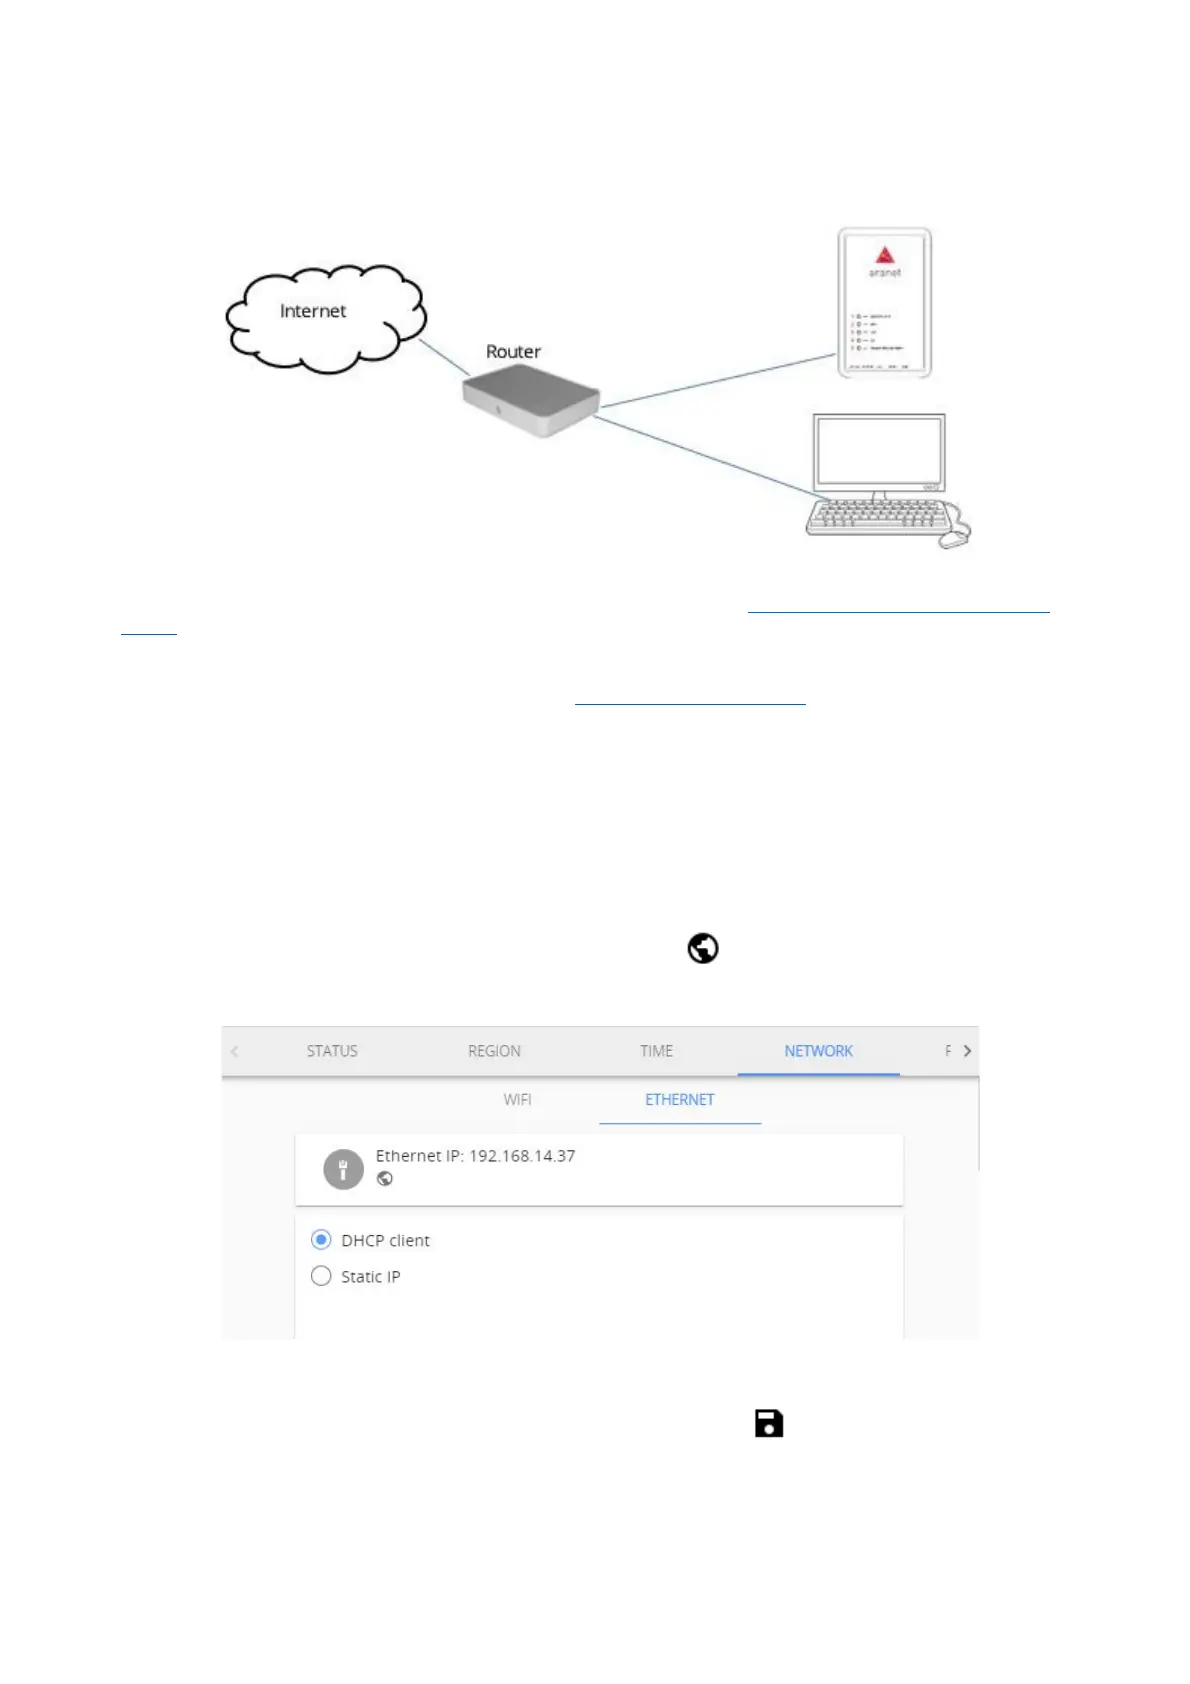
Connecting Aranet PRO/PRO+ to internet network using external router
If during initial setup process you connected your Aranet PRO/PRO+ to Local Network with working DHCP
server, most probably Aranet PRO/PRO+ is connected to Internet already. Consult your network
administrator to be sure.
If you are connected to Aranet PRO/PRO+ using its built-in Wi-Fi Access Point, you should change
Ethernet settings on Aranet PRO/PRO+ in following way:
(1) Navigate to SYSTEM > NETWORK and select ETHERNET tab
(2) Connect Aranet PRO/PRO+ LAN port to external router (or Switch) LAN port using Ethernet cable.
(3) Verify that LED indicators next to “12V” and “LAN” turn on.
(4) As factory setting, Aranet PRO/PRO+ DHCP client is ON. If there is working DHCP server in the
network (as usually is when connecting to router), Aranet PRO/PRO+ will receive new IP address
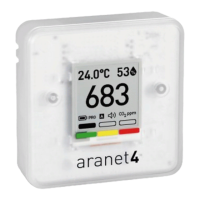
automatically. While connected to Aranet Wi-Fi, you can verify new Ethernet IP address assigned by
external router like shown in the below picture. Note the globe symbol is not crossed, which indicates
successful connectivity to the Internet.
In case of static IP, select Static IP and fill in all needed fields: IP address, Subnet Mask, Default gateway
and DNS server, example is shown in the picture below, and click Save . Consult your network
administrator for these parameters in your local network.