67Troubleshooting
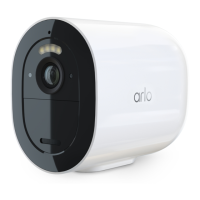
Arlo Go 2 LTE/WiFi Security Camera
User Manual
Update the Go 2 Camera rmware manually
1. Open the Arlo app.
2. Tap Settings > My Devices.
3. Select the camera that you want to update.
4. Tap Device Info > Firmware > Update.
WARNING: Do not release the camera from its housing or remove the battery while
your Arlo camera is updating and installing rmware. Wait until the rmware update is
complete.
If you turned o your Arlo Go 2 Camera’s LED in the camera settings, the LED does not blink
to show that a rmware update is in progress. While the LED is turned o, always make sure
that you can view your camera live from the Arlo app or a web browser before interrupting
power to the camera. If you remove the battery or otherwise interrupt power while a rmware
update is in progress, your camera might become unusable.
The camera’s LED blinks amber and blue while the rmware is downloading and installing.
Aer the rmware is installed, the camera restarts and the LED is o. When the LED lights
again and the pattern stops changing, your camera is available to stream.
Go 2 Camera is oline
If your Go 2 Camera was working before and now is oline, try to identify where the problem
is coming from.
• Check the Status LED on your Go 2 Camera. See Check the LED on page 11.
• Verify whether your Go 2 Camera is set up for LTE only or LTE/WiFi. Arlo Go 2 is designed to
work with either LTE or WiFi connectivity. For more information, see Control whether your
Go 2 Camera connects to mobile or WiFi on page 19.
If your camera is set up for LTE only, make sure the mobile broadband account for the SIM
in your Go 2 Camera is still active. If your camera is set up for LTE/WiFi, make sure that
either your WiFi network is in range and available or the cellular coverage is available.
• To troubleshoot a mobile broadband connection, see Optimize mobile broadband
connectivity for your Go 2 Camera on page 12.