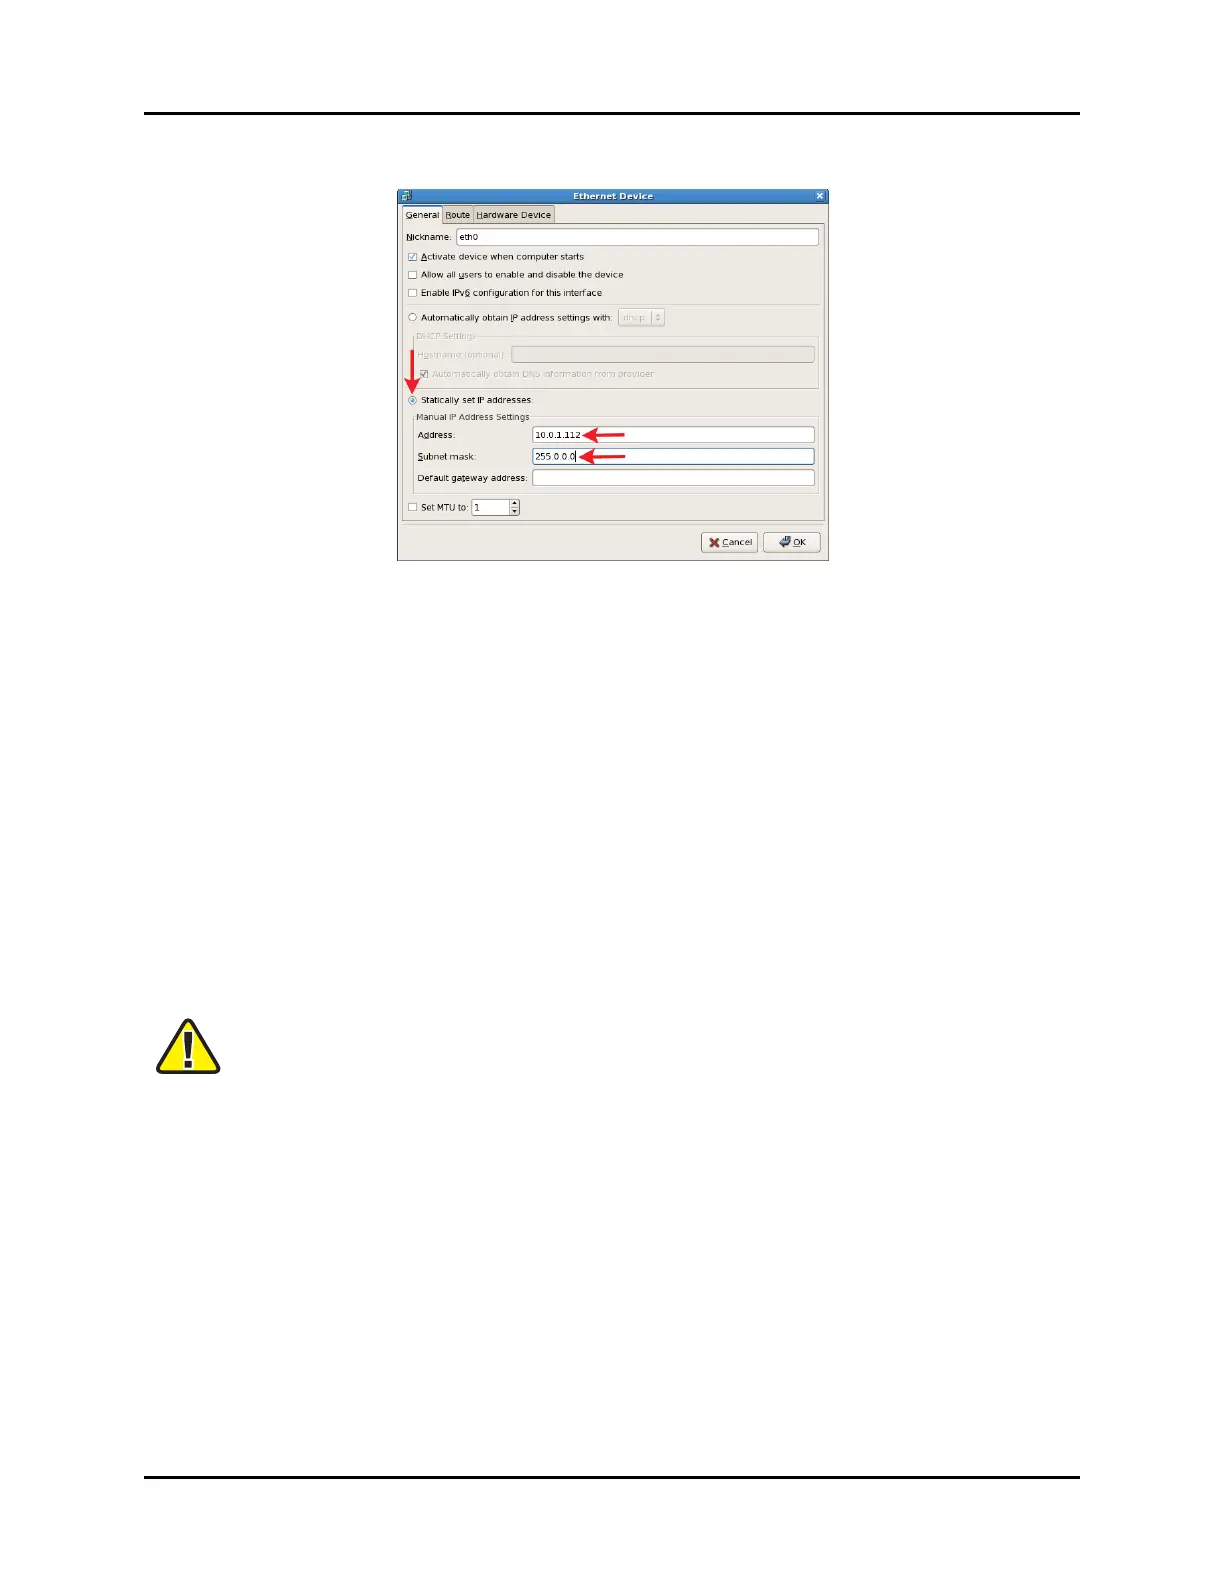
7. Click Statically Set IP Addresses.
Figure 30: Ethernet Device
8. In the Address box, type the IP address.
9. In the Subnet mask box, type the subnet mask. Ask your network administrator for valid
IP addresses and subnet masks for the network(s) where the platform will be integrated.
10. If applicable, enter the default gateway. If the network does not have a gateway, type the
IP address from Step 8.
11. To reboot the server, press the Reset button on the front of the chassis.
10.2 ACEStudio cold start procedure for Red Hat 6.X
The following sections provide cold start procedure instructions for ACEStudio version 6.0 and
higher.
Important Do not connect Keyboard Video Mouse (KVM) switches to the system during the
cold start procedure. If you run into an issue with the procedure while using a KVM, dis-
connect it, and repeat the cold start procedure with a dedicated keyboard, monitor, and
mouse.
10.2.1 Install ACEStudio versions 6.0 and higher
To complete the ACEStudio cold start procedure, follow these steps:
1. To turn on the server, press the Power button on the front of the chassis.
2. Insert the Telestra Studio Software Installation DVD, and press the Reset button.
3. At the boot prompt, press Enter.
Copyright © 2018 Advanced Simulation Technology inc. 41
ACE Target and Studio Cold Start Guide (Rev. B, Ver. 0)