4
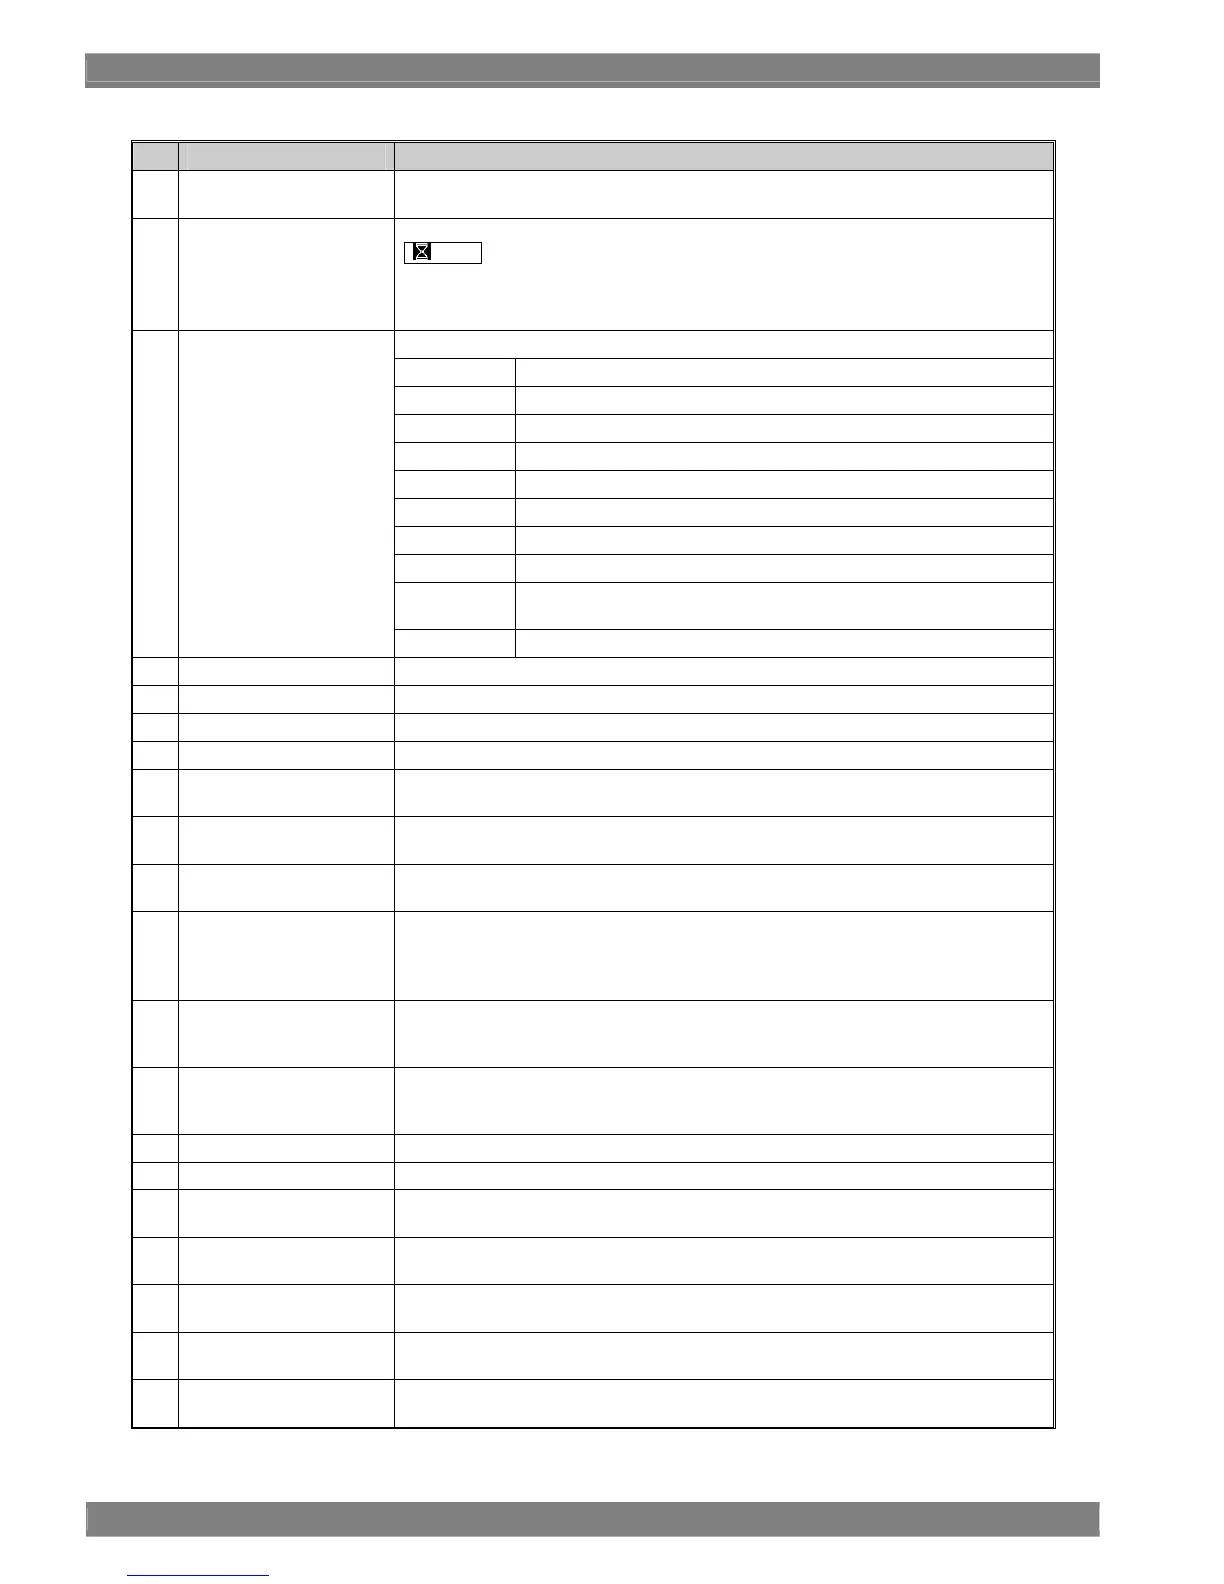
Table 2.1 Front panel parts
No. Part Description of function
1 POWER switch / LED
This switch is used to turn the power ON and OFF.
(Its LED lights up green while the power is supplied.)
2 LOCK switch / LED
This switch is used to lock the panel switches and save the settings simultaneously.
Wait appears at the bottom right of the screen while the settings are being
saved.
The settings which have been saved are loaded when the power is turned on. (*1)
(The LED of this switch lights up yellow while the panel switches are locked.)
This switch is used to select the monitor's mode.
PICTURE1 Mainly for performing the image adjustments on the picture screen.
PICTURE2 Mainly for selecting the auxiliary functions on the picture screen.
PICTURE3 For showing the screen on which the settings items are not displayed.
WAVEFORM For displaying the waveforms.
VECTOR For displaying the vectorscope.
STATUS For displaying the input data as numerical values.
AUDIO For displaying the embedded audio level meter or audio vectors.
MULTI For the multi display.
PRESET
For establishing the read mode for the user settings stored inside the
monitor.
3 Mode switch
MENU For selecting the input signals, etc.
4 Adjustment dial This dial is used to adjust and select the settings.
5 Set switch For entering or canceling the settings.
6 Headphones jack The sound is output from this jack (diameter: 35 mm). (*2)
7 Liquid crystal display The images appear on this display.
8 TALLY 1
Tally lamp (red): This is controlled by the rear panel tally connector
(contact supply type).
9 TALLY 2
Tally lamp (green): This is controlled by the rear panel tally connector
(contact supply type).
10 1/4-20UNC threaded hole
Threaded hole for the screw to secure the monitor
(used to secure the monitor to a tripod, arm, etc.).
11 INPUT switch
This switch is used to select SDI A, SDI B, analog component or analog composite for
the input signals.
The input signals are selected in the following sequence: SDI A ⇒ SDI B ⇒ analog
component ⇒ analog composite ⇒ SDI A (back to the first selection).
12
DISPLAY switch
Half Turn switch
This switch is used to set whether the setting items of function indicators F1 to F5 are
to be displayed on the screen or not. When it is held down (for more than one second),
the top and bottom of the screen are inverted.
13
OVERLAY switch
Color switch
This switch is used to change the picture overlay settings. When it is held down (for
more than 1 second), the color setting screen appears.
(The color setting items differ according to the mode selected.)
14 FREEZE switch This switch is used to select freeze or update.
15 FUNC switch This switch is used to switch the setting items.
16 F1 switch
The function of this switch differs depending on the mode selected.
It works for the display that has appeared most recently.
17 F2 switch
The function of this switch differs depending on the mode selected.
It works for the display that has appeared most recently.
18 F3 switch
The function of this switch differs depending on the mode selected.
It works for the display that has appeared most recently.
19 F4 switch
The function of this switch differs depending on the mode selected.
It works for the display that has appeared most recently.
20 F5 switch
The function of this switch differs depending on the mode selected.
It works for the display that has appeared most recently.

 Loading...