4. Turn on your virtual machine, and do the following:
a. Access the VM console.
b. Accept the license agreement and continue with the following post-installation steps.
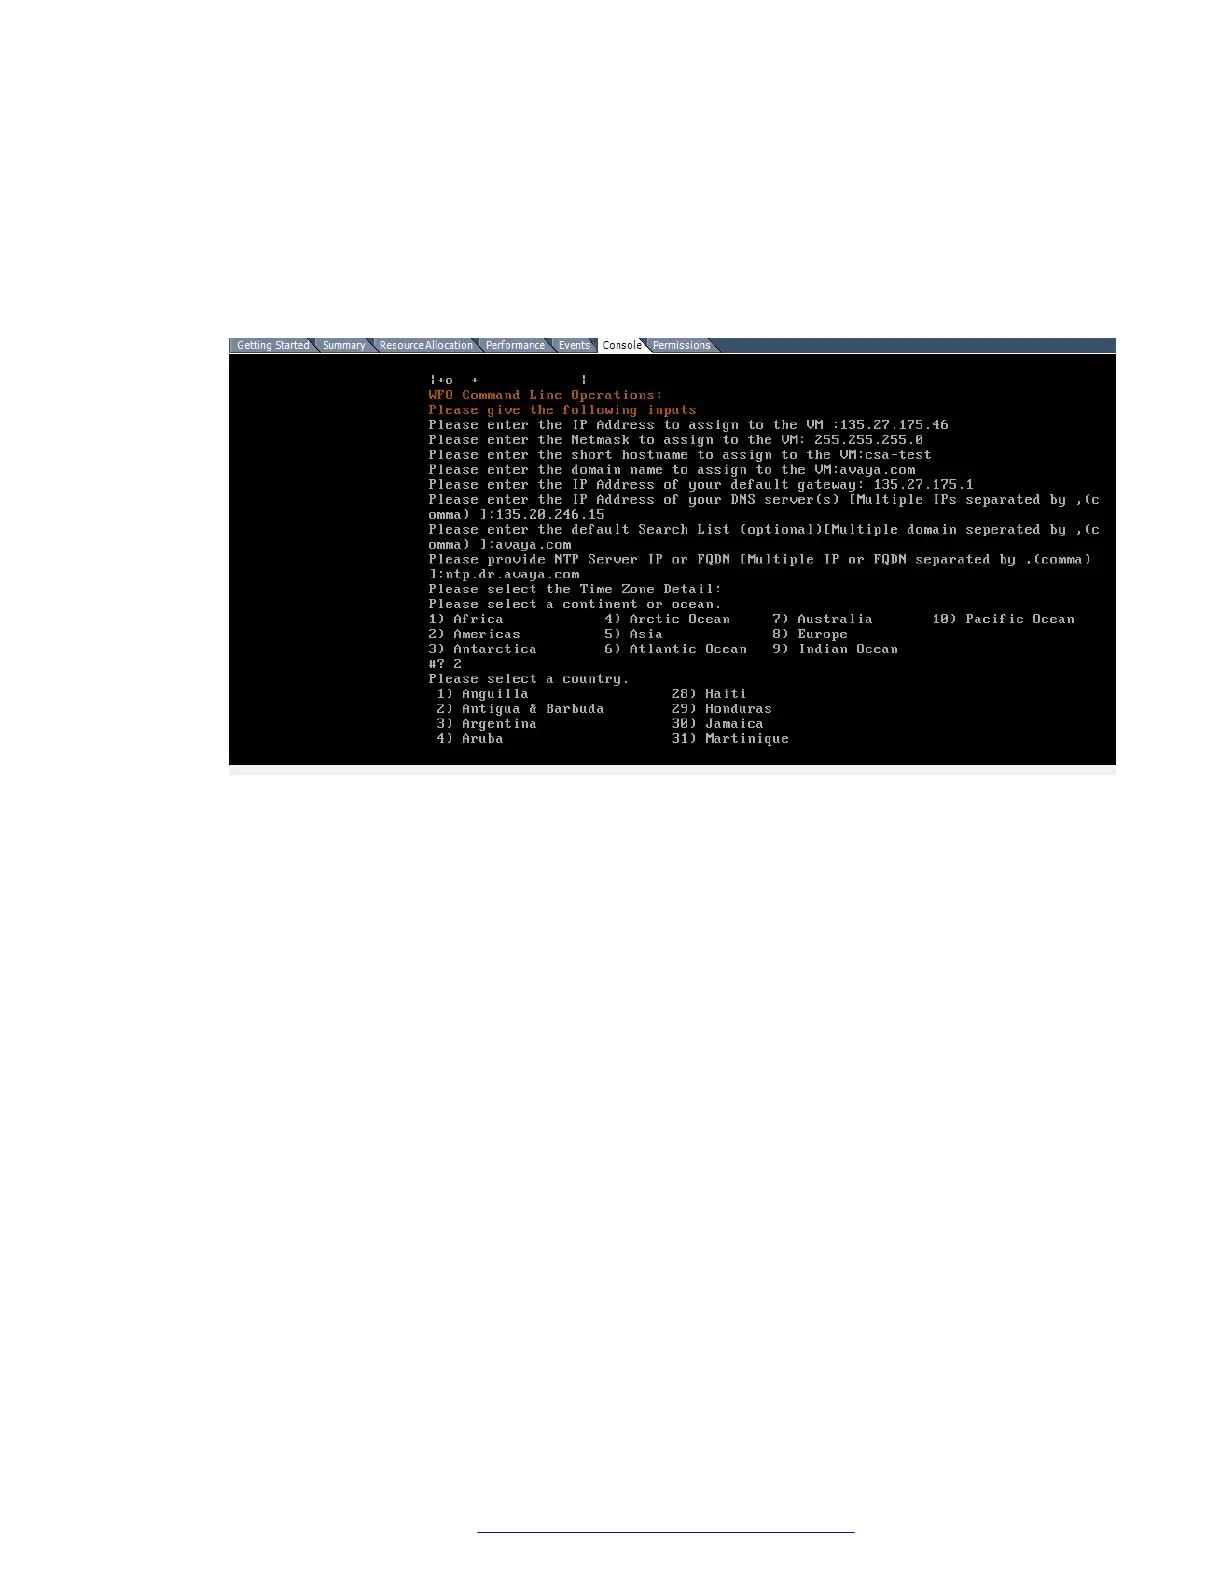
5. Provide the network settings information
The following image provides an example of network and IP settings in the VM console:
6. Ensure that the Default Search List includes the list of domains for:
• Avaya Aura
®
Web Gateway
• Avaya Equinox
®
Conferencing Management
• System Manager and LDAP
Deploying the Avaya Aura
®
Web Gateway OVA through Solution
Deployment Manager from System Manager
About this task
Use this procedure to create a virtual machine on the ESXi host and deploy the Avaya Aura
®
Web
Gateway OVA on the virtual machine.
Before you begin
• Ensure that you are familiar with the “Deployment checklist” section in Deploying Avaya
Aura
®
applications from System Manager.
• Add Appliance Virtualization Platform (AVP) or an ESXi host to the location.
Procedure
1. Upload the required OVA file to System Manager.
For information about uploading a file to the software library, see Deploying Avaya Aura
®
applications from System Manager.
VMware deployments
October 2018 Deploying the Avaya Aura
®
Web Gateway 45
Comments on this document? infodev@avaya.com