Caution:
If you are installing the Branch Gateway in the United States of America:
• The AC power supply cord must not be attached to the building wall, for example with
wire staples, clamps, and so on.
• You must install the Branch Gateway near the AC receptacle (socket outlet) that services
the Branch Gateway.
• You must install the AC power supply cord in a way that minimizes the risk of physical
damage to the cord. The cord must not be hanging on the floor, or routed in any way that
can subject it to physical abuse.
Attaching brackets to the Branch Gateway for wall mounting
About this task
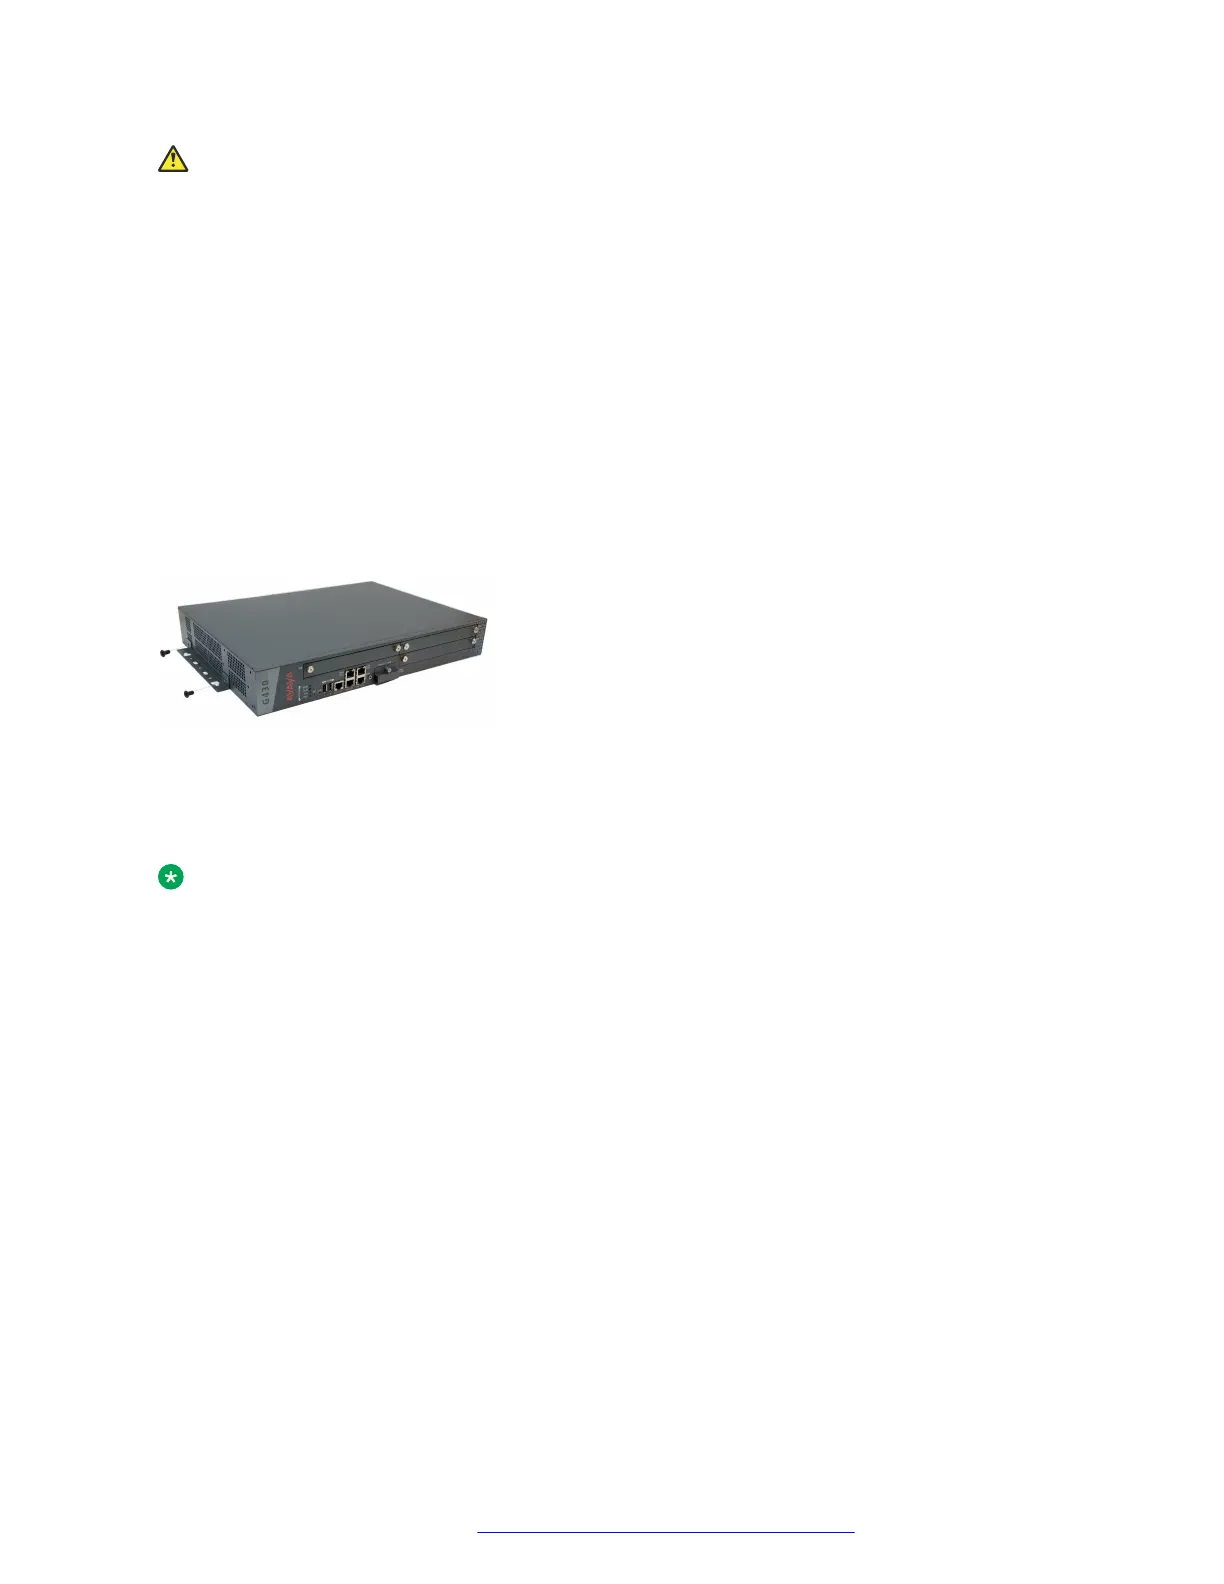
Attach a wall mounting bracket to each side of the Branch Gateway, as shown in the following
figure.
Figure 1: Attaching a bracket to each side of the Branch Gateway
Fastening the Branch Gateway to the wall
About this task
Note:
The plywood and the hardware to mount the plywood are customer-provided.
Procedure
1. If the wall does not have a portion of plywood available, mount a plywood sheet at least ¾
in (2.0 cm) thick and at least 4 x 4 ft (1.2 x 1.2 m) in size, horizontally onto the wall.
Make sure the plywood is sufficiently anchored in the wall. Use a minimum of four wood
screws and ensure the screws are driven into wall studs, or use four wall anchors rated not
less than 50 pounds (22.5 kg) shear strength each.
2. Mark the plywood with the location of the Branch Gateway bracket screw holes before
fastening the plywood to the wall.
3. Position the Branch Gateway so that its front panel is facing up, and secure it to the
plywood using a minimum of four screws (pan head at least ¾ in, #10-12 screw).
Installing the Branch Gateway and EM200
July 2018 Deploying and Upgrading Avaya G430 Branch Gateway 26
Comments on this document? infodev@avaya.com


 To Next Page