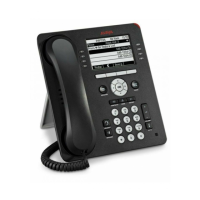
Power-Up and Reset Operation (Dynamic Addressing Process)
Issue 1 August 2010 19
1. Plug one end of the H4DU 4-conductor coiled handset cord into the phone and the other
end into the handset.
2. Plug one end of the first Category 5 modular line cord into the Ethernet jack of the PC and
the other end into the secondary Ethernet jack on the phone, if appropriate.
3. If the telephone is to be IEEE-powered, plug one end of the second Category 5 modular
line cord into the Ethernet jack on the phone. Plug the other end of this cord into the
Ethernet wall jack. You are now finished. Do not proceed to Step 4.
4. If the telephone is to be powered locally, connect the Category 5 modular line cord
provided with the IP Phone Single Port PoE Injector (SPPOE-xx, where xx represents the
model number) into the Ethernet jack on the phone. Plug the femite end of this cord into the
deskphone. Plug the other end of this cord into the SPPOE-xx power injector jack labeled
DATA & POWER OUT. Plug another Category 5 cord into the SPPOE-xx power injector
jack labeled DATA IN. Plug the other end of this cord into the Ethernet wall jack. Finally,
connect the SPPOE-xx to an AC power source.
Power-Up and Reset Operation (Dynamic Addressing
Process)
Note:
Note:
Before starting this process you must have an extension number for the IP
telephone and the Avaya Communication Manager security code (password) for
that extension, unless the deskphone will use unnamed registration. For more
information, see Unnamed Registration
on page 26.
Any reference to the HTTP server applies equally to an HTTPS server.
The following description of the process of IP deskphone power-up or reset
assumes that the process is executed successfully. For errors that might be
encountered during the process and the messages displayed, see
Chapter 5:
Troubleshooting Guidelines.
The initial display messages, some of which are part of DHCP give a "power on" indication and
dynamic feedback as the telephone initializes. The intent of these messages is to reassure the
 Loading...