• Synchronizing contacts for all endpoints in a network from the corporate directory, including XT
Series.
• Synchronizing settings of all XT Series devices in your organization. You can export the
settings of one unit into a configuration file, then import those settings to other units (see
Enabling System Logs and Remote Initialization on page 175).
You must enable AT and SNMP functionality to work with Scopia
®
Management.
For more information on adding, removing and upgrading the system remotely in Scopia
®
Management, or for details on synchronizing contacts for the endpoints in your organization, see
Administrator Guide for Avaya Scopia
®
Management.
Before you begin
If configuring from the endpoint, you must first enable advanced configuration, as described in
Enabling Advanced Maintenance on the XT Series on page 112.
Procedure
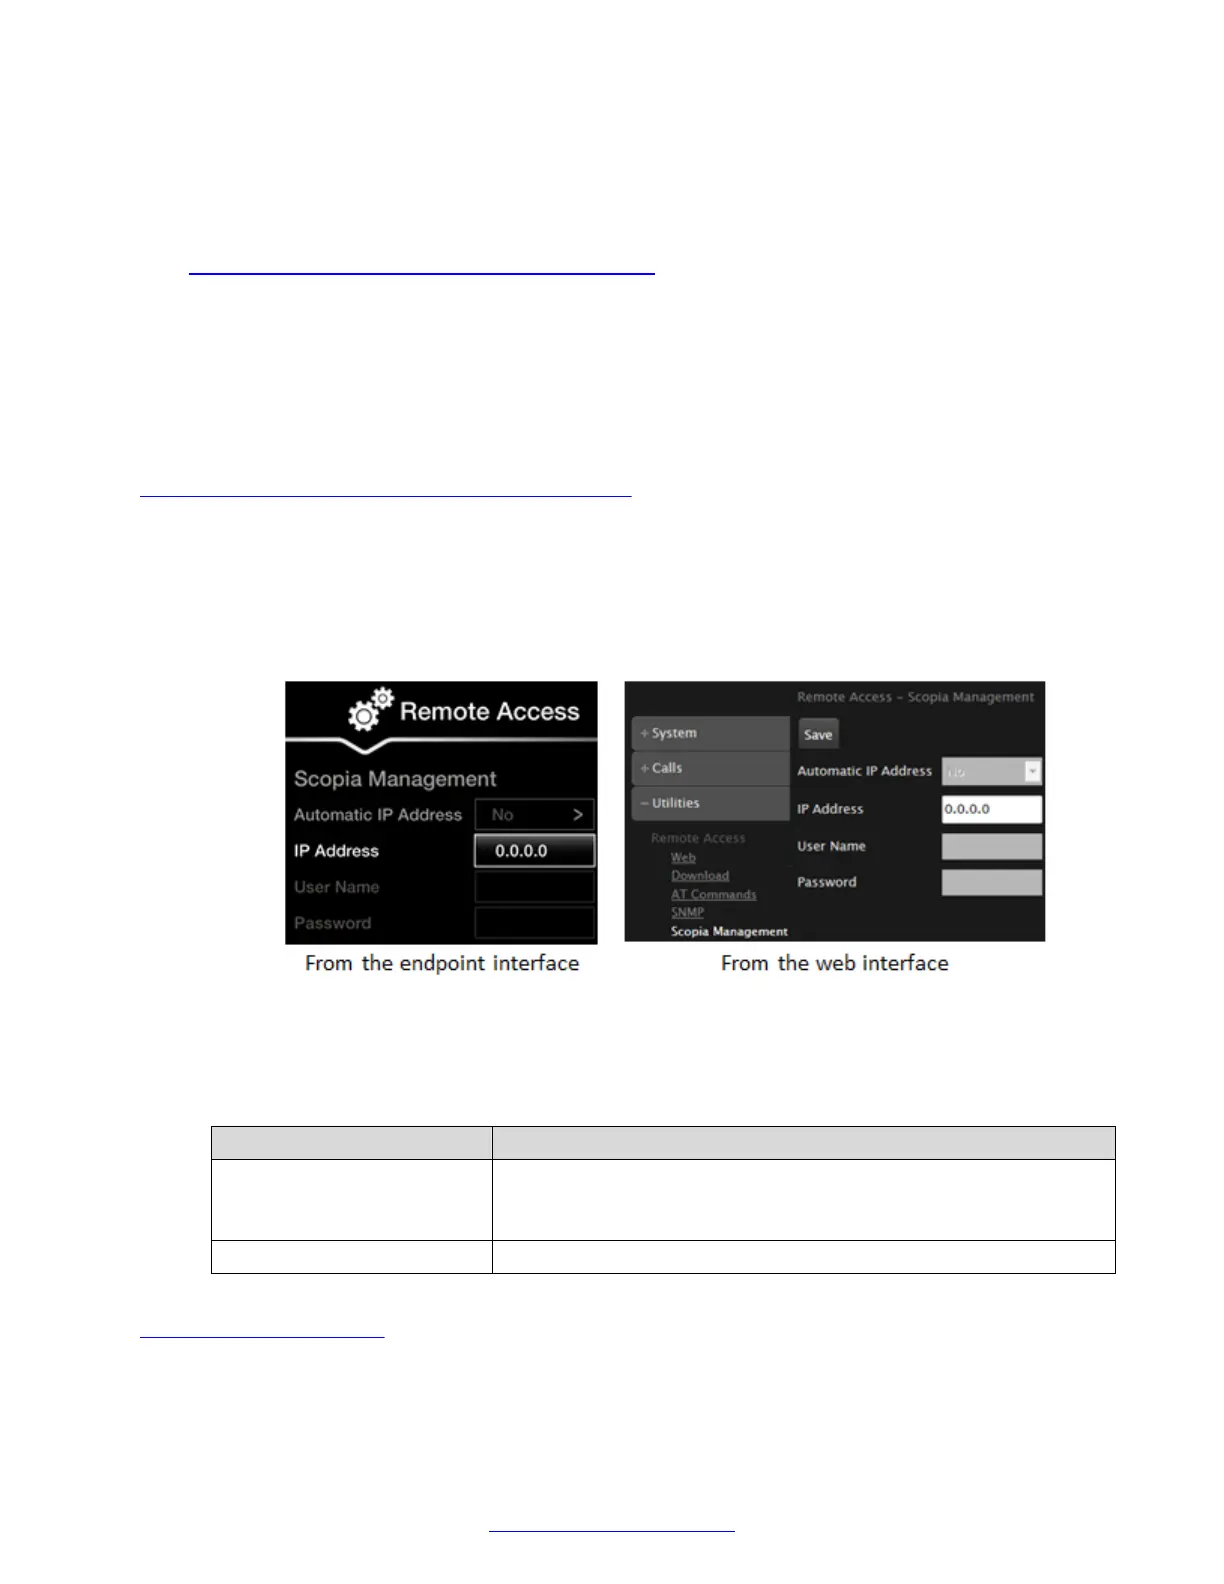
1. Access the Scopia
®
Management remote access settings. From the XT Series web
interface, select Administrator Settings > Utilities > Remote Access > Scopia
®
Management. From the endpoint's main menu, select Configure > Advanced > Utilities >
Remote Access > Scopia
®
Management.
Figure 51: Granting Scopia
®
Management remote management of the XT Series
2. Set the fields as required.
Table 12: Granting remote access to Scopia
®
Management
Field Name Description
Automatic IP Address Not currently supported. Select Yes for the system to automatically
know the Scopia
®
Management, sent by Scopia
®
Management
when controlling the device.
IP Address Enter the IP address of the Scopia
®
Management server.
Related Links
Controlling the XT Series on page 68
Managing Avaya Scopia
®
XT Series from Scopia
®
Management
April 2015 Avaya Scopia
®
XT Series Deployment Guide 77
Comments? infodev@avaya.com
 Loading...


