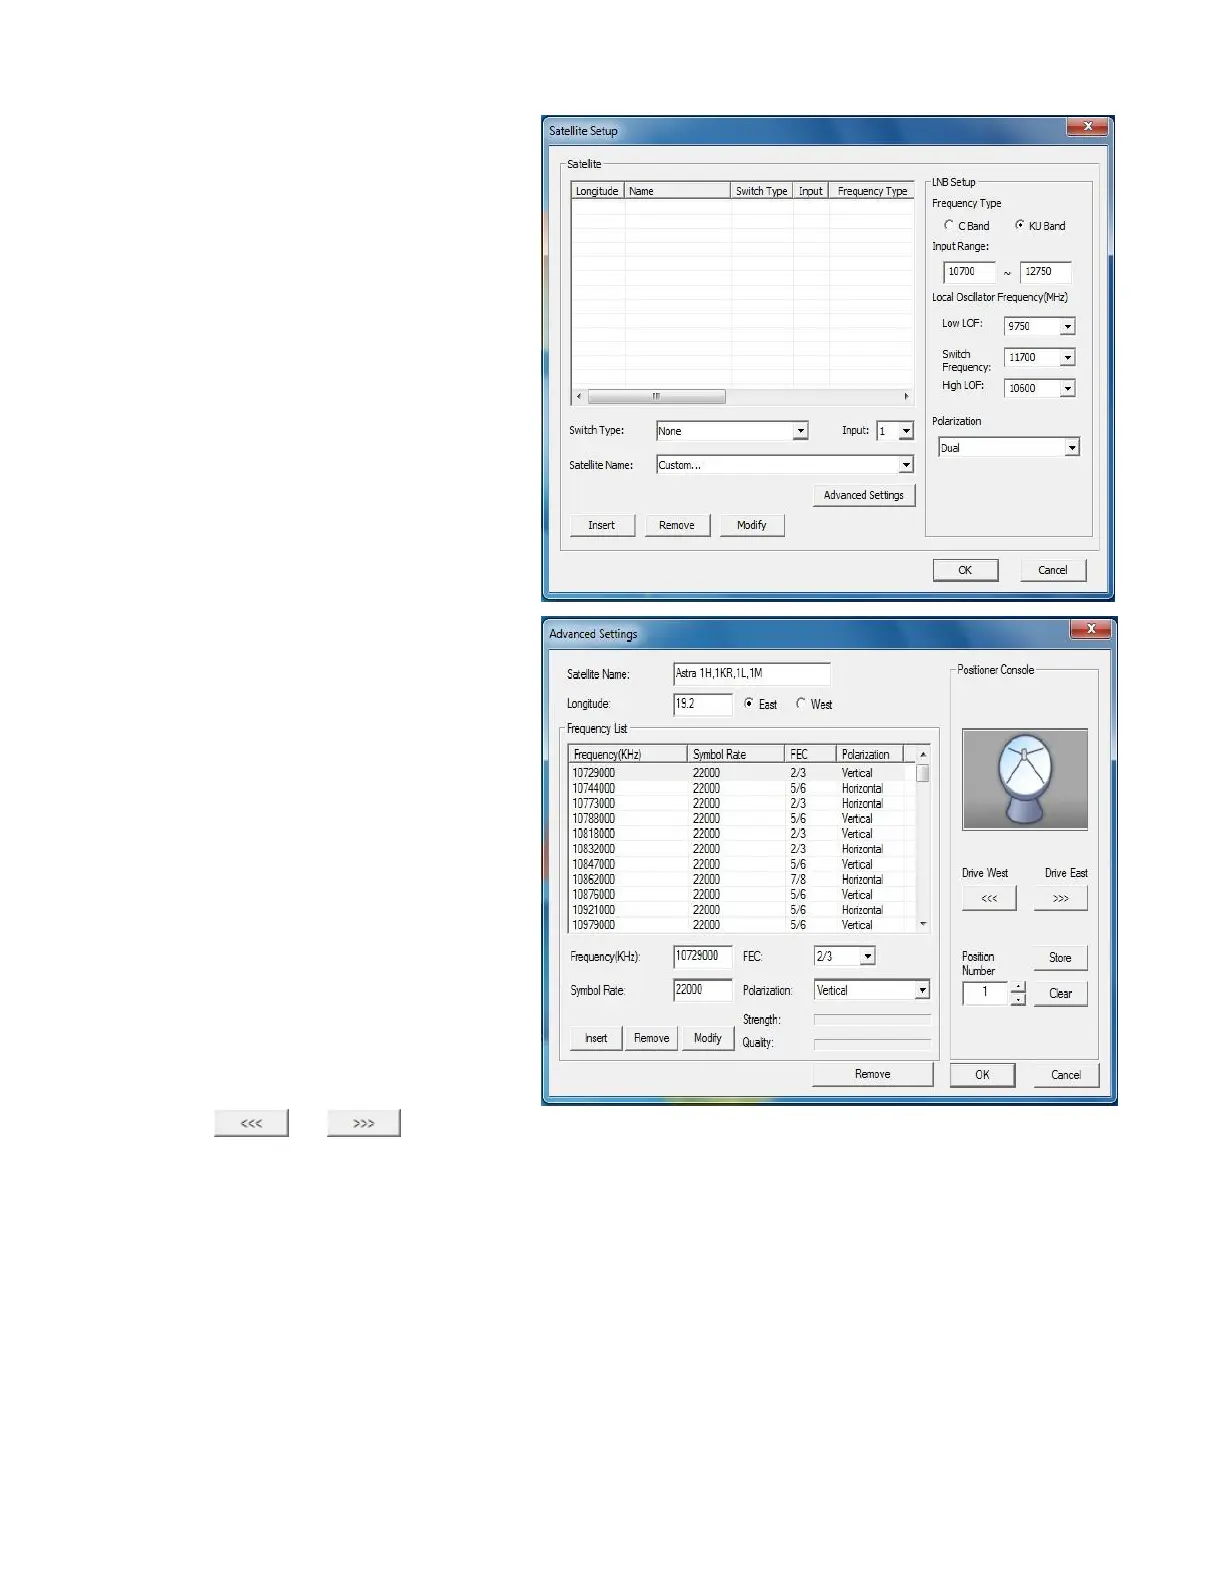
7. Click Satellite Setup.
8. Select the Switch
Type and Input port number if
you use a switch; otherwise,
skip this step.
9. Select Custom... in Satellite
Name drop-down list.
10. Configure LNB Setup data.
11. Click Advanced Settings.
12. Configure Satellite name,
Longitude, Frequency, FEC,
Symbol Rate,
andPolarization.
13. Click Insert to add the
frequency data to the
Frequency list.
Click Remove to delete
or Modify to change the
selected frequency data.
If you use a motor, you can
adjust the dish position, test the
signal strength, and save the
position for quick positioning
next time. Select any one of the
frequencies in the list and
click or to
adjust the position of the dish.
Once the strength and quality
are detected, assign a Position
Number and click Store to
save the dish position for this
selected satellite. Click Clear to
delete the setting of this
position. For the same satellite,
you only need to save the
position once. For another