Before recording, check if the settings meet your needs.
1. Click the Setup button and
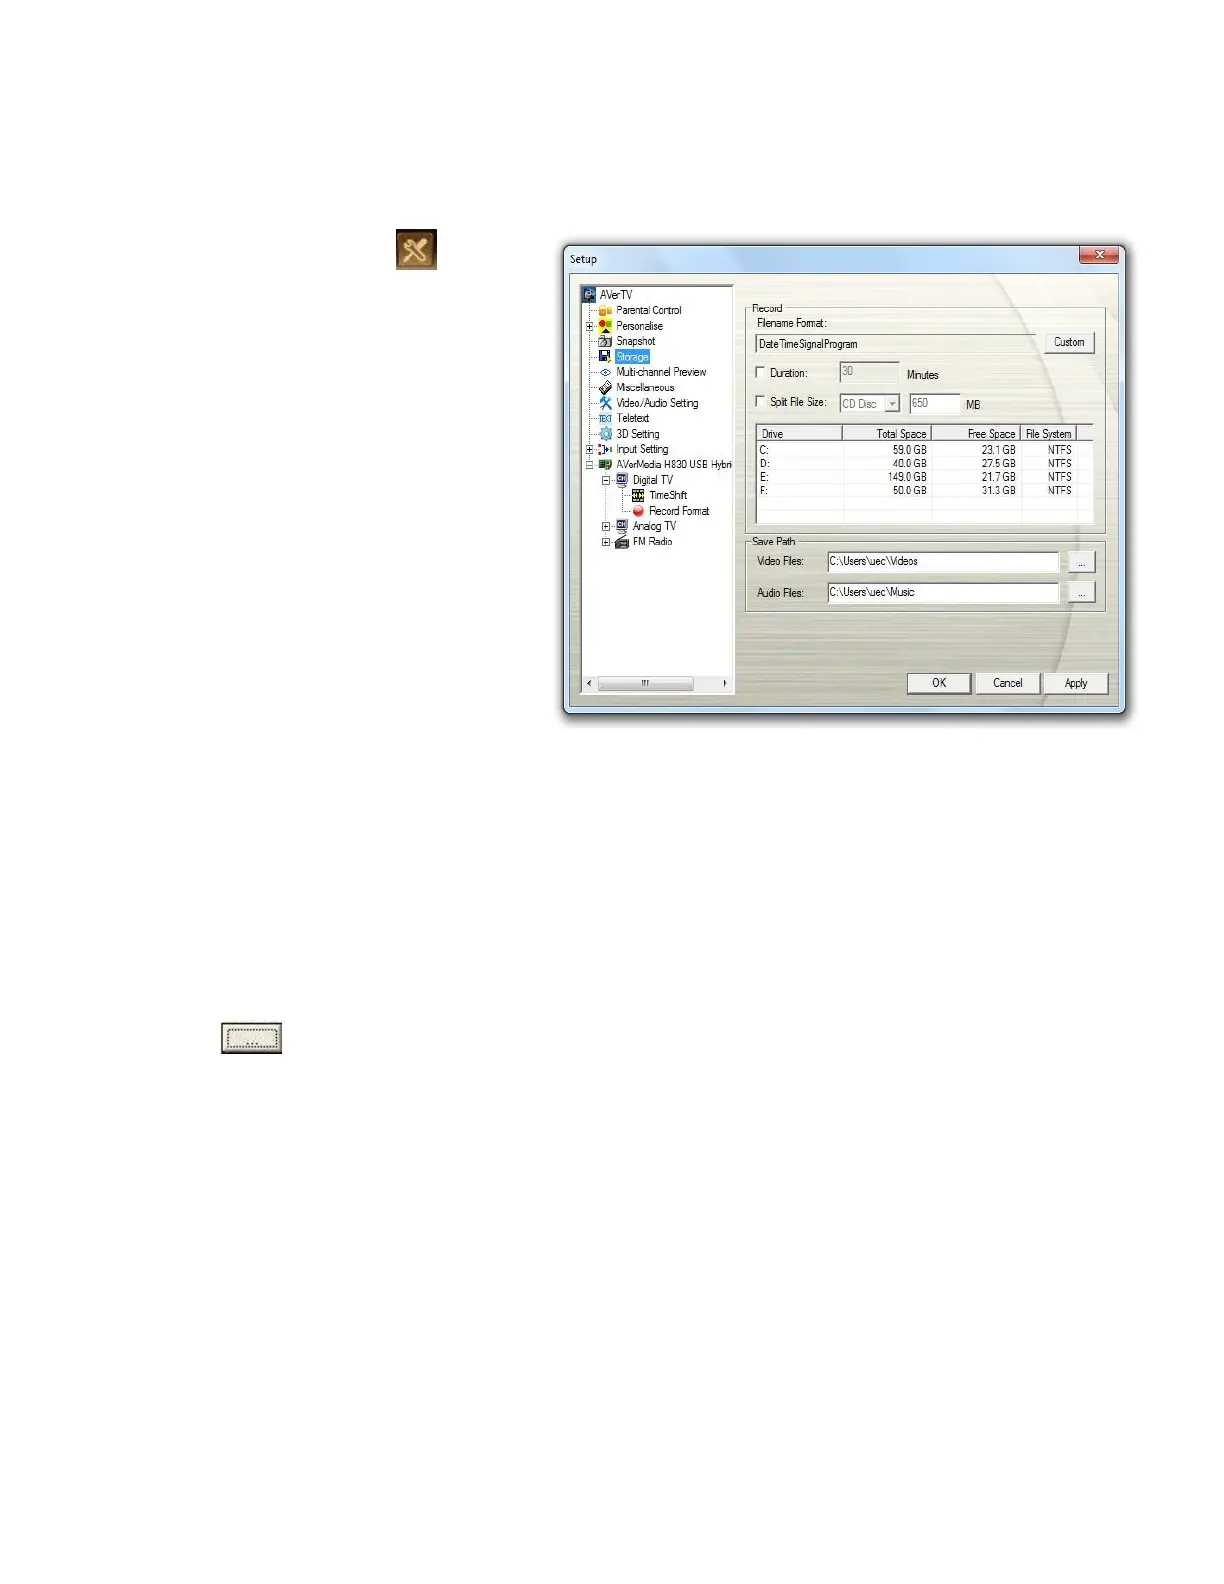
select Setup > Storage.
2. By default, the system sets the
recording Date and Time as the
file name format. To create your
own file name format, please
click Custom.
3. The Duration option allows you to
specify a recording duration;
otherwise, the system will record
the largest clip that your hard drive
can accommodate.
4. You to divide the recording files
into smaller parts for burning onto
removable optical media, such as
CD-R (650 MB) and DVD (4096
MB) discs. Enable the Split
FileSize option and select the
appropriate video file size from the
drop-down menu so that each
video file will not exceed the limit.
Or you can choose Custom to
assign the file size you want.
5. Determine the destination folder.
Click to choose a folder you
want.
6. Click Apply to save the settings
and click OK to exit the current
dialog box. To abort this operation,
click Cancel.