Chapter 3: Assembling Legs 13
Chapter 3: Assembling Legs
This chapter explains how to assemble the Leg Frames for S6. If your system does not include a Leg Frame, proceed to Chapter 4,
“Assembling Frame Chassis.”
Unpack the Leg Frames
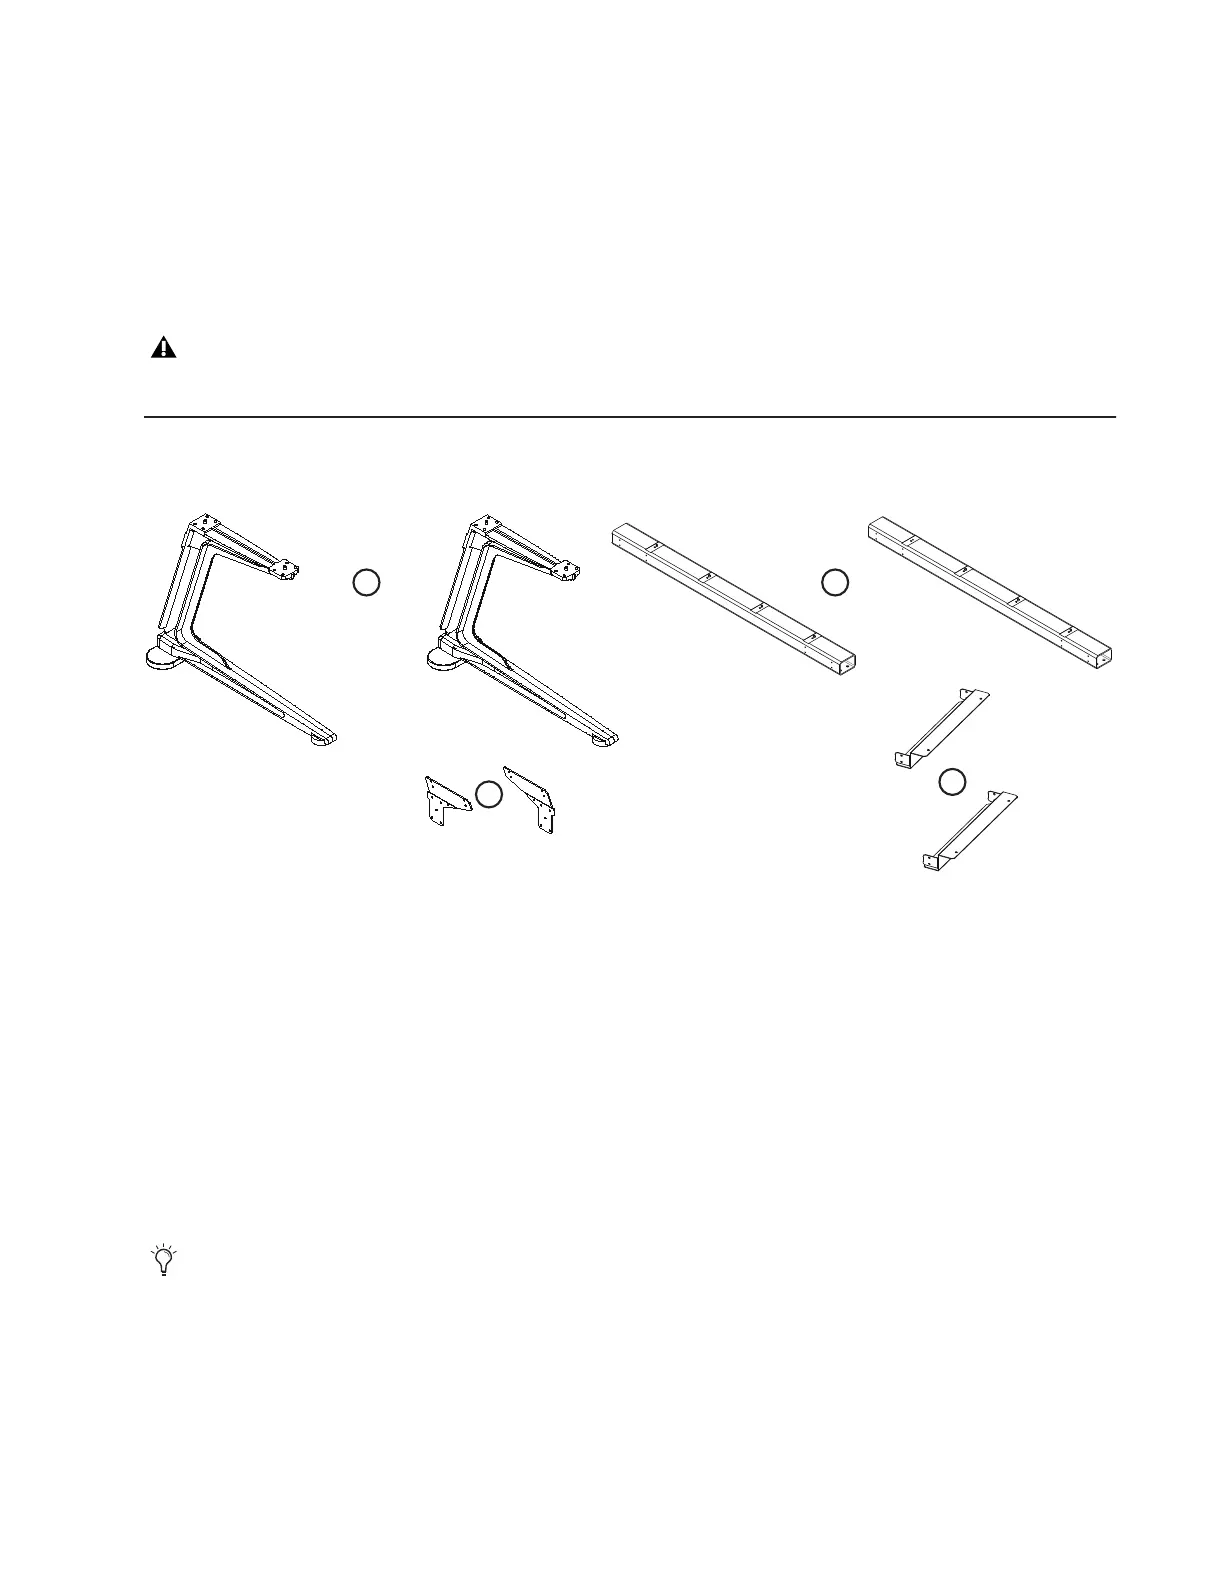
Unpack the Legs and Beams and identify the components shown in Figure 1.
1 – Legs
2 – Beams
3 – Back Corner Brackets
4 – End Brackets
5 – Fasteners and Tools (not shown)
Overview of Leg Frame Assembly
When assembling a Leg Frame you should start by placing one of the Beams on the floor to gauge how far apart the Legs need to
be. Place the Legs parallel on the floor with proper spacing and put the first Beam across the back of the Legs, orienting it as shown
in the following diagrams and securing it with the included fasteners. Do not tighten down fasteners all the way. Once the back
Beam is attached to the Legs, place the other Beam across the front and secure it with fasteners (do not fully tighten the fasteners).
Then attach the Back Corner Brackets and End Brackets.
Leg Frame Join Module and Leg Frame Extension
The Leg Frame Join option lets you join two or more S6 Leg Frames together to form a larger system. The Leg Frame Extension
lets you add one chassis to each end of a Leg Frame. If your system includes either of these options, refer to the documentation in-
cluded with it and follow its instructions to install the special center legs and brackets. After assembling and joining the leg frames,
or installing one or more extensions, return to this guide to start assembling chassis.
Make sure you have at least one other person available if you need to lift, turn, or move the system during and after assembly. Com-
ponents and systems are heavy! Team lift, always.
Figure 1. Legs Frame components
To simplify assembly, do not fully tighten any fasteners until legs, beams, and brackets are put together and aligned. After all parts
are assembled and aligned, start at one end and tighten all fasteners securely as instructed.
2
3
4
1

 Loading...
