QUICKFIRE® WRAP AROUND
1MANUL825 Belanger, Inc. * 1001 Doheny Ct. * Northville, MI 48167 * Ph (248) 349-7010 * Fax (248) 380-9681 17
Installation
Positioning the Stands (Legs)
Note:
The stands will have to be leveled later during the installation, so do not pound any lag
bolts down all the way into the floor. Shims may also be required in the leveling process
although they are not supplied.
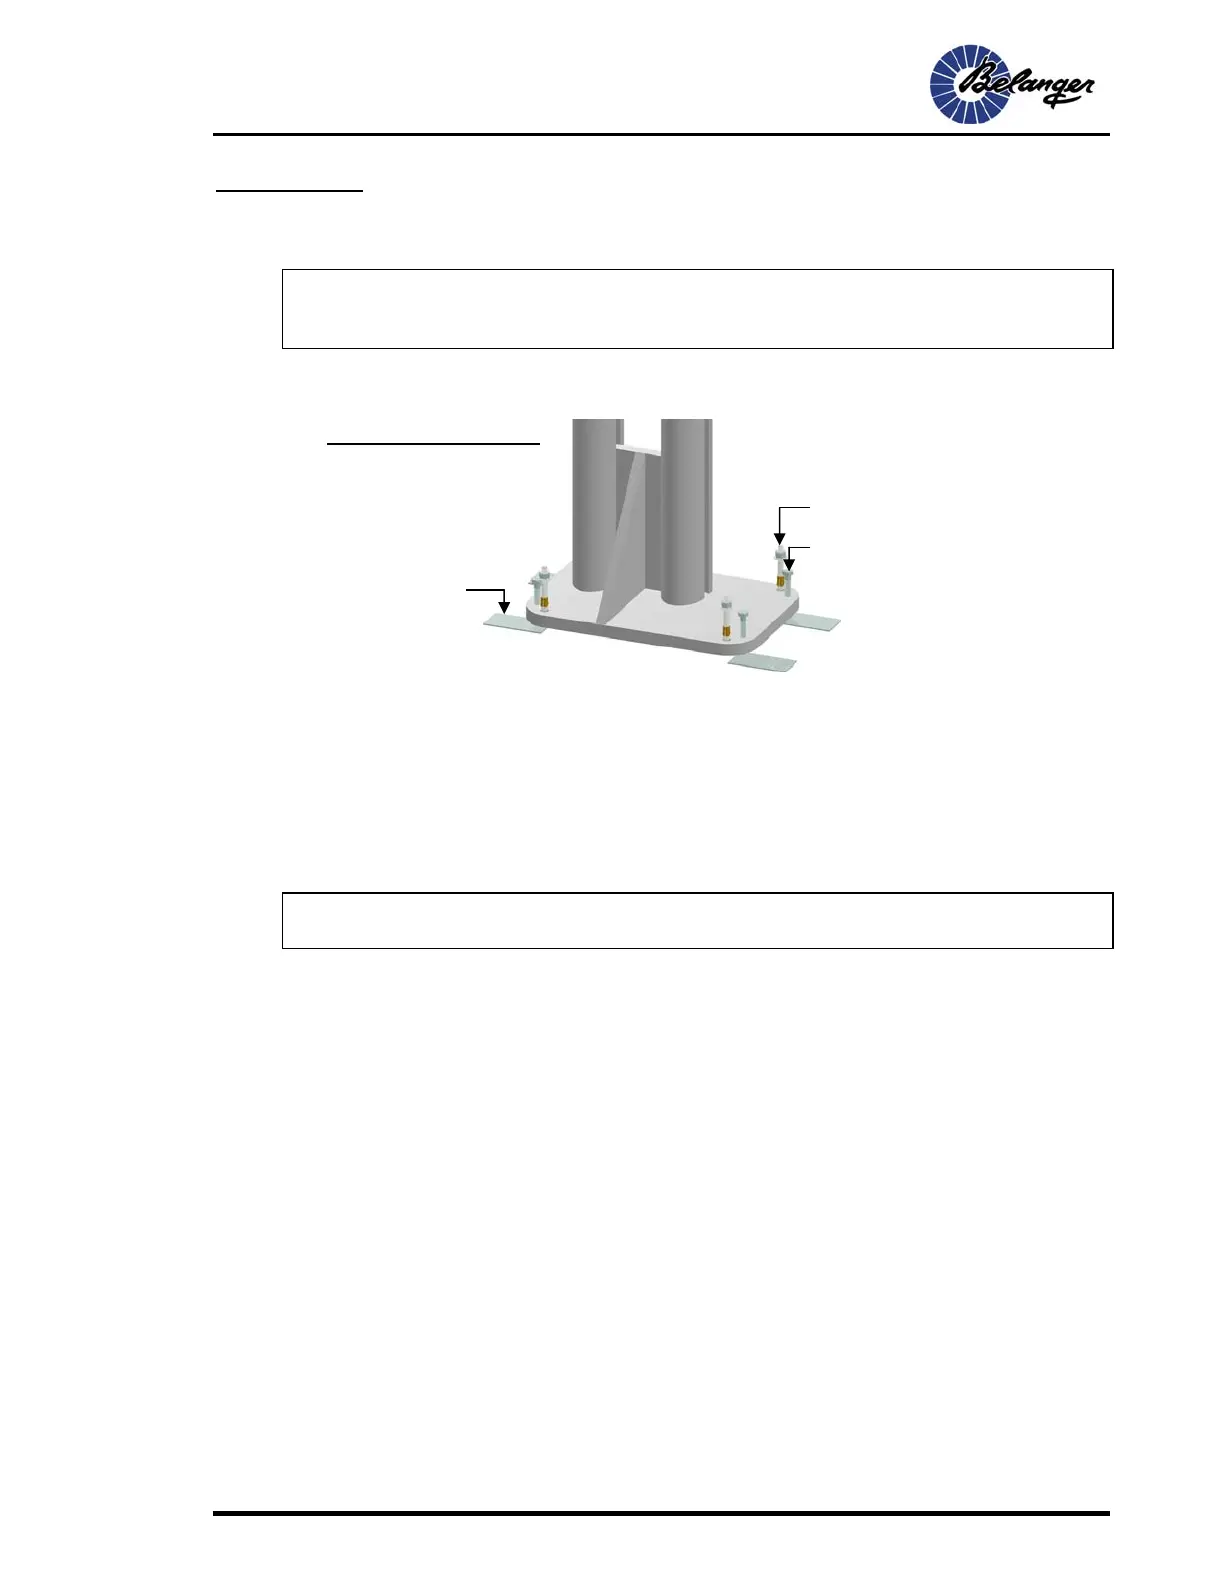
4) After making sure the stands are square to the conveyor, drill a 5/8” hole and place one 5/8”
lag bolt into place as shown below. Drill the other three holes.
5) Locate the supplied 3/4-10 x 3-1/2” bolts and place them into the threaded holes of the two
Base-Plates. These will be used later as the “leveling Bolts”. Place a small piece of steel or
aluminum plate under each leveling bolt so that it doesn’t penetrate the cement floor. Steel
or aluminum plating is field supplied.
6) Level stand both North, South, East and West
7) Now that the Stands are level, pound the lags all the way down.
8) Tighten the lag bolts.
Note: The stands will need to be leveled again after the Booms, Head Assemblies and Wash
Materials are installed.
Passenger Side Leg shown.
You can tell by the larger
plate surface being on the
side of the Boom and the
angle bracket facing outward.
La
Bolts
o in the outer
non-threaded
holes
Levelin
Bolts
o in the inner
threaded
holes
Metal plate to
stabilize leveling
process (typical)