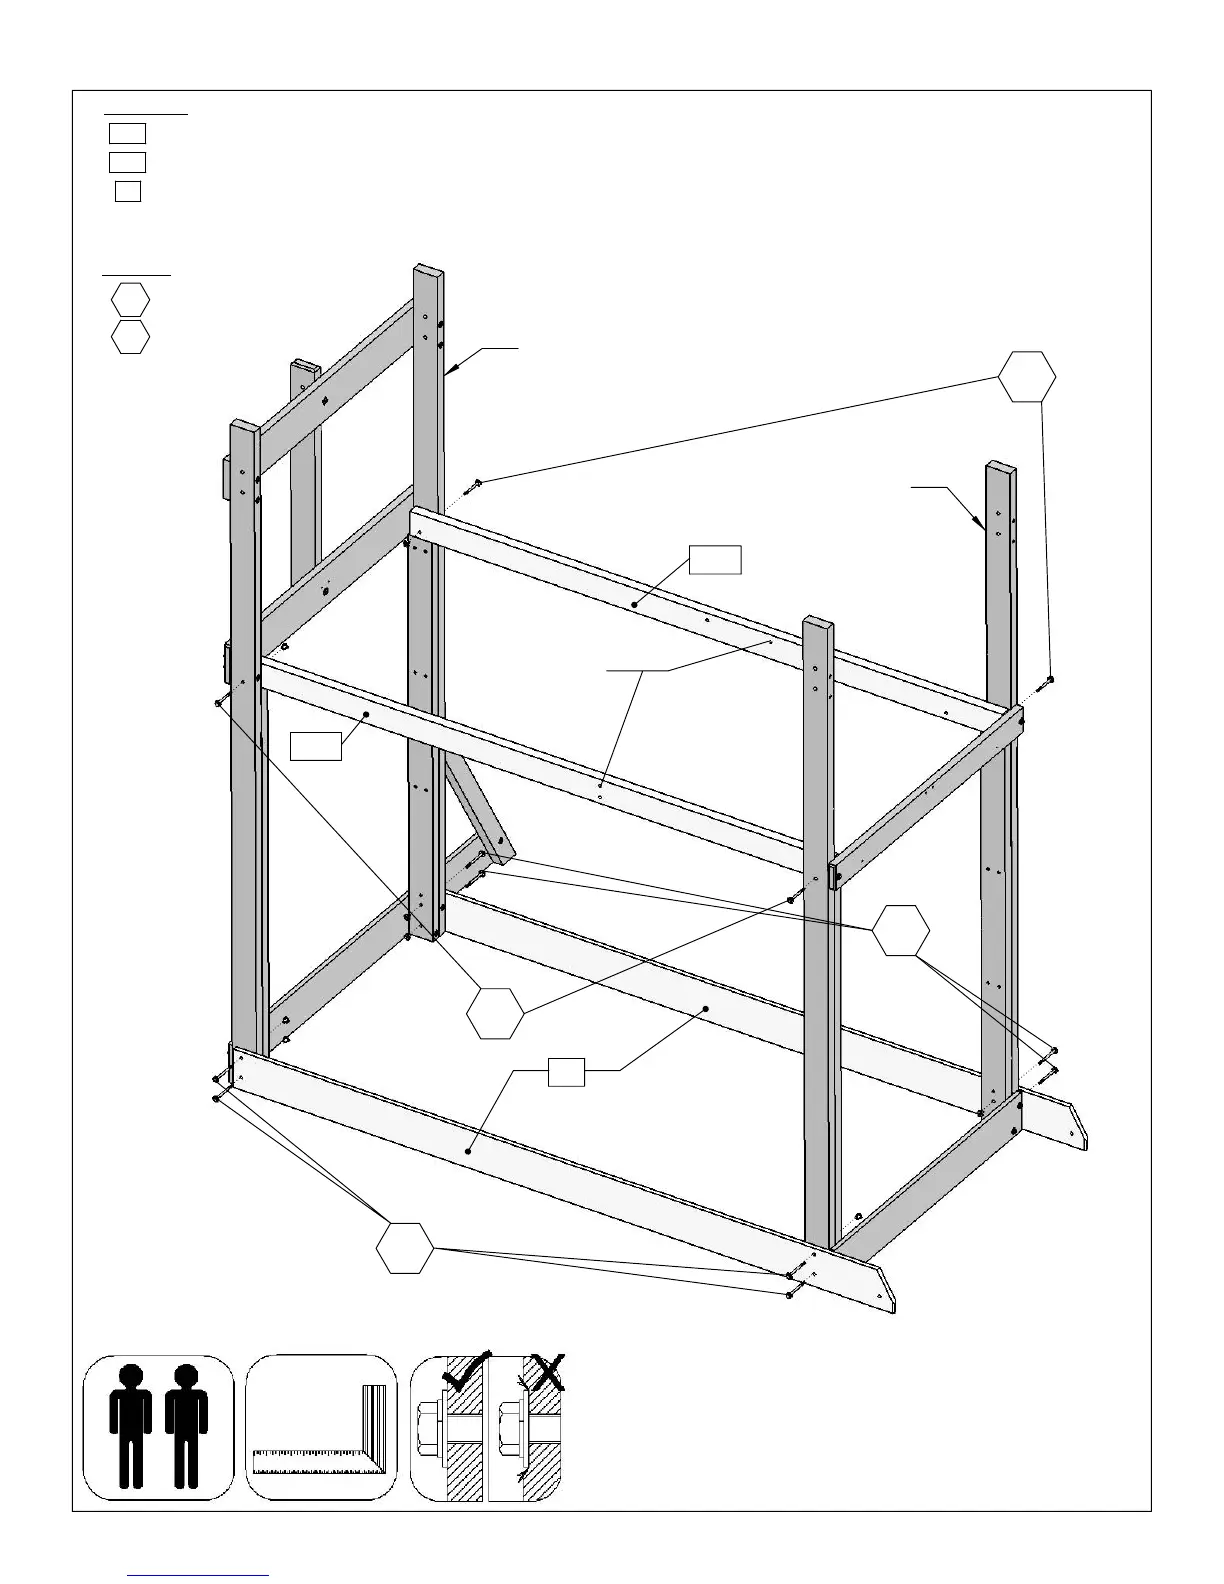
2X
8X
4X
Hardware
B20
Hex Bolt 1/4 x 2¾"
shown below using 4
(H13)
Hex Bolt 1/4 x 3½"
B19
1X
: Make sure the fort is square and then tighten all bolts.
Back Floor 2 x 4 x 83Ǫ"
C
Front Floor 2 x 4 x 83Ǫ"
Ground Front Back 1 x 6 x 92½"
lock washer and t-nut) per board. Notice the boards extend past
1/4 x 3½” hex bolts (with flat washer,
1X
the Slide Wall side.
Wood Parts
H11
A
: Attach both the
(B19)
Front Floor and
(B20)
Back Floor
between each Wall Assembly using 2
(H11)
1/4 x 2¾” hex bolts
(with flat washer, lock washer and t-nut) per board. Notice the
hole locations of each board.
B
: Attach both
(C8)
Ground Front Back to both Wall Assemblies as
H13
C8
1X Swing Wall Assembly
1X Slide Wall Assembly
Slide Wall Assembly
H11
B19
Swing Wall Assembly
H11
H13
H13
C8
B20
Notice hole
locations
Use Help Square Assembly Tighten Bolts
STEP 6 Assemble Fort Frame
21