E26
E23
X12
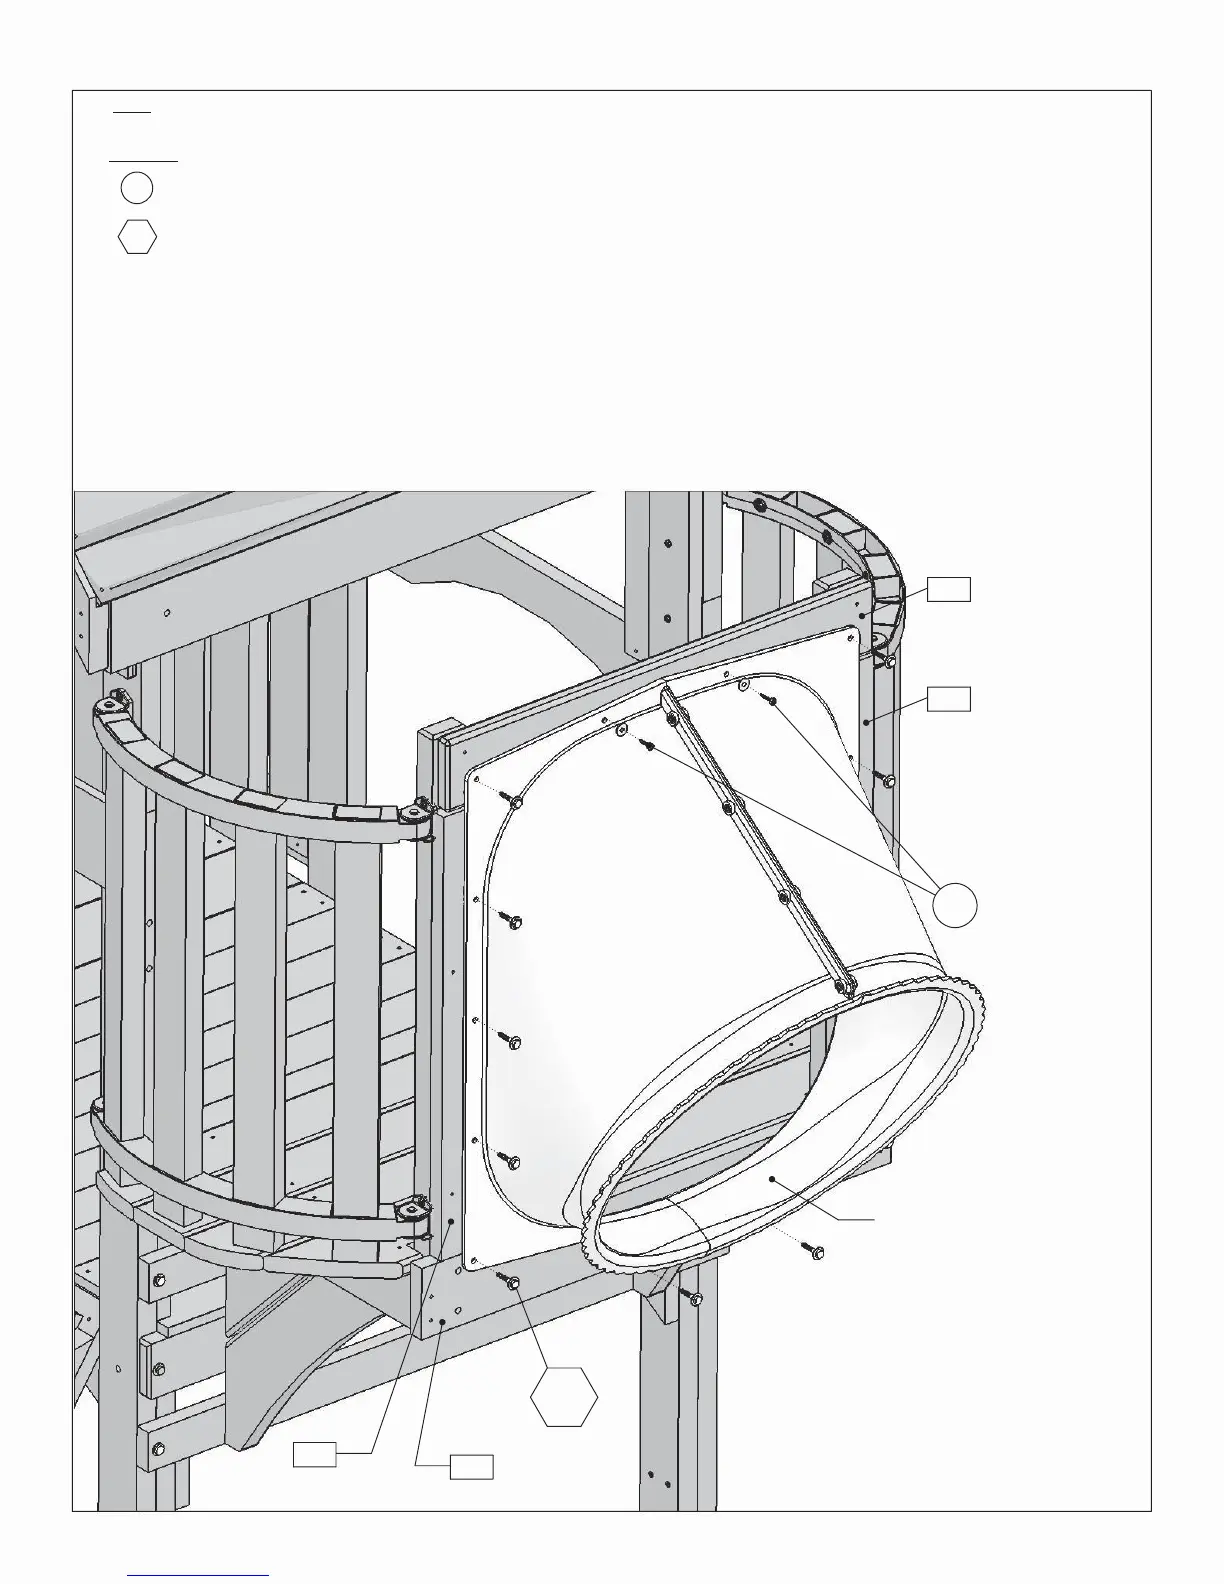
Assembled Flange
LS1
E21
E26
S6
Note: Bottom of Slide should be flush with floor
STEP 36 Attach Flange to Fort
1X
S6
Parts
Hardware
Pan Screw #12 x 1"
Assembled Flange
2X
Lag Screw 1/4 x 1½"12X
LS1
2X 1/4" Flat Washer
A
: Pre-drill pilot holes with at 1/8” drill bit before installing lag screws.
B:
Attach the Assembled Flange to
(E23)
Upper SL,
(E21)
SL Floor
Support and both
(E26)
SL Sides using 12
(LS1)
1/4 x 1½” lag screws
(with flat washers) in the pre-drilled holes.
C:
Attach top of Assembled Flange to
(E23)
Upper SL using 2
(S6)
#12
x 1” pan screws (with 1/4" flat washers).
51