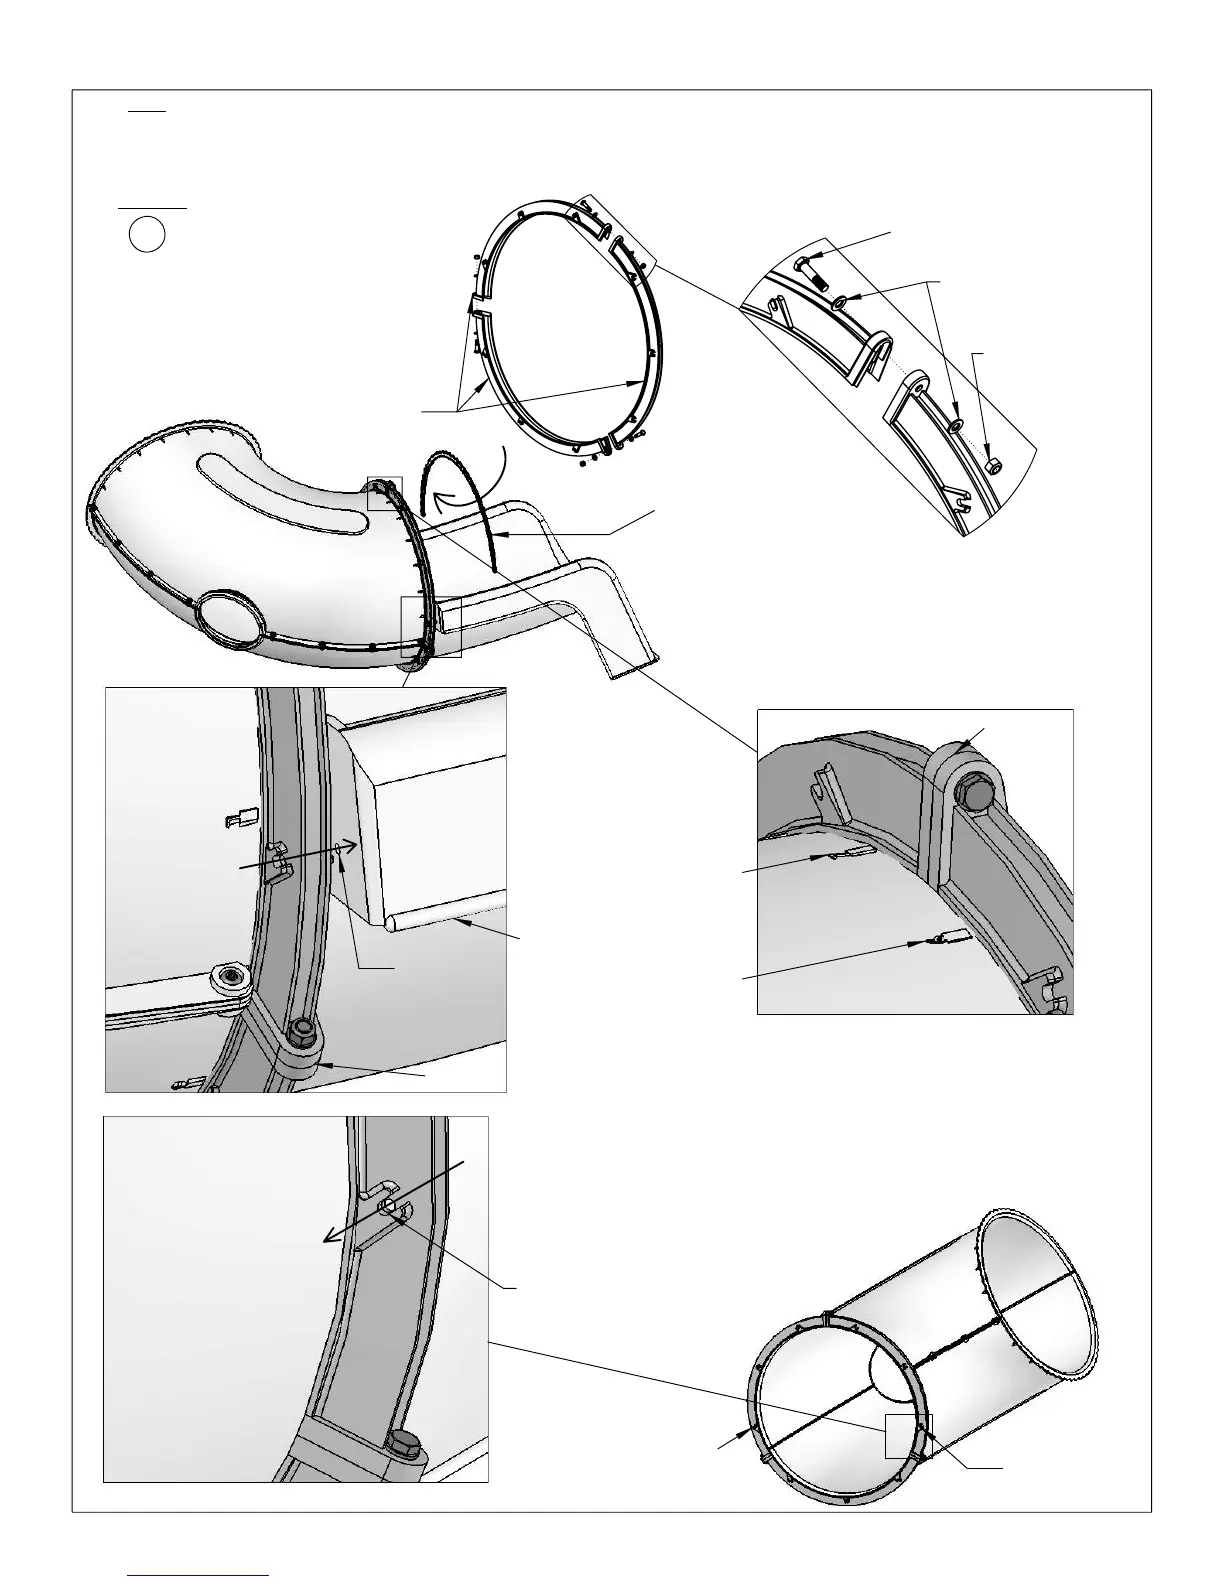
Clamp Rings
rail of the exit to the elbow.
hole. These holes will be used to bolt the side
Filler into Clamp Ring above exit. This will
help hold the exit in place and fill the gap in
2X Bushing Spacer
Ring. Before tightening, insert Clamp Ring
Remove exit from Clamp Ring assembly by
lifting it out. With Clamp Ring still in place on
Clamp Ring & Exit AssemblySTEP 37A
1X Clamp Ring Filler
4X TNR Clamp Ring w/ hardware
2X 1/4" Lock Nut
Hardware
2X 1/4" Flat Washer
2X
Elbow, drill second thru-hole across from first
CB2
Carriage Bolt 1/4 x 2"
Parts
1X TNR Slide Exit
of Elbow Section.
between the molded #6 and #7 on the top
the Clamp Ring. Align Clamp Ring seam
B
: Assemble Exit and Elbow using Clamp
D
:
C
: Align Seam of Elbow 2" below Bottom edge
of Exit rail. Tighten Clamp Ring Bolts. Make
sure Exit and Elbow slide surfaces are flush
before drilling.
slope and mounting.
Follow all alignments to assure proper slide
the serrated lips of each section.
A
: Preassemble all Clamp Rings loosely with 2
bolts. Add third bolt once Clamps are in place over
Hex Bolt 5/16 x 1¼"
5/16" Flat Washer
5/16" Lock Nut
molded #6
Seam
molded #7
Seam
thru-hole
Drill 1/4"
Bottom edge
Clamp Ring Filler
Second
Drilled Hole
First Drilled
Hole
Drill second
1/4" thru-hole
52