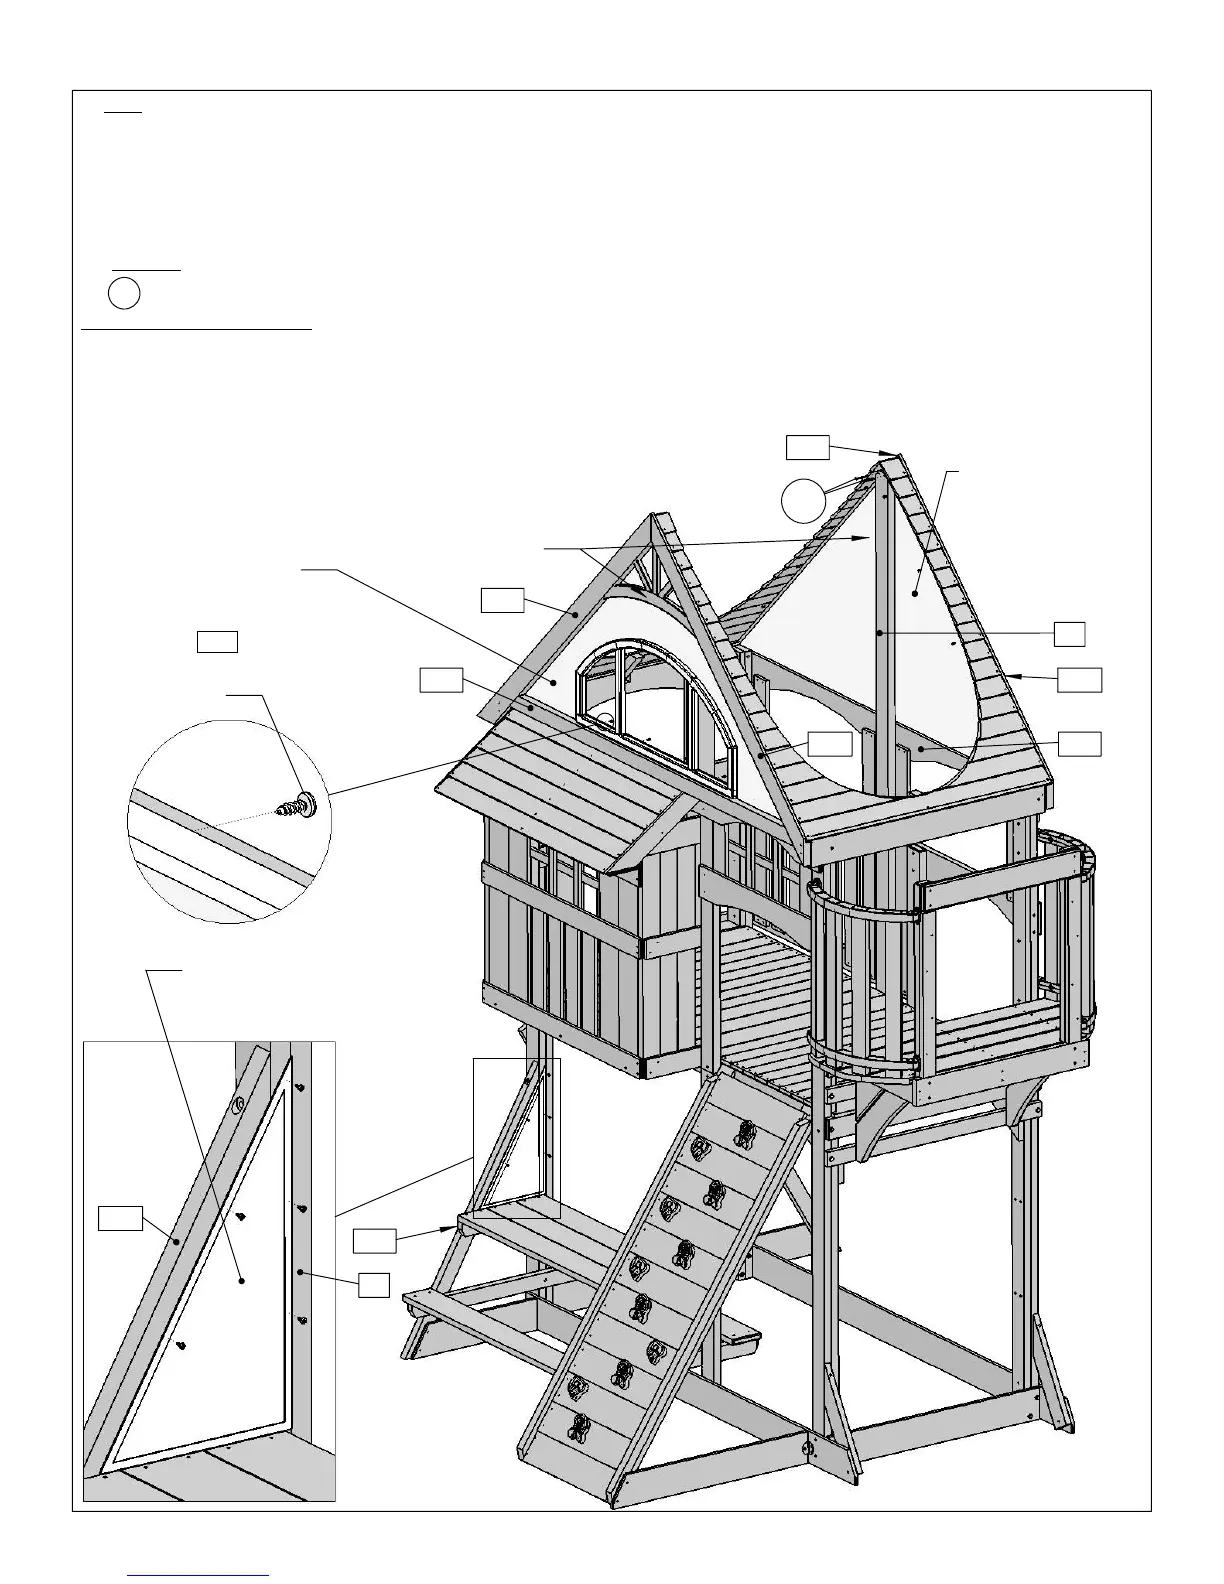
STEP 33 Attach Gable Tarps
Pan Screws
C16
Use 8 #6 x 1/2"
Picnic Triangle
C4
Wood Screw #8 x 2½"
40X
13X
removed for clarity.
S3
Hardware
1X
Back Gable Tarp1X
1X Front Gable Tarp
Picnic Triangle1X
2X Peak Detail
Parts
Window Frame
evenly spaced.
Support using 5 #6 x 1” pan screws. Make sure tarp is tight and screws are
Pan Screw #6 x 1"
Pan Screw #6 x 1/2"
Swing and Access Ladder
2X
A:
Attach the Picnic Triangle to the
(C4)
Post,
(C16)
Picnic Diagonal and
(B31)
Table Support using 8 #6 x 1/2” pan screws.
B:
Attach 1 Peak Detail to the peak of
(B32)
Roof Support Right and
(C10)
L
Roof Support and 1 Peak Detail to the peak of
(B21)
Roof Support Left and
(C12)
R Roof Support using 4 #6 x 1” pan screws per peak. Install screws from
the inside of the fort.
C:
Slide Back Gable Tarp under
(C9)
Roof Upright and attach
(C9)
to Roof using
2
(S3)
#8 x 2½” wood screws.
D:
Attach Back Gable Tarp to
(B21)
Roof Support Left,
(C12)
R Roof Support
and
(E15)
Top Back using 16 #6 x 1/2” pan screws. Make sure tarp is tight and
screws are evenly spaced.
E:
Attach Front Gable Tarp with Window Frame to
(B32)
Roof Support Right and
(C10)
L Roof Support using 16 #6 x 1/2” pan screws and to
(E32)
Lower Roof
Hardware included with Tarp Set
Window Frame
attach to
E32
Use 5 #6 x 1"
Pan Screws
B21
Front Gable Tarp
Use 16 #6 x 1/2"
Pan Screws
E15
Pan Screws
Use 16 #6 x 1/2"
Back Gable Tarp
C9
Peak Detail
S3
(also on back)
Pan Screws
Use 4 #6 x 1"
E32
C10
C12
B32
B31
48