E2
CE Floor 5/4 x 5 x 49"
6X
S7
1X
Hex Bolt 1/4 x 2½"
E3
4X
E1
E25
1X
2X
CE Floor Board 5/4 x 5 x 49"
CE Crowsnest Floor 5/4 x 5 x 49"
Wood Screw #8 x 2½"
CE Gap Board 5/4 x 6 x 45"
S2
E23
1X
2X
Hardware
E4
SL Post 2 x 3 x 37"
Wood Screw #8 x 1½"
E26 SL Sides 5/4 x 3 x 28"
Wood Parts
24X
1X
10X
Pan Screw #12 x 2"
1X
SL Brace 2 x 2 x 6"
S3
Upper SL 5/4 x 5 x 30½"
2X
H3
A1
X24
6 per
floor
board
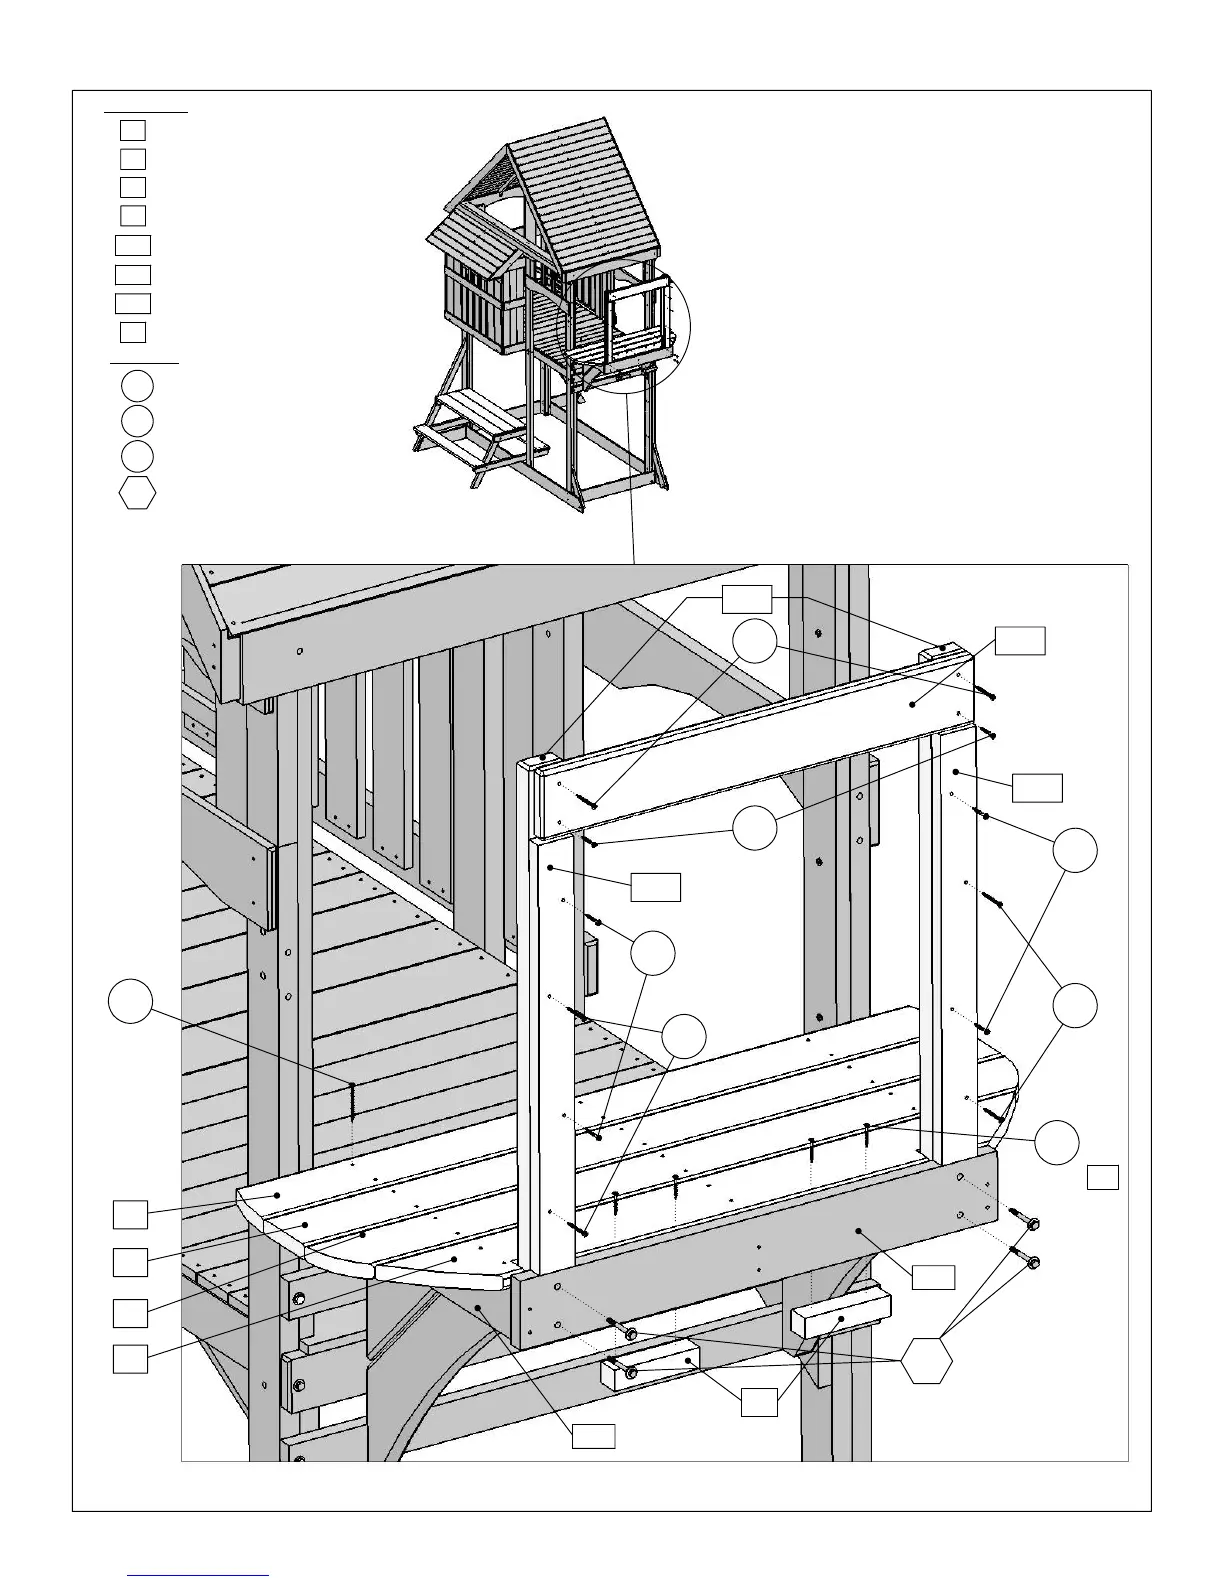
A
: Attach 2
(E25)
SL Posts to
(E21)
SL Floor
Support using 2
(H3)
1/4 x 2½" hex bolts (with
flat washer,lock washer and t-nut) per board.
B
: Attach 1
(E26)
SL Side to each
(E25)
SL
Post using
(S2)
#8 x 1½” wood screws and
(S7)
#12 x 2” pan screws per board as shown
below.
C
: Attach
(E23)
Upper SL to the top of each
(E25)
SL Posts using 2
(S2)
# 8 x 1½” wood
screws in the bottom holes and 2
(S7)
#12 x
2” pan screws in the top holes.
D
: Attach
(E2)
CE Crowsnest Floor tight to
the fort;
(E1)
CE Floor Board,
(E4)
CE Floor
and
(E3)
CE Gap Board to each
(B17)
Crowsnest Floor Joist using 6
(S3)
#8 x 2½”
wood screws per board.
E
: Attach 2
(A1)
SL Brace to
(E3)
CE Gap
Board using 2
(S2)
#8 x 1½" wood screws per
brace.
STEP 24 Attach Crowsnest Front Railing & Flooring
S2
E3
E2
S7
S7
S3
E26
E25
H3
E1
E4
E23
S2
S2
E26
S7
E21
B17
S2
A1
2 per
A1
39