G5
GL8
FRONT SIDE
Big Backyard Plaque w/ hardware
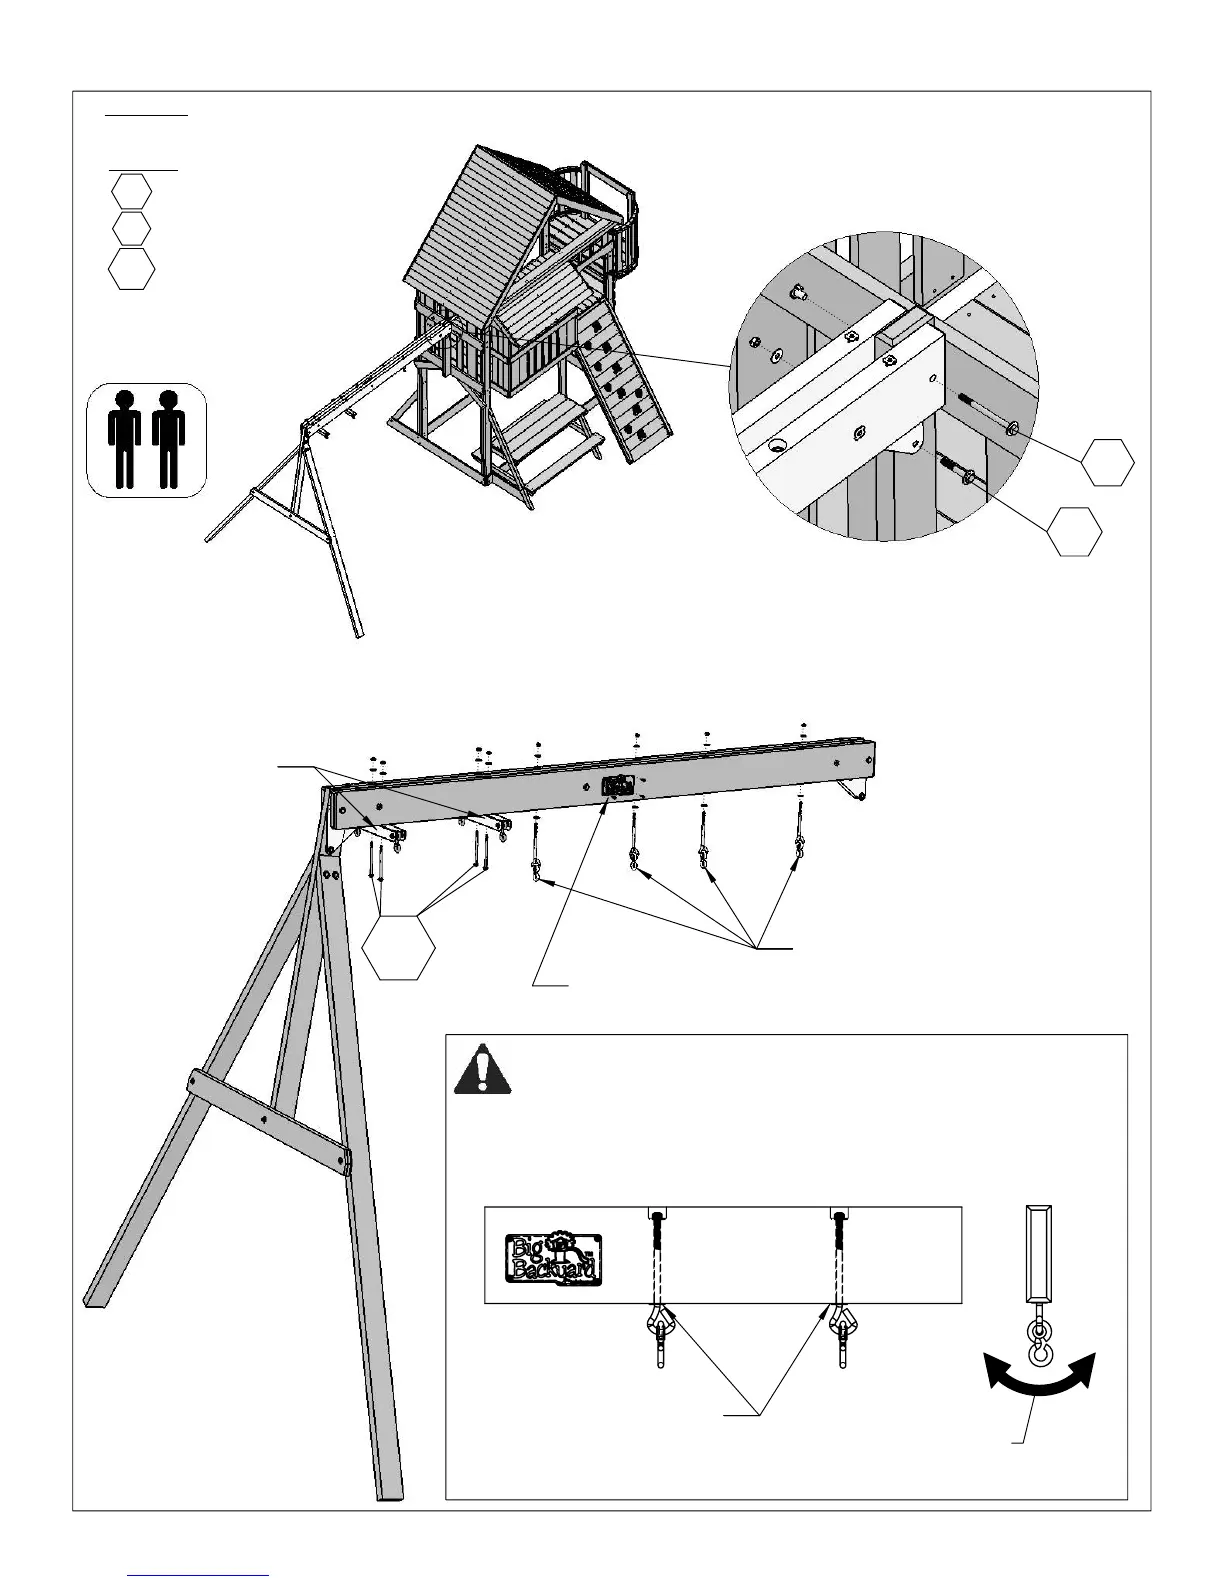
Warning
: For your child’s safety, orientate the swing
hangers as shown to ensure your swing will have
proper swinging motion when installed. Failure to
do so could result in the premature failure of swing
hanger or swing chain.
Proper Swinging Motion
STEP 30 Attach Swing and Fasten Hangers
4X
bottom of Swing Beam
it is tight and flush with
Tighten Hanger in until
1X Big Backyard Plaque
Bolt Hangers
1X
1X
Swing Assembly
Hex Bolt 5/16 x 5½"
Use Help
GL5½
2X Glider Hanger
Wood Parts
4X Bolt Hanger w/ hardware
Hardware
Hex Bolt 5/16 x 2"
GL8
Hex Bolt 5/16 x 4½"1X
Glider Hangers
GL5½
G5
B
: Attach the Glider Hangers to the swing beams at the Swing End
side using 2
(GL5½)
5/16 x 5-1/2” hex bolt (with 2 flat washer and
1 lock nut) per hanger.
C
: Attach 4 Bolt Hangers into the swing beams using the included
hardware.
D
: Attach the Big Backyard Plaque to the centre of the swing beam
using the included hardware.
A
: With the aid of an adult helper, attach the Swing
Assembly to
(B10)
Wall Mount using 1
(G5)
5/16
x 4-1/2” hex bolt (with flat washer, lock washer
and t-nut) and 1
(GL8)
5/16 x 2” hex bolt (with 2
flat washers and 1 lock nut) as shown below.
45